Sharpening should restore the cutting edge—not reshape the entire blade.
A pocket knife that once sliced cardboard may start crushing it, skate across cord, or leave ragged paper cuts. That dull edge demands extra force, making slips more likely. Yet aggressive grinding creates another problem: unnecessary steel removal and a misshapen bevel.
The safer middle ground is restraint and consistency. Use light pressure, hold the same angle through each stroke, and stop grinding once a small burr forms along the opposite side. Then switch sides and remove that burr cleanly. A few controlled passes followed by a cutting check are more useful than prolonged sharpening. The goal is not to chase a mirror finish—it is to produce a stable, clean apex while preserving as much steel as practical.
Inspect the Edge Before Sharpening
Under a bright, focused light, hold the open knife securely and rotate the edge—not a finger—toward the light. A sharp apex is too narrow to reflect much. Bright glints usually reveal flattened sections, chips, rolls, or a remaining burr. Check both sides from heel to tip.
Next, make slow, controlled cuts through clean printer paper, keeping fingers away from the cutting path. Note whether the blade:
- Catches at one location: likely a chip, roll, or damaged spot.
- Tears along its full length: likely a generally rounded or incomplete apex.
- Cuts one way but drags the other: often indicates a burr leaning to one side.
Visible chips, broad flat spots, or an edge that still slides after light stropping generally require sharpening until both bevels meet at a newly formed apex. A slight roll or residual burr may need only a fine ceramic hone or strop. This distinction is covered further in deciding whether an edge needs sharpening or just stropping.
Avoid running skin along the edge. Light inspection and controlled paper cuts reveal defects without direct contact.
Follow the Blade’s Existing Geometry
Before touching the stone, inspect the bevel under bright light. A conventional plain edge usually has two flat bevels meeting at the apex. The stone should lie flush with that existing bevel; raising or lowering it changes the geometry and removes unnecessary steel.
Choose angle deliberately
A lower angle generally cuts with less resistance, while a higher angle leaves more steel behind the apex for durability. Manufacturer guidance is a useful starting point, but angle markings may mean per side rather than the total included angle. The practical differences between a 15- and 20-degree knife edge help clarify that tradeoff.
A marker provides a quick check: color the bevel, make one light pass, then inspect where the ink disappeared. Ink removed only at the shoulder means the angle is too low; removal only at the apex means it is too high.
Specialty profiles need different methods:
- Serrations: Use a tapered rod matching each scallop; avoid flattening the points.
- Recurves: Use narrow stones or rods that can follow the inward curve.
- Chisel grinds: Sharpen mainly on the beveled side and deburr the flat side lightly.
- Convex edges: Preserve the curve with a flexible abrasive rather than a rigid angle guide.
Match the Sharpener to the Knife and Skill Level
- Reliable angle control
A clamped guide reduces guesswork, while a stone offers more freedom but demands steadier technique. Compare a guided sharpener with a whetstone according to current skill and willingness to practice.
Look forStable support and an angle that can be repeated from heel to tip.AvoidA setup that rocks, flexes, or encourages heavy pressure. - Abrasives suited to the steel
Wear-resistant steels can make soft or glazed abrasives frustratingly slow. A sharpener suited to S30V and similar steels may use diamond or another abrasive capable of cutting them efficiently.
Look forReplaceable, clearly graded abrasives appropriate for the blade steel.AvoidPressing harder because an abrasive no longer cuts cleanly. - Enough working length
The abrasive should allow smooth, controlled passes without forcing the blade into cramped movements. Longer blades generally benefit from more usable sharpening surface.
Look forRoom to cover the edge in consistent, overlapping strokes.AvoidShort contact surfaces that cause abrupt angle changes. - Access to the entire edge
Clamps, guides, and handles must not block the heel, tip, or unusually shaped sections. Check fixed-angle compatibility with wide or short blades before choosing a system.
Look forSecure clamping and unobstructed contact along the full edge.AvoidForcing recurves, serrations, or thick blades into incompatible hardware.

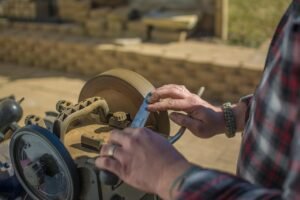

Set Up the Workspace and Check Contact
-
Clear and light the work area
Use a stable counter or bench with enough light to see the entire bevel. Remove clutter from the blade’s travel path.
-
Secure the sharpener
Place a stone on a non-slip base or damp towel. Fasten guided systems according to the manufacturer’s instructions.
-
Keep hands behind the edge
Start with a clean, dry handle. Keep fingertips on the handle, spine, or blade flat—never ahead of the cutting edge.
-
Mark the bevel lightly
Color the existing bevel from heel to tip with a thin permanent-marker line, then allow it to dry.
-
Make a test pass
Use one or two light strokes, then inspect the ink under bright light. Consistent contact depends on holding the sharpening angle steadily.
Reapply marker whenever contact becomes difficult to read.
Marker removed only at the shoulder means the angle is too shallow. Removal only at the apex indicates a steeper angle than the existing bevel. Ink disappearing evenly across the bevel shows broad contact with the factory geometry.
If the pattern changes near the heel or tip, correct hand position or stroke path before removing more steel.
Raise a Small Burr Without Grinding Away Steel
- Start with the finest abrasive that can correct the damage
A merely dull edge may need a fine stone, while chips or a badly rounded apex may require a coarser one. A restrained grit progression that avoids unnecessary abrasive changes removes less steel.
- Set the bevel, then lighten the pressure
Place the heel on the abrasive at the established angle. Use light pressure—roughly enough to keep consistent contact without flexing the blade or forcing the abrasive.
- Move smoothly from heel to tip
Sweep the entire edge across the abrasive in one controlled motion. Follow the belly by gradually lifting the handle; avoid twisting the blade, pressing harder at the curve, or letting the tip slide off the stone.
- Inspect instead of counting strokes
After several passes, check the full edge under bright light and feel carefully for a burr by moving a fingertip from the blade face toward the edge—never along it. Continue only where the burr is missing.
- Switch sides when the burr is continuous
Once a small burr runs from heel to tip, sharpen the opposite bevel until the burr flips across the entire edge. This visible and tactile checkpoint is more reliable than a preset count; see how to time each side change.
- Finish with progressively lighter passes
As both bevels meet, reduce pressure and use deliberate alternating strokes. The aim is to weaken and remove the burr without rounding the newly formed apex.
Wipe the blade before inspection; loose abrasive and metal particles can imitate a burr.
Stop grinding once a small, continuous burr forms. Continuing under heavy pressure can create a fragile wire edge and remove steel unnecessarily.
Remove the Burr Without Dulling the Apex
A burr can make an unfinished edge feel sharp from one direction. The thin flap leans toward one side, catching skin or paper, but may fold over during a cut and leave the knife performing poorly.
Once a continuous burr has formed, alternate sides after every stroke. Make several passes with light pressure, then repeat with barely more than the blade’s weight. A finer stone can help weaken the remaining wire edge without removing much additional steel.
Stropping is optional but useful for plain edges. Use edge-trailing strokes, keep the spine slightly lower than the sharpening angle, and apply minimal pressure. Too much force—especially on soft leather—allows the strop to wrap around the apex and round it. A few controlled passes per side are preferable to prolonged stropping.
Check the result under bright light; a clean apex should show little or no reflective line. Then slice thin paper from heel to tip in both directions. Snagging on only one side often indicates a remaining burr. If the knife still seems dull after sharpening, inspect each section rather than returning immediately to heavy grinding.
Do not slide a thumb along the blade. Use paper, reflected light, or a cotton swab moved gently across the edge to detect snagging fibers.
Special edges need different tools
Treat serrations, recurves, and hawkbills as separate sharpening jobs, not extensions of the plain-edge sequence. Each needs an abrasive that reaches its profile without reshaping it.
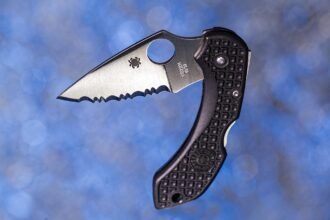
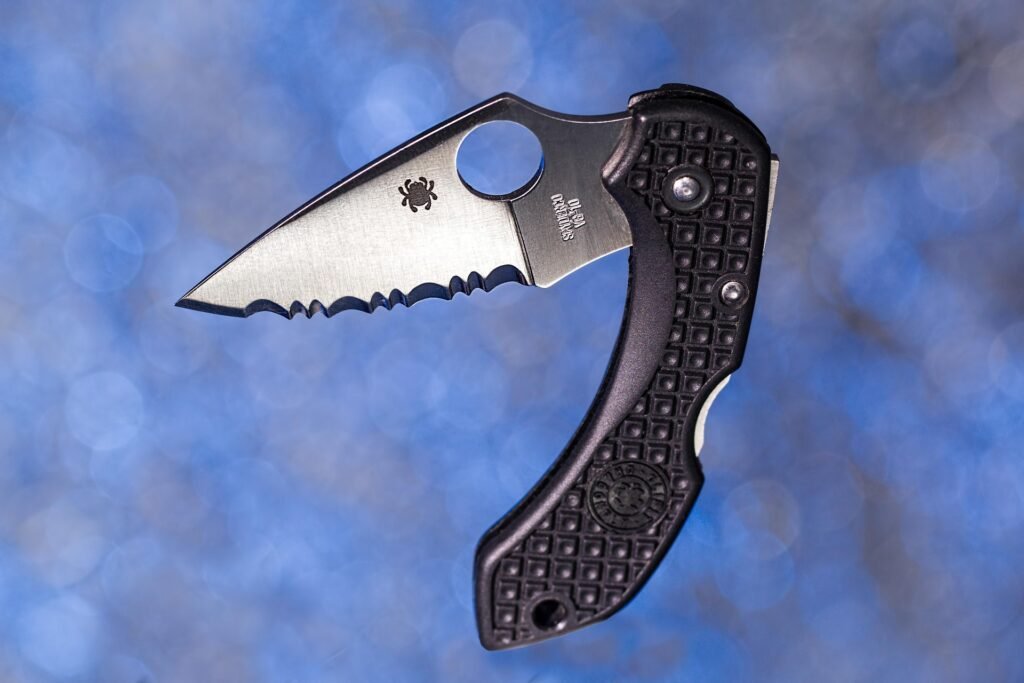
For serrations, work each scallop from the beveled side with a tapered ceramic rod or narrow abrasive matched to its radius. The serrated-edge sharpening process explains stroke direction and deburring. An oversized rod may ride on the points and miss the valleys.
Recurves and hawkbills need a rod, narrow stone, or suitable belt that follows the inward curve. Review sharpeners designed for curved edges before choosing. Flat bench stones contact high spots, while broad pull-through slots may widen curves, flatten scallops, or round a hawkbill’s tip.
Stop if marker remains in valleys or the abrasive touches only the points. Uneven contact signals a tool-profile mismatch, not a reason to press harder.
-
Touch up the edge early
Address slight dullness with a fine abrasive or strop before heavy grinding becomes necessary. Stop and inspect after a few light passes.
-
Use only the grit the damage requires
Reserve coarse abrasives for chips, severe rolls, or geometry correction. Routine maintenance often needs only a fine stone, ceramic rod, or appropriate strop.
-
Confirm a continuous apex
Under bright light, the edge should show no reflective flat spots from heel to tip. Test it on paper or the material it is intended to cut.
-
Check for a remaining burr
Use alternating, feather-light passes, then inspect from both sides. A sharp-feeling wire edge that folds during use means deburring is incomplete.
-
Clean and protect the blade
Remove abrasive residue and metal particles, dry the knife thoroughly, and apply a blade-safe corrosion protectant when the steel or storage conditions warrant it.
Skipping unnecessary grits preserves steel. The sequence ends when the edge meets the required condition—not when every abrasive has been used.
- Frequent light touch-ups generally remove less steel than waiting for a badly dulled edge.
- Coarse abrasives belong in repair work, not every maintenance session.
A finished pocket-knife edge has a continuous apex, no detectable burr, and enough sharpness for its intended work. Once those conditions are met, further grinding offers little benefit and can shorten the blade’s service life.
Clean, dry, and protect the knife before storage, then repeat brief maintenance as soon as cutting performance begins to decline.