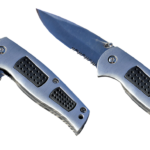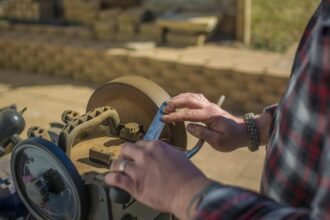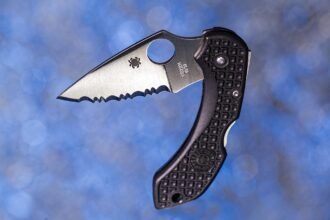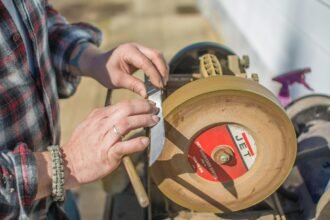
A polished bevel and a clean apex do not guarantee a clean slice.
Under a bright bench light, the bevel looks even and mirror-smooth. Magnification shows no obvious glint, roll, or remaining burr. Yet the blade skates across printer paper, catches halfway through, or leaves a ragged tear.
That contradiction does not automatically mean the sharpening failed. Paper cutting tests the whole interaction: edge finish, slicing angle, pressure, paper grain, moisture, and how firmly the sheet is held. A stable, genuinely keen apex can still perform poorly when one of those variables works against it. The pattern of the failure—skating, snagging, or tearing—is more useful than a simple pass-or-fail result.
Read the failure pattern first
Before touching the sharpener again, make five or more cuts through the same sheet, alternating direction and testing the heel, middle, and tip. Use light pressure and hold the paper consistently. One clean pass can hide an uneven edge, while one tear may come from damp, creased, or loosely held paper.
| Repeatable symptom | Likely cause |
|---|---|
| Edge skates before biting | Rounded apex, incomplete apexing, or an angle too high for easy initiation |
| Paper snags or tears | Remaining burr, microchips, or a rough, inconsistent section of edge |
| Cuts cleanly in only one direction | Burr leaning to one side or uneven sharpening between bevels |
| Heel fails but the middle cuts | Heel missed by the abrasive, often near the bolster or plunge line |
| Tip fails | Tip rounded during sharpening or lifted away from the abrasive too early |
| Sharpness disappears after a few cuts | Fragile wire edge, incompletely removed burr, or damaged apex folding over |
Repeat the test with fresh paper before correcting the edge. If the failure stays in the same location and direction, it is probably edge-related. If it moves between cuts, paper quality, grip, slicing angle, or excessive pressure deserves attention first.
Verify apex formation
Science of Sharp microscopy shows a full-length detectable burr indicates meeting bevels. Patchy marker removal exposes inconsistent angles or poor contact; excess pressure can round the apex.
Questioning the paper test
HalfInsaneOutDoorGuy questions paper-cutting results alone.
When the edge bites, then tears
An edge that enters paper readily but then snags often has a localized defect at the apex. As Leonard Lee explains in The Complete Guide to Sharpening, forming a burr confirms that the bevels met; it does not mean the burr has been removed cleanly.
Identify what remains
- Retained burr: The knife cuts more cleanly in one direction than the other because the burr leans to one side.
- Wire edge: A thin, weakened strip may feel extremely sharp at first, then fold, snag, or tear after a few cuts.
- Chip or flat spot: The paper catches repeatedly at the same point, regardless of cutting direction. Under bright light or magnification, the damaged area may reflect light.
- Coarse, uneven scratches: Deep grooves reaching the apex create tiny teeth. These may saw through fibrous paper but catch on thin, smooth paper.
Deburr without blunting the apex
Return to the finest stone already used and keep the established sharpening angle. Make one light, edge-leading stroke per side, alternating sides after every stroke. Repeat with progressively lower pressure until the final passes use little more than the knife’s weight.
Avoid lifting the spine to “chase” the burr. A higher angle can remove it quickly, but may also round or widen the apex. Recheck with slow cuts from both directions. If the snag stays in one location after controlled deburring, treat it as a chip, flat spot, or unfinished scratch pattern rather than continuing to polish.
Cuts one way, fails the other
When an edge slices paper cleanly from one blade face but catches or skates from the other, suspect a burr folded to one side. Uneven finishing can create a similar result: one bevel reaches the apex while the opposite bevel remains slightly rounded.
Compare both faces
Hold the paper, cutting angle, and pressure constant. Make one cut with each blade face toward the paper, then inspect the edge under a bright light from both sides. A folded burr may appear as an intermittent bright line; a properly apexed edge generally reflects little light along the cutting line.
Correct the edge with a few light, alternating strokes, matching the established bevel angle. Test again after each short set rather than grinding one side until the symptom moves.
A stubborn burr that repeatedly changes sides is not becoming sharper. Each flip bends an already thin strip of steel, increasing the chance that it breaks away unevenly or survives as a fragile wire edge. Metallographic work by John D. Verhoeven documents this burr behavior and supports progressively lighter, alternating finishing strokes.
If the failure simply switches direction, reduce pressure instead of adding more one-sided strokes.
Find the section the stone missed
A knife may slice paper near the middle yet snag at the heel or tip because those areas never fully contacted the abrasive. Common causes include a bolster blocking the heel, a stroke ending before the tip, or wrist rotation steepening the angle through the belly.
Check each zone
- Color the bevel with permanent marker, then divide the edge into heel, belly, and tip.
- Make one slow stroke in each zone at the intended angle. Short, controlled strokes make contact problems easier to isolate than full-edge sweeps.
- Inspect the ink under bright light. Marker remaining at the apex means the abrasive is contacting the bevel shoulder instead; removal above the apex can indicate an overly steep angle.
- Correct only the missed zone, then mark and inspect it again.
At the tip, rotate the blade to follow the curve while keeping the sharpening angle steady rather than lifting the spine. At the heel, confirm that the plunge line or bolster clears the stone.
Match the abrasive to the profile
A flat stone may bridge a recurve and miss its recessed apex. Recurves, hawkbills, and tight transitions generally need a narrow rod, slipstone, or abrasive whose radius fits the curve. Use light pressure and repeat the marker check before returning to paper.
Control the test before blaming the edge
Paper can give contradictory results. Humidity softens fibers, coatings can make a surface slick, and coarse or recycled sheets may tear unpredictably. A fold creates a reinforced ridge, while unsupported paper buckles before the edge can engage.
Cutting motion matters too. A long slicing stroke often passes where a straight push-cut stalls, and changing the blade angle can hide or exaggerate a damaged section.
For a repeatable check:
- Use dry, uncoated printer paper from the same sheet.
- Hold it lightly but taut, with no crease near the cut.
- Start at the heel and draw through to the tip at a consistent angle.
- Repeat in both directions and note whether a snag occurs in the same blade location.
Then inspect the apex under a bright light. A sharp apex should show little reflection; bright points can indicate rolls, chips, or unsharpened sections. Corroborate the result by slicing a tomato resting on a cutting board, using minimal downward pressure and keeping fingers clear. If the edge enters the skin cleanly, a failed paper cut may reflect the test medium or motion rather than sharpening.
Avoid shaving arm hair or dragging a thumb across the edge. These checks risk cuts and add little diagnostic value.
If results vary, replace the paper first, then standardize support and stroke before returning to the stones.
Check the edge before removing more steel
-
Standardize the paper
Use clean, dry copy paper from one sheet. Hold each strip the same way and cut with the same light, controlled stroke.
-
Map the failure
Test heel, middle, belly, and tip separately. Mark any section that catches, skates, or tears repeatedly.
-
Inspect without touching
With the edge pointed away, examine it under a bright light. Reflected spots can indicate a flat, chip, rolled area, or apex that was never reached.
-
Confirm bevel contact
Color both bevels with marker, then make a few light sharpening passes. Remaining ink near the edge reveals missed contact; follow the sharpener manufacturer’s angle guidance.
-
Apex, then deburr
Continue only where contact is missing. Establish the apex on both sides, then use alternating, progressively lighter strokes to remove the burr.
-
Clean and retest
Remove marker, swarf, and loose residue before repeating the standardized test. Check the previously failing zone first, then test the full edge.
Keep fingers out of the cutting path; never test sharpness by sliding a fingertip along the edge.
More abrasion can worsen the problem. Deep chips, pronounced bevel asymmetry, heat or gouging from powered equipment, and uncertain edge geometry are sensible reasons to use a qualified sharpening professional rather than continue removing steel.
Let the evidence choose the correction
A paper-test failure is a symptom, not a sharpening instruction. Standardize the test, isolate the affected section, inspect it, and verify stone contact before changing angles or grinding further.
If a clean, fully apexed, deburred edge still fails in one location, stop and reassess for damage or geometry problems.
The paper test fails for two different reasons, and removing chips from a knife edge covers the second one: visible damage that no amount of refinement will polish out.