Stroke counts are easy to track, but the edge itself gives the more reliable signal.
After ten strokes, one section may have reached the apex while another still reflects light. Switching sides at that moment can leave a dull, unapexed gap. Continuing far beyond it, however, removes unnecessary steel and can build a large burr that is harder to eliminate cleanly.
During initial sharpening, work one side until abrasion reaches the apex along the full edge and a light, continuous burr can be detected on the opposite side. Then switch. Check the heel, belly, and tip separately; pressure and stone contact are rarely perfectly even. On finer stones, switch sooner and alternate more frequently, using scratch-pattern refinement and burr reduction—not a fixed stroke total—as the guide.
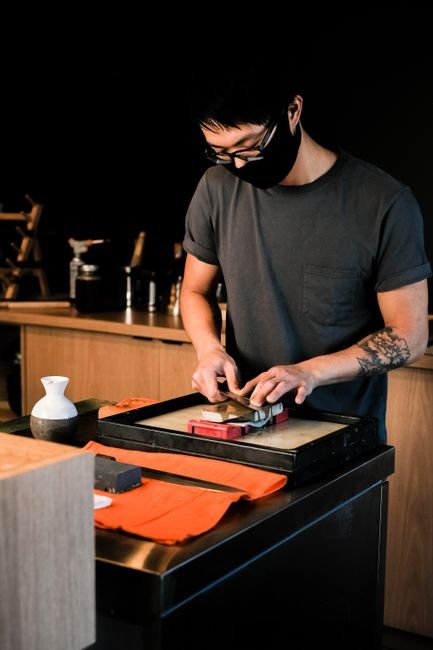
Read the edge before switching
Before deciding when to switch sides, determine whether the knife needs full sharpening or a light touch-up. Full sharpening corrects substantial dullness, chips, or a rounded apex, often across several grits. A touch-up uses a fine stone or ceramic to restore bite while removing little steel; see the complete process for sharpening a pocket knife.
Next, inspect the grind from heel to tip:
- Symmetrical double bevel: Both bevels meet at roughly equal angles. Comparable work on each side generally makes sense, though stroke counts may differ while correcting an uneven edge.
- Asymmetrical double bevel: One bevel is wider or set at a different angle. Preserve the maker’s stated ratio or measured geometry rather than automatically matching strokes.
- Single bevel: Most grinding occurs on one face, while the flat or slightly concave back receives only careful deburring passes.
Only a symmetrical edge normally calls for broadly equal treatment. For asymmetrical and single-bevel knives, switching after identical stroke counts can alter the intended geometry. When the grind is uncertain, manufacturer documentation or a close visual inspection under bright light should guide the approach.
Switch only after the burr reaches the full edge
For a dull, symmetrical edge, the main switching signal is a continuous burr from heel to tip. Remain on the first side until that slight wire edge can be detected along the entire opposite side. Switching earlier can leave sections of the original dull edge untouched.
Check progress in several places rather than relying on the easiest section to sharpen. Move a fingertip carefully from the blade face toward and across the edge—never lengthwise along it—or use bright, low-angle light to inspect the apex.
- Burr at the belly but not the heel: The heel has not reached the apex; the side is unfinished.
- Burr at the heel and belly but not the tip: The curved tip likely needs better stone contact.
- Burr along the full length: Switch sides and repeat the process on the opposite bevel.
A missing section should prompt a correction in technique, not an immediate increase in force. Keep the sharpening angle stable, slow the stroke, and ensure the relevant portion of the edge meets the stone through the full motion. A permanent marker applied to the bevel can reveal whether the stone is reaching the heel or tip.
Once the burr is continuous, avoid unnecessary extra passes on that side. Excess grinding can enlarge the burr and remove more steel than needed before the second bevel is sharpened.
Inspect the burr safely from heel to tip
-
Clean the edge
Wipe away water, oil, and loose metal particles with a cloth. Swarf can mimic a burr but disappears when cleaned.
-
Check under angled light
Hold the edge stationary under a bright light and tilt the blade slightly. A burr may appear as a thin, bright line along the side opposite the stone.
-
Test across—not along—the edge
With the knife stable and facing away, move a fingertip lightly from the spine toward and just past the edge. Never slide a finger lengthwise along the blade.
-
Inspect several points
Check the heel, quarter points, belly, and tip. This method for finding the burr on a dull knife helps expose sections that have not yet reached the apex.
-
Confirm continuity
A continuous burr produces the same slight lip or catch at every checkpoint. A catch at only one or two points indicates isolated burr formation; keep working the original side only where contact is missing.
Sharpening scratches sit on the bevel and remain visible after wiping, but they do not project past the edge. Confirm any bright line visually and with a careful cross-edge touch before switching sides.
Reverse the burr on the second side
Sharpen the second side at the same target angle used on the first, starting with similar pressure. The goal is not to duplicate the stroke count; it is to make the existing burr fold over so it can be detected from the first side along the entire edge.
After each small set of passes, clean the blade and inspect three zones:
- Heel: Confirm that stone contact reaches the edge near the handle.
- Belly: Check the curved section rather than assuming straight strokes covered it.
- Tip: Follow the curve without lifting the spine enough to steepen the angle.
If the burr has reversed at two zones but not the third, concentrate short, controlled passes on the lagging area, then blend into the adjacent edge. Recheck instead of matching an arbitrary stroke total.
Bevel width is only a supporting clue. A wider patch may indicate a lower angle, thicker blade geometry, or extra work in that area; it does not prove that the apex has formed. Stop sustained work on the second side once the burr has reversed continuously from heel to tip.
Finish with alternating strokes
Once the burr has reversed along the full edge, stop grinding one side in batches. On a double-bevel knife, make one edge-leading stroke per side, alternating after every stroke while preserving the sharpening angle. This weakens the burr from both directions instead of repeatedly folding it over.
Reduce pressure in stages:
- Begin with only enough pressure to keep the bevel stable on the stone.
- After several alternating pairs, lighten to roughly the weight of the blade.
- Finish with a few feather-light strokes, one per side.
Check after each short set. If the burr keeps changing sides, excess pressure—or too many strokes—is rebuilding a thin wire edge. Stop when no continuous catch can be detected from heel to tip and the apex no longer reflects light. Asymmetrical edges should retain their intended stroke ratio; single-bevel knives require their established bevel-and-flat deburring method rather than equal alternation.
For a finger-safe sharpness check, slice downward through clean printer paper with fingers held above and outside the cutting path. A clean, controlled cut suggests a well-finished apex; snagging at one location points to a remaining burr or an incompletely sharpened section. Never slide a fingertip along the edge.
Change the rule after apexing
Once the bevels meet at a clean apex, side switching no longer needs to follow the full-burr rule. On each finer stone, the goal is to replace the previous grit’s scratches—not grind enough steel to create another pronounced burr.
Use light, controlled passes and switch sides frequently. A practical sequence is three to five passes per side, followed by pairs and then single alternating strokes as the scratch pattern becomes finer. When moving through sharpening grits, inspect both bevels under angled light; lingering coarse scratches indicate that refinement is incomplete.
Pressure should decrease with each grit. If a burr forms, it should be small enough to remove with light alternating edge-leading strokes. A large burr usually signals excessive pressure or too many passes on one side.
A lightly dulled but undamaged knife can often be treated differently from the outset. If the edge has no chips, rolls, or visibly uneven bevels, alternating single strokes on a fine stone may restore keenness while removing less steel. Stop when cutting improves and reflections along the apex disappear; continuing beyond that point shortens the blade’s useful life without adding meaningful sharpness.
Equal strokes can change the intended edge
Equal counts suit only a centered, symmetrical edge—and even then, burr progress matters more.
Uneven wear, pressure, or stone contact can make one bevel reach the apex sooner.
Existing bevel angles and widths should be preserved rather than converted accidentally.
A 70/30 edge may need more work on its dominant bevel; a single-bevel knife typically receives only careful deburring on its back face.
The equipment maker’s documented sequence should take priority for guided, pull-through, and powered systems.
Preset stages, abrasives, and belt or wheel direction may require a specific order that differs from freehand stone sharpening.
Check both bevels under angled light. Compare their angles and widths, then consult the knife maker’s guidance when the grind is unclear. Do not “correct” visible asymmetry until confirming that it is unintended.
Let the burr set the cadence
- Follow the burr Switch sides when a burr runs continuously from heel to tip—not after an arbitrary number of strokes.
- Correct partial burrs For missing sections, verify the sharpening angle and stone contact, then work the heel, belly, or tip locally.
- Limit oversized burrs A large, floppy burr indicates excess pressure or repetition. Use lighter strokes and begin alternating sooner.
- Respect geometry Preserve asymmetrical or single-bevel geometry, and follow equipment-specific sequencing when it differs from freehand practice.
The practical rule is simple: follow burr location, not stroke count. Confirm full-length formation, reverse it on the opposite side, then finish with light alternating strokes. If progress is uneven, correct angle and contact; if the burr grows large, reduce pressure.
Switching sides is about tracking a burr, and removing chips from a knife edge covers the same judgment over a longer grind, where the burr takes far more passes to raise.