More passes on the stone can make a stubborn edge worse, not better.
The knife glides off the stone feeling keen, then snags printer paper, crushes tomato skin, or loses its bite after preparing a single meal. That pattern often points to a remaining burr rather than an edge that needs more grinding.
A burr is a thin strip of steel pushed over the apex during sharpening. When it becomes long and foil-like, it can feel sharp because it catches skin or paper—but it quickly folds sideways or breaks away in use, leaving a blunt, irregular edge. Sharpening again without checking may remove unnecessary steel while creating an even larger burr. Before returning to a coarse stone, inspect both sides under bright light and determine whether the apex needs careful deburring instead.
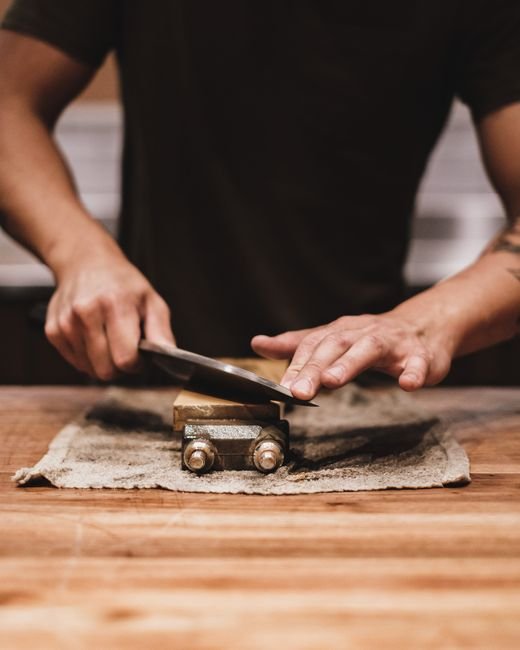
Locate the burr’s remaining side
A burr usually bends away from the side most recently sharpened. If the final strokes were made on the right face, the burr will generally lean toward the left. Alternating strokes can leave it in patches, so the heel, belly, and tip may not behave alike.
Place the knife on a stable surface with the edge facing away. Under a bright, focused light, inspect the edge from heel to tip, changing the viewing angle slightly as each section passes through the light. A clean apex is difficult to illuminate directly; a remaining burr may flash as a thin, bright line or produce isolated glints.
Then check for one-sided catching:
- Hold a clean cotton swab against one blade face, above the bevel.
- Move it from the spine toward and across the edge, never lengthwise along it.
- Repeat at the heel, belly, and tip, then test the opposite face.
- Note where fibers snag or pull. Catching on only one face often indicates that the burr is leaning toward that side.
A glint and a snag at the same location provide stronger evidence than either test alone. Marking the corresponding blade section with a washable marker can help target the next light deburring strokes.
Do not slide skin from heel to tip or use a fingertip to feel for roughness. Keep the edge pointed away, stabilize the knife, and make every inspection motion across the edge rather than along it.
When the burr keeps changing sides
A burr that moves to the opposite face after every stroke usually indicates that the stone has already reached the apex. The edge is not waiting for more grinding; it is carrying a thin flap of fatigued metal that bends back and forth.
At this stage, switching sides after each stroke should serve to remove the burr, not raise a larger one. Repeated passes on one face can rebuild the flap, shift the apex off-center, and remove more steel than necessary.
Use lighter alternating strokes
Keep the sharpening angle stable and make one edge-leading stroke per side, moving the edge as though slicing a thin layer from the stone. Then reduce pressure in stages:
- Begin with light pressure—just enough to maintain consistent contact.
- Alternate sides after every stroke rather than working in batches.
- Ease toward near-zero pressure for the final passes.
- Check after each pair of strokes; stop when the burr no longer flips or catches.
If the burr persists, inspect angle control before increasing the stroke count. A wobbling spine can alternately miss the apex and strike it too steeply, perpetuating the wire edge instead of cleaning it away.
When sharpness disappears after one cut
A knife that slices paper immediately after sharpening but struggles after cutting cardboard or firm produce may still carry a fatigued wire edge. This thin flap can stand upright during testing, then bend sideways or break away when the blade meets resistance. Under angled light, the damaged apex may appear as intermittent bright spots.
Remove it without rebuilding the edge
Return to the finishing stone rather than restarting with a coarse abrasive. Make a few alternating, edge-leading strokes at the established sharpening angle, using only enough pressure to keep the bevel stable. Check after each pair; repeated passes can create another burr or remove more steel than necessary.
Follow with minimal-pressure stropping:
- Use clean leather, denim, or another firm strop surface.
- Move the blade edge trailing so it cannot cut into the strop.
- Keep the angle at or slightly below the sharpening angle.
- Stop after a few alternating passes and retest on paper, then on a moderately resistant material.
Cork or soft wood can be used as an optional aid: draw the edge through once, gently, to catch loose foil. It should not replace careful stone deburring. Excessive pressure on cork, wood, or a soft strop can bend the apex or round it over, trading a wire edge for a blunt one.
Long stropping sessions can temporarily align a wire edge instead of removing it. If sharpness fades again, return to a few controlled finishing-stone strokes.
Map the section that missed the stone
A knife can feel sharp near the heel yet slide over paper at the belly or tip. That pattern usually indicates uneven stone contact, a changing sharpening angle, or a section where the two bevels never met to form an apex.
Use marker as a contact map
Color both bevels with a permanent marker, then make two or three normal strokes per side. Inspect the edge under bright light, preferably with magnification.
- Ink remaining beside the cutting edge: the stone is contacting the shoulder, not the apex.
- A patch of untouched ink: the stroke is skipping that section.
- Ink removed only at the very edge: the angle may be too steep, creating or enlarging a microbevel.
At the heel, a bolster, handle, or late stroke start often blocks contact. Through the belly, the handle must rise gradually so the curved edge stays on the stone. Near the tip, excessive lifting can round the point, while too little rotation leaves the final section untouched.
Repair only what is missing
If a dull patch still reflects light or retains marker after repeated strokes, continued polishing wastes time. Return that section to a moderately coarser stone and use short, controlled passes until a consistent apex—and a small burr—reaches the entire area. Then blend the repaired section into the rest of the bevel and resume an appropriate grit progression.
Check each region separately with a slow paper cut. A clean heel does not confirm that the belly or tip is finished.
No burr—or no apex?
An edge can feel smooth because the burr is gone—or because sharpening never brought both bevels together. The difference matters: further deburring cannot sharpen an incomplete apex and may round it further.
Read the edge under light
Hold the clean, dry edge beneath a bright light and rotate it slowly. A properly formed apex should be difficult to see directly; bright glints or a continuous reflective line indicate a flat, rounded, or damaged strip. If the entire edge reflects and no burr developed on either side, the stone probably has not reached the apex.
Marker provides a second check. Color both bevels, make a few controlled strokes, then inspect:
- Ink remains at the cutting edge: the sharpening angle is too low, or the bevel needs more shaping.
- Ink disappears only at the edge: the angle is relatively high and may be creating a narrow microbevel.
- Patchy residue: stone contact, blade curvature, or pressure is inconsistent.
Return to a shaping grit and correct the angle according to pocket knife sharpening fundamentals. Work one side until a burr can be detected along the full edge, then repeat on the other side before using finer abrasives.
Broader repair is warranted when deep chips, severe rounding, thick edge geometry, or uneven bevels prevent consistent apex contact. In those cases, reshape the bevel rather than repeatedly polishing the same incomplete edge.
What each sharpness test reveals
What does slicing paper prove?
A clean slice shows that the tested edge section can start and sustain a cut. Test heel to tip in both directions; a leaning burr may cut one way yet snag the other.
Is newsprint more conclusive?
Thin, flexible newsprint exposes snagging that stiff paper can hide. Grain direction, moisture, and technique affect results, so success still does not confirm a stable apex.
What does tomato skin reveal?
Low-pressure slicing checks whether the edge bites a slick, resilient surface. A toothy burr may pass, while a polished edge may need a slight drawing motion.
What does bright light show?
Glints can reveal flat spots, rolls, or chips because a narrow apex reflects little light. Rotate the blade and inspect both sides; one viewing angle can hide damage or a burr.
Clean off food residue, then determine whether sharpening is actually needed.
Directional snagging: likely burr; deburr gently. A continuous rolled line: routine honing may suffice. Fixed glints, chips, or dents: damage may require localized sharpening.Removing more metal before this check can enlarge the repair.
Finish without removing more steel than needed
-
Dry the blade and inspect it under directional light
Secure the knife, then rotate the edge beneath a bright light. Mark only sections that flash or catch a cross-edge cotton swab.
-
Treat the affected section only
Use one very light, edge-leading stroke on the side opposite the remaining burr. Avoid working the full edge when only one section shows trouble.
-
Check after every stroke
Repeat the light and swab checks. If the catching switches sides, reduce pressure and alternate single strokes rather than chasing the burr aggressively.
-
Remove loose residue
Wipe the blade carefully from spine toward edge and away from the body. Clean abrasive particles from the edge before testing.
-
Retest, then stop
Try paper or newsprint at several points along the edge. Stop when it cuts cleanly without snags and shows no reflected glints; further passes risk weakening or rounding the apex.
A final correction should be local, light, and checked after every stroke. Once the edge passes both cutting and visual tests, cleaning and stopping are more useful than additional polishing.
A surviving burr is one explanation; a damaged apex is the other. Removing chips from a knife edge covers the case where the edge never reached an apex to begin with.