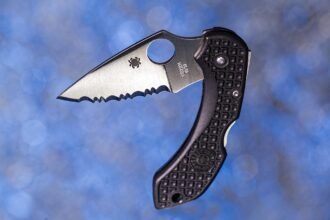
A blade can sit between the jaws and still resist safe, consistent sharpening.
A compact cleaver may enter a conventional clamp, yet its tall blade can leave the edge far below the guide rod’s usable path. A short chef’s knife creates another problem: there may be too little flat spine for the jaws to grip without reaching the heel or interfering with the handle.
The workable setup must balance secure clamping, full edge access, and clearance. Before buying, compare the clamp’s gripping area with the blade’s flat section, then check whether the stone holder or rod could strike the clamp at the intended angle. If the blade rocks, twists, or requires clamping on a taper, it is not securely positioned.
- Measure the flat spine section, not overall blade length.
- Check clearance at both heel and tip.

What blade compatibility actually means
Stable support
The clamp or blade table must hold the knife without rocking, twisting, or creeping under abrasive pressure. Adequate contact depends on the blade’s width, thickness, taper, and available parallel surfaces.
Complete edge exposure
The abrasive must reach the heel, belly, and tip without the clamp, guide, or handle blocking its path. A short cutting edge can fit inside the fixture yet remain partly inaccessible.
Abrasive clearance
The stone or belt needs an unobstructed stroke on both sides of the blade. Wide blades, pronounced plunge lines, thumb studs, guards, and thick handles can restrict travel.
Angle preservation
The sharpener must reach the intended edge angle across the full profile. Blade width, clamp position, edge curvature, and guide geometry can make the effective angle change from heel to tip.
Relevant measurements
Compare manufacturer-stated limits for blade width, thickness, length, and angle range. Also inspect distal taper, spine shape, swedges, fullers, recurves, and the amount of flat clamping area.
Before sharpening, mount the blade and check for movement using light hand pressure. Then trace the abrasive’s intended path without contacting the edge.
Stop if the fixture shifts, the heel is blocked, hardware enters the stroke, or the guide cannot maintain the target angle. When published limits omit a critical dimension, confirmation from the sharpener manufacturer is safer than assuming compatibility.
Write down the blade’s fit-critical measurements
- Overall blade geometry
Measure the sharpened edge from heel to tip and the blade height from edge to spine near the intended clamp position. These dimensions affect jaw placement and abrasive clearance.
RecordEdge length and blade height in millimetersDo not overlookRelying only on the manufacturer’s overall blade length - Available clamping surface
Record spine thickness where the jaws would sit, plus the length of uninterrupted flat surface available there. Note distal taper, swedges, and full-flat or hollow grinds that may leave the jaws gripping angled faces.
RecordThickness, usable flat length, taper, and grindDo not overlookMeasuring thickness at the heel when the clamp must sit farther forward - Target edge angle
Write down the desired degrees per side, not merely the included angle. A tall blade may allow lower settings, while a short blade can bring the stone or holder into contact with the clamp.
RecordTarget angle per side and current bevel angle, if knownDo not overlookAssuming every advertised angle remains reachable on every blade - Potential travel obstructions
Mark thumb studs, bolsters, guards, pronounced shoulders, and handle scales near the heel. Include which side each feature occupies because abrasive rods and clamps may need clearance on both faces.
RecordLocation and projection of every obstructionDo not overlookChecking edge access while ignoring the abrasive’s return stroke
Keep the measurements in a single searchable entry:
Edge: mm · Height: mm · Clamp thickness: mm · Flat length: mm · Target: ___° per side
Add: taper/grind, left-side obstructions, right-side obstructions, bolster or handle interference. A side-on photo with the proposed clamp zone marked can make manufacturer fit questions more precise.
Clamp systems offer strong repeatability when both jaws can grip a flat, reasonably parallel section of the blade. Wide, short blades often complicate that arrangement: a steep taper, swedge, thumb ramp, or abrupt handle transition can leave too little stable purchase. A clamp that sits securely may also block the heel or force the abrasive into the jaws.
Platform or table systems need less parallel clamping area. The blade rests against a surface while a guide controls the abrasive angle, making this architecture useful for cleavers, compact outdoor knives, and other broad profiles. The tradeoff is control: blade placement, pressure, and registration against a stop must remain consistent through every stroke and grit change.
Magnetic supports can hold broad blade faces without jaws occupying the spine or heel. They may simplify positioning when the steel responds strongly enough to the magnet. However, magnetic attraction varies with steel, thickness, surface coatings, and contact area. A magnet is a positioning aid—not a substitute for a positive stop, stable hand control, or protection from edge movement.
For a wider comparison of control and setup demands, see how guided sharpeners differ from whetstones. In practice, clamps favor repeatable registration; platforms and magnetic supports favor access when usable jaw area is scarce. The safer choice is the architecture that keeps the blade from rocking, sliding, or rotating while leaving the entire edge reachable.
| Likely candidate | Edge Pro’s current Apex platform is a plausible starting point because the blade rests on an open table rather than relying on jaw contact. |
| Official capacity | Edge Pro lists support for blades up to 3.5 inches wide and of any length; it does not publish a minimum blade length. |
| Angle range | The manufacturer specifies continuously adjustable settings from 10° to 24° per side. Blade position and thickness can affect the angle at the edge. |
| Accessories | Available add-ons include a Small Knife Attachment, Slide Guide, scissor accessory, and retractable magnet. Package contents vary by Apex kit. |
| Stabilization | The Apex instructions call for the blade to be held against the table during sharpening. The optional magnet assists positioning but does not replace controlled hand pressure. |
| Handle clearance | A short blade can be shifted sideways to place its handle beyond the table. Before sharpening, the stone should be swept past the heel at the lowest intended angle to check handle and bolster clearance. |
| Rocking risk | Tapered grinds, curved spines, and raised logos can prevent full table contact. Pressure near an unsupported tip may rock the blade and change the bevel angle. |
| Fit check | Confirm that enough blade remains on the table while the entire edge stays reachable. Very short profiles may still require the Small Knife Attachment. |
| Candidate | Wicked Edge WE130 |
| Short-blade fit | No stated blade-length limit; enough parallel spine must remain for secure clamping |
| Blade thickness | Up to 1/4 in, per Wicked Edge |
| Edge exposure | 5/8 in above vise is the manufacturer’s angle-calibration reference, not a universal fit guarantee |
| Angle range | 13°–35° per side; actual angle changes when the edge sits above or below the 5/8-in reference |
| Jaw design | Self-centering jaws adjust independently to accommodate blade geometry |
| Small blades | Wicked Edge Small Knife Adapter may be required when the vise cannot safely grip a narrow blade; confirm model compatibility |
Recommendations were matched to blade geometry, then checked against manufacturer documentation for clamping, abrasive options, and required adapters.
Priority went to stable support, heel access, and unobstructed abrasive travel.
Adapters, blade supports, and replacement abrasive availability were treated as part of the system.
Manufacturer fit limits should be confirmed against the recorded blade measurements before purchase.
Choose around the blade and workflow
Trust the edge, not the dial
A sharpener’s scale is usually referenced to a particular blade position. A wide blade places the edge farther from the clamp or pivot reference, so the displayed setting may not equal the angle formed at the apex. Blade taper and uneven clamping can introduce further variation.
Verify the setup with a digital angle gauge placed on the abrasive holder, zeroed against the sharpener’s base or manufacturer-specified reference. Then use the marker method: color the bevel, make a light pass, and inspect where ink was removed. The gauge checks angle; the marker reveals whether the stone is reaching the shoulder, apex, or both.
Before buying, examine the full stroke:
- Heel access: the stone should reach the edge beside the plunge line without hitting the clamp.
- Tip access: the holder must remain controlled as it follows the curve, rather than running off the stone.
- Stone length: sufficient travel reduces short, overlapping strokes on broad blades.
- Clamp clearance: test the lowest intended angle, where stone-to-jaw strikes are most likely.
Match abrasives to the work. Fine stones suit routine maintenance; coarse abrasives remove chips or reset bevels faster. Diamond or CBN options may be more practical for high-carbide, wear-resistant alloys; compare sharpener options for S30V steel when that steel is part of the rotation.
Sketch the clamp, edge position, and lowest sharpening angle at full scale. This simple profile can expose jaw strikes and blocked heel access before purchase.
Four assumptions that cause poor fit
Clamping and sharpening clearance are separate checks.
A blade may clamp securely while the stone holder strikes the jaws, spine, or platform near the heel.
Blade width alone does not determine the attainable angle.
Clamp height, blade position, primary grind, and abrasive-holder clearance can impose a higher practical limit.
Adapters are system- and blade-dependent.
Mounting pattern, jaw geometry, thickness range, and edge access must match both sharpener and knife.
Recurves and hawkbills require suitable abrasive geometry.
A flat stone can bridge the curve and remove metal unevenly. Consider systems intended for recurved and hawkbill blades with maker-documented narrow or rounded abrasives.
Mount the blade, set the intended angle, and move the abrasive from heel to tip without powering or cutting. Any collision, flex, or inaccessible edge section means the setup needs repositioning or different hardware.
Make fit the first safety check
Mount the sharpener on a rigid, level, nonslip surface and secure every base, rod, jaw, and angle adjustment before adding an abrasive. Position the blade with its edge facing away from the supporting hand. Keep fingers outside the stone’s travel path, use moderate pressure, and stop if the blade shifts, flexes, or vibrates.
Before beginning, clean and dry the knife, inspect stones and holders for damage, and protect the tip from accidental contact. The same precautions used when learning how to sharpen pocket knives safely apply here, but wide, short blades deserve extra attention because limited clamping area can amplify movement.
A marker check and a few light, controlled strokes can confirm angle and clearance—but only after the blade is securely supported. Never resolve uncertain fit by loading the abrasive against a questionable mount.
Choose support before features
- Record blade width, length, thickness, spine geometry, and usable clamping area.
- Confirm edge access, abrasive clearance, and a stable manufacturer-documented mounting method.
- Prefer a platform when jaw purchase is limited; consider a clamp or approved adapter when repeatable purchase is documented.
For many wide, short blades, a supported platform merits early consideration because it does not depend on a long, flat spine section. Clamps and adapters may offer stronger repeatability when their required contact area and clearance are explicitly documented.
If compatibility remains unclear, send the measurements and blade photos to the manufacturer. An unresolved mounting question should be settled before sharpening, not tested under pressure.
Blade shape decides compatibility more than clamp design does, and sharpening a serrated pocket knife is the case where a fixed-angle system stops being the right tool altogether.
Work Sharp Precision Adjust Elite Knife Sharpener - Fixed Angle Sharpening System for Kitchen & Pocket Knives - Professional Guided Knife Sharpening Tool
Features
| Brand Name | WORK SHARP |
| Number of Items | 1 |
| Manufacturer | Work Sharp |
| Number of Packs | 1 |
| Unit Count | 1 Count |
| Global Trade Identification Number | 00662949040976 |
| UPC | 662949040976 |
| Included Components | Leather strop, ceramic rod for serrations |
| Item Length | 14.5 inches |
| Model Number | WSBCHPAJ-ELT-ATL |
| Manufacturer Part Number | WSBCHPAJ-ELT-ATL |
| ASIN | B09FWWDFF9 |
| Material Type | Plastic, Stainless Steel |
| Color | Black |
| EU Spare Part Availability Duration | 3 years |
| Item Dimensions L x W x H | 14"L x 6.75"W x 5"H |
| Item Weight | 3 pounds |
- PERFECT FOR HOME COOKS, HUNTERS & KNIFE ENTHUSIASTS - Delivers razor-sharp, professional-quality edges on kitchen knives, hunting blades, and EDC pocket knives. Get barbershop-sharp results at home in minutes—no professional services needed
- ADJUSTABLE ANGLES FROM 15° TO 30° - Set the perfect angle for any knife: 15° for Japanese-style, 20° for Western kitchen knives, 25° for hunting blades, or 30° for cleavers. The precision guide eliminates guesswork
- YES, IT SHARPENS SERRATED KNIVES - Includes a dedicated conical ceramic rod for serrated blades. Restore bread knives, steak knives, and fillet knives to like-new sharpness without expensive professional services
- COMPLETE ELITE KIT INCLUDED - Coarse 320-grit diamond plate, fine 600-grit diamond plate, ceramic finishing rod, serrated blade rod, and tri-brasive attachment for curved blades. Industrial-quality materials built to last
- EASY FOR BEGINNERS, PRECISE FOR EXPERTS - Guided sharpening system makes it foolproof. Clamp, set angle, sharpen—impossible to mess up. A perfect gift for the chef, hunter, or knife lover in your life