
Permit in hand, compact pistol ready—now what?
That first night after getting a permit and bringing a compact pistol home often triggers the same worries: printing, all‑day comfort, and wasted accessory buys. A tight, prioritized essentials list focuses purchases on proven needs—holster fit, concealment, secure carry support and training—rather than impulse gadgets.
That filter saves money, reduces printing, and speeds readiness.
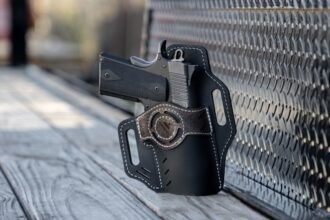
- A fitted, trigger-covering holster (Kydex or quality leather) compatible with everyday clothing.
- A sturdy, carry-rated belt to prevent sagging and preserve draw consistency.
- At least one spare magazine and a reliable magazine carrier.
Triage: Safety, Concealability, Daily Comfort
- Safety first
Prioritize accessories that reduce accidental discharge risk and preserve trigger protection. Check passive retention, consistent holster mouth rigidity, and materials that fully cover the trigger guard under all carry positions.
Look forSolid trigger coverage and reliable passive retentionAvoidSoft or stretched holster mouths, accessories that expose the trigger - Concealability and profile
Evaluate how an accessory changes the firearm’s silhouette and printing during typical movement and clothing choices. Low-rise clips, slim attachment points, and minimal added bulk matter more than brand labels.
Look forLow profile, minimal added thickness, secure belt attachmentAvoidLarge, bulky mounts or thick protrusions that print - Daily comfort and ergonomics
Assess weight distribution, edge geometry, and adjustability for all-day wear. Materials that breathe and hardware that allows micro-adjustments reduce shifting and hotspots over long periods.
Look forRounded edges, adjustability, breathable materialsAvoidRigid, sharp hardware and one-size-fits-all designs - Durability, serviceability, and compatibility
Choose accessories with replaceable wear parts, corrosion-resistant finishes, and clear compatibility lists. Long-term value comes from repairability and predictable fit across gear changes.
Look forReplaceable parts, stable finishes, documented fitmentAvoidProprietary one-piece items with unknown longevity
Why the holster is the single biggest decision
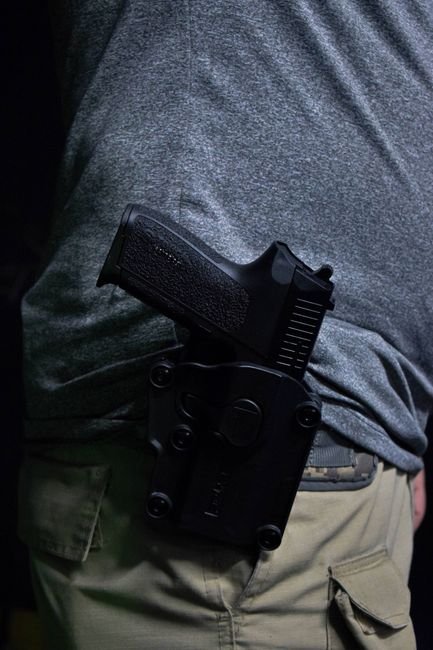
A holster, a key part of concealed carry essentials, determines concealment, comfort, and how reliably the pistol stays in place. Additionally, selecting the correct holster and carry position first prevents wasted purchases on belts, mag carriers, or clothing modifications.
Pick a carry position by balancing three trade-offs: concealment, comfort, and retention. Common options behave differently:
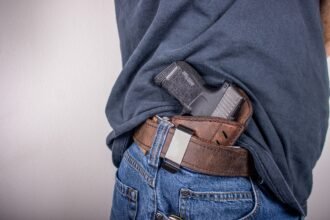
- IWB (inside-the-waistband): strong concealment, moderate comfort; good retention when properly fitted. Ride height and cant are important for comfort and draw angle.
- AIWB / appendix: excellent front concealment and fast access, but can be uncomfortable for some body types and risky if holster retention or trigger coverage is low. For focused picks, see the comfortable AIWB picks.
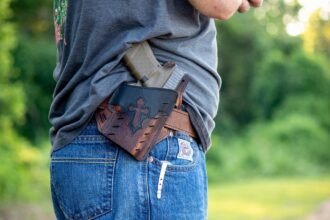
- OWB (outside-the-waistband): more comfortable and often better for retention with a belt-mounted holster, but typically requires layering to avoid printing.
- Tuckable holsters: allow the shirt to tuck behind the holster for extra concealment; sacrifice some quickness and may need a lower ride height.
Beyond position, pistol configuration dictates holster choice. Full-size frames, red-dot optics, or weapon lights require specific cut and retention systems. Additionally, for compact pistols like the Glock 19, dedicated IWB molds avoid modification. See recommended Glock 19 IWB options.
Choose the holster first, then match a stout belt and magazine carrier. Test draw, retention, and printing with everyday clothing before committing to other gear.
Carry position: pick one primary spot and evaluate ease of draw.
Pistol fit: confirm holster fits the exact model and any optics.
Retention & trigger coverage: prioritize full trigger protection and secure retention.
Practical test: simulate daily movements and try different cant/ride heights.
Holsters for guns with lights: fit and trade-offs
A weapon light changes the pistol’s profile, so the holster must be matched to the entire rig — not just the frame. Purpose-built holsters that accept a mounted light keep retention predictable and protect the activation switch.
Styles and materials that work
- Kydex/molded polymer: common for light-equipped guns; holds shape around the light and gives crisp retention and draw.
- Leather (custom-molded): can work but usually requires custom shaping and may be bulkier.
- Hybrid designs: combine a rigid light-molded shell with a leather backing for comfort.
A light increases printing and often forces a slightly wider cant or higher ride height to clear clothing. This can slow or change the draw stroke. However, consider whether the practical benefits of illumination outweigh reduced concealability and added bulk for concealed carry essentials. For practical fitting and safety details, consult the holsters built for lights guide.
Why one slim spare-mag carrier usually wins
A single, slim mag carrier generally makes the best daily spare because it minimizes bulk and printing while staying predictable in draw and retention. Consistency and concealability matter more than extra capacity for everyday wear.
Key trade-offs:
- Single carriers: lowest profile, easiest to tuck, lighter and less likely to snag. Best for deep concealment.
- Double carriers: carry extra rounds but add width, weight, and a different feel at the belt; can print and complicate draw mechanics.
Orientation and fit:
- Vertical offers a natural reload motion; horizontal can be lower-profile for appendix or pocket carry. Cant (forward/backward angle) affects speed and comfort.
Common attachment positions and matching advice:
- Strong-side hip, appendix, small of back, pocket, ankle. Match the mag side and orientation to the holster and typical clothing — for example, a right-hip holster pairs with a right-side vertical mag. For slim, low-profile options, consult the slim, low-profile mag carriers.
Belt and clothing: the real concealment backbone
A stiff concealment belt is the single most effective accessory for preventing sag and maintaining consistent holster geometry. Moreover, rigid support keeps the pistol close to body, stabilizes draw angle, and stops belt from folding under load. Additionally, consider a belt with a solid internal core and minimal stretch; see options in stiff concealment belts roundup.
Clothing choices that actually matter
Clothing controls printing and silhouette. Key factors:
- Shirt cut: longer, slightly loose hems that cover the grip; straight or high-low hems work better than cropped or tight tucks.
- Layering: a lightweight overshirt or unstructured jacket breaks lines without bulk.
- Fabric: medium-weight weaves with some drape and texture hide edges better than clingy synthetics.
Summer needs special attention for concealed carry essentials.
Additionally, breathable patterns and loose layers help; practical summer tactics are covered in the summer concealment strategies.
A coherent belt-plus-clothing plan usually has higher impact on day-to-day concealment than frequent holster changes. Test combinations with movement to confirm no printing or sag.
Belt has a rigid core and minimal stretch
Shirt covers grip when standing and bending
Add a light layer or patterned fabric for disruption
Test drawing and sitting to confirm no printing
Fast Fixes for Common Comfort & Fit Problems
IWB chafing or pressure points — quick diagnosis?
Move the holster a half-inch and adjust cant or ride height; small shifts often eliminate hotspots. Check belt stiffness and shirt layers—looser fabric or a stiffer belt redistributes pressure. See the detailed fixes for IWB chafing for persistent issues.
Sweat buildup inside the holster — is a sweat shield necessary?
Breathable materials and moisture-wicking clothing reduce trap sweat; leather and sport kydex behave differently. A sweat shield can help in high-sweat conditions but adds bulk, so weigh trade-offs against carry needs and consult when sweat shields help.
Retention feels loose after moving around — why and how to restore it?
Loss of retention usually stems from holster fit, worn clips, or a loosened retention screw. Tightening screws, replacing weak clips, or switching to a holster with adjustable passive retention typically restores secure hold.
Gun prints or shifting during the day — minor, no-replacement fixes?
Rotate carry position slightly, lower or raise ride height, and change shirt cut to a looser or patterned top to hide edges. Small accessories (holster wedges, anti-slip pads) reduce canting and printing without replacing the holster.
Retention hardware: quick fixes that restore a holster
Small hardware tweaks often bring a holster back to safe, predictable retention without buying new gear. First inspect for stripped screw heads, cracked shells, loose clips, or worn mounting holes.
Common, effective fixes:
- Tighten with the correct driver and avoid over-torquing. Apply a removable threadlocker for screws that back out.
- Replace stripped fasteners with same‑size stainless or Torx replacements and add a split washer or nylon insert nut for vibration resistance.
- Swap worn belt clips, rivets, or retention posts; add thin friction pads where Kydex meets the pistol.
If a retention screw keeps loosening, consult the troubleshooting for loose retention screws. After repairs, verify consistent retention with an unloaded firearm before regular use.
High‑impact, low‑cost training gear
Small, inexpensive training accessories multiply safety and proficiency and are part of concealed carry essentials.
Additionally, they reduce range time wasted on basics, protect parts, and make holsters, belts, and magazines perform as intended.
Recommended items
- Snap caps / dummy rounds: protect the firing pin and allow safe reload and malfunction drills. Keep several for repeated practice.
- Dry‑fire tools / laser trainers: useful for sight alignment, trigger prep, and presentation speed — see the detailed dry‑fire tool options.
- Inert magazines or follower inserts: practice reloads and press checks without live ammo.
- Simple timer or phone app: adds tempo and focus to repetitions.
Practice rhythm and effect
Short daily sessions (5–10 minutes) on draw, presentation, and trigger reset produce big gains. Additionally, these concealed carry essentials should be combined with a weekly live‑fire session to validate skills. Always maintain strict safe‑handling checks during dry‑fire. These tools amplify safety by making rehearsed movements reliable.
Common Concealed‑Carry Myths — Quick Corrections
More magazines add weight, increase printing, and complicate everyday reloads; a single slim carrier often suffices.
See ‘Why one slim spare‑mag carrier usually wins’ and belt/clothing sections.
Lights add bulk and change draw mechanics, but holsters made for lights plus wardrobe choices can preserve concealment.
See ‘Holsters for guns with lights’ and holster‑first guidance.
Holsters must match the pistol model, sight/light configuration, and chosen carry position; mismatches harm retention and comfort.
See ‘Why the holster is the single biggest decision’ for matching guidance.
Three‑Tier Daily Kit — Actionable Checklist
-
Must‑have: the core kit
A purpose‑fit holster matched to the carry position and pistol configuration, a rigid carry belt, and one slim spare‑mag carrier. These items address retention, support, and predictable reloads — the foundation of daily carry.
-
Highly recommended: concealment and comfort
A tuckable or concealment‑friendly outer garment, a sweat guard or holster with backer, and a small quality flashlight if needed for work or low light. Prioritize slim, compatible items that minimally change daily profile.
-
Optional: situational add‑ons
Tourniquet or minimal first‑aid kit, extra magazine or different carry positions for specific days, and weapon‑mounted lights only when mission‑necessary. Expect trade‑offs in bulk and concealability.
-
Fit validation
Confirm retention, clearance, and smooth draw with the actual pistol and holster. Check seated and standing positions; address rub, hot spots, or movement before adding gear.
-
Concealment test
Try typical outfits and movements: walk, sit, reach, and raise arms. Inspect printing from multiple angles and have a trusted observer verify concealment.
-
Training priority
Establish a dry‑fire routine, draw and reload drills, and malfunction practice with current kit before buying extra accessories.
Next Steps: Validate, Test, Train
- Keep the kit minimal: fit and comfort first, extras later.
- Validate fit and concealment using real clothing and movement.
- Prioritize regular training with the carried configuration before expanding gear.
Confirm holster and belt fit, run concealment checks in normal outfits, and build a short, consistent training plan focused on draw, reloads, and malfunctions. Only after those steps show repeatable results should additional accessories be introduced, weighing each for concealability and daily comfort.

10 Comments
Loved the part about belts. I wasted money on a fancy holster before realizing my cheap belt was the actual problem. Rigid belt + better shirt cut fixed 80% of my printing issues.
Why is one slim spare-mag carrier recommended over a double? I get the comfort part but what about being undergunned in a bad situation?
I’m a bit skeptical about prioritizing concealability over comfort — the article says triage is safety, concealability, daily comfort. Shouldn’t comfort come before concealability if you end up not carrying because it’s miserable?
I worry beginners will buy everything to be invisible and then never carry.
Great point. The triage order in the article emphasizes safety first, then concealability, then comfort as a framework for purchases — but practical reality matters.
If comfort is so poor that you don’t carry, you failed the purpose. Use the triage to choose what to buy first (holster, belt, spare mag, training), but always iterate: validate fit and comfort at home, and don’t let the perfect concealment justify gear that makes you ditch carry entirely.
Quick question: when you say “fit validation” in the Three‑Tier Daily Kit, do you mean testing carry positions at home or should I go to a range/instructor for that? I’m new and nervous about drawing in public.
Start at home. Do clothing/concealment checks and dry‑run draws in front of a mirror to verify printing and accessibility. Once you have a good baseline, do live‑fire checks with an instructor or at the range to validate draw speed and safe handling under stress. Always practice slowly and safely first, then build speed.
Short and honest: training section low cost tips = brilliant. Dry fire + snap caps got me comfortable way faster than just going to the range every weekend. Also, don’t forget sweat chafing fixes — I carry summer daily and those little foam pads saved me.
That myth vs fact list should be required reading. People in my local group still swear you need a big thick holster pad to hide prints — nope, it’s mostly belt and shirt choice.
The retention hardware section was gold. I had a holster that lost retention and thought it was garbage until I swapped out a screw and tightened the clip. Wish more sellers showed that in product pages.
On lights: I carry a compact pistol with a light attached. The article says expect altered draw and bulk — can someone explain the trade-offs? Is it worth it for self‑defense?