
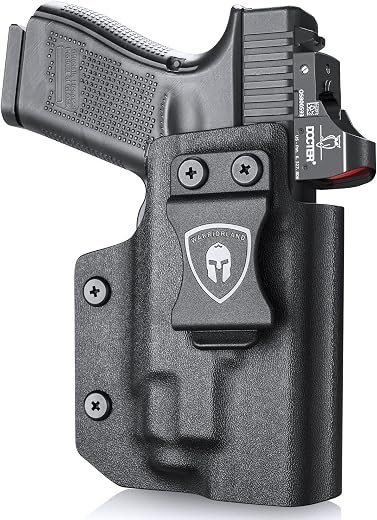
A mounted light flips holster choices into trade-offs.
Strapping a compact pistol with a TLR-style light on a commute changes the silhouette: printing becomes obvious, the trigger-guard profile grows, and draw angle or pants choice might change. That creates a trade-off between full trigger coverage (thicker holsters, mechanical retention) and concealability (low-profile IWB, shallow cant).
This guide will walk through the decisions: holster types (IWB vs OWB), materials (Kydex vs leather), retention levels, optic/light cuts, and belt/garment considerations so the right compromise is clear for different carry setups.


Technical terms and dimensional factors for light-equipped pistols
Bezel
The front perimeter of the weapon light that surrounds the lens and emitter; measure bezel diameter and any protrusions because these determine how deeply the holster must recess the lamp and whether retention edges contact metal or polymer.
Footprint
The plan‑view outline of the light plus the portion of the handgun it occupies; compare holster cavities to the combined outline (length × width and mounting lug position) to ensure correct seating and retention.
Rail interface
How the light physically mounts to the pistol—common standards include MIL‑STD‑1913 (Picatinny), proprietary dovetails, or clamp systems; the location and shape of the rail lug and any rearward offset affect holster compatibility.
Switch / activation location
The type and placement of the light’s activation control (rear paddle, side button, pressure pad) and whether it is momentary or constant; switch geometry dictates interior relief, cutouts, or travel space in the holster.
Clearance & offsets
Vertical and lateral measurements such as lens protrusion, body thickness, and offset from barrel axis; small changes in height or cant can create interference with the holster mouth or retention devices and must be checked against holster specs.
Choosing a holster style for pistols with lights
Everyday-concealment options
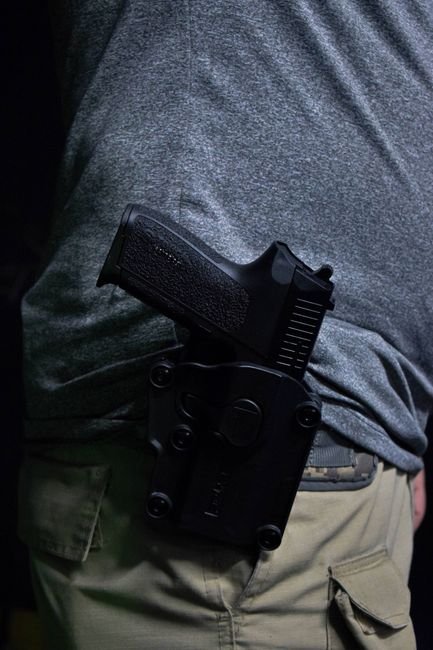
- IWB (inside-the-waistband): Best balance of concealment and retention for light-equipped pistols. Requires a holster cut for the light footprint and often an optic cut; look for full-length sweat guards, solid retention (posi-click or adjustable screws), and carry clips rated for the added torque. For a catalog of purpose-made options, see holsters that fit pistols with lights.
- AIWB/appendix: Faster natural draw path but higher risk of printing and switch snagging. Comfort depends on holster profile and body shape; lower ride height and rounded edges improve sit/drive comfort.
- OWB (outside-the-waistband): Easier draw and generally more comfortable for larger lights, but concealment suffers unless a jacket or cover garment is used. Good for open or semi-concealed carry when retention systems (thumb-breaks, active locks) are desired.
Duty and specialty rigs
Duty holsters: Designed for heavy retention and one-handed re-holstering. Most duty rigs accommodate weaponlights and irons, but require matching the light’s bezel and switch location to the retention hood/active lock geometry.- Shoulder rigs: Distribute weight off the belt, useful for heavier configurations. Less concealable; select rigs with secure retention and a good cover garment.
- Pocket/ankle: Rarely practical with full-sized lights; only very compact lights on subcompact pistols can work. Expect slow draws and limited retention options.
Practical priorities: verify pistol light holster fit for the light footprint and cant/retention, then test draw with the pistol-light combo.
Fits Glock models with TLR-7 series
IWB Kydex holster cut for optics and compatible with TLR-7/TLR-7A/TLR-7X lights. Features .08″ US Kydex, full-length sweat guard, hand-polished edges, posi-click audible retention, adjustable cant, and open muzzle/compensator clearance—suited for Glock 17/19 families (check exact Gen compatibility).
Prioritize a holster fitted to the pistol+light footprint. A generic holster may seat the gun but leave switches exposed or prevent a clean reholster. If possible, do a dry-fit with the exact light model and check switch clearance, retention click, and comfortable ride.
Material and construction: fit, break-in, and long-term tolerance
Kydex offers a rigid, dimensionally stable shell that delivers a precise pistol light holster fit with minimal break‑in. Properly formed Kydex tolerates odd bezels and rails but can transmit rubbing forces to polymer or aluminum housings; look for recessed contact surfaces and rounded internal edges. Retention is typically adjustable with tension screws, and a stiff mouth aids repeatable re-holstering.
Leather molds to a handgun over time and is more forgiving of slight clearance mismatches, but it requires a break‑in period and will relax with heat and moisture — potentially reducing retention. Leather edges can be rolled or flared to guide the bezel and reduce scuffing; however, long‑term sweat exposure accelerates wear.
Hybrids pair a rigid Kydex shell with a leather or synthetic backing to combine precise fit with carry comfort. The shell must be cut or molded to clear the light footprint; poorly trimmed shells create pressure points or snag points.
Mouth rigidity and edge treatment matter: a reinforced mouth prevents collapse during draw, and flared/rounded mouth edges guide the bezel and reduce abrasion. Useful features to seek:
- Adjustable retention or replaceable shells
- Recessed contact zones and rounded internal edges
- Open channels for switches and drainage
Confirm shell clearance for bezel and switch
Verify adjustable retention or replaceable shell
Check mouth rigidity for positive reholstering
Look for rounded edges to limit wear
Safety-engineering priorities for lights
Uninterrupted trigger‑guard coverage
The primary safety metric is complete trigger‑guard coverage that remains consistent whether the pistol is seated or being drawn. Light housings can create gaps or narrow access to the trigger face; a holster must retain material across the entire guard perimeter so nothing can intrude into the trigger well when holstered or handled.
How light cuts change retention dynamics
Light cuts often remove material used by the holster to create passive retention, shifting retention from the frame to the light housing. Passive retention (friction and compression) can be reduced by bezels and asymmetrical footprints. Active retention (hoods, straps, mechanical locks) can compensate, but the retention point may need repositioning to engage the light body rather than the pistol frame.
Tuning retention without compromising safety
Tuning is an engineering process: small, measured changes and verification under realistic draws. Recommended practices:
- Adjust retention incrementally and test with a full-featured draw stroke.
- Prefer changes that increase holster contact around the trigger guard rather than relying solely on light housing grip.
- Use active retention as a redundant layer, not the sole barrier to trigger access.
- Recheck retention after any light or accessory change; footprints and torque forces differ between models.
Retention tuning that prioritizes consistent trigger‑guard coverage reduces failure modes introduced by light modifications.
When a light cut reduces passive engagement, compensating only with tighter screw tension can leave the trigger guard exposed. Validate retention changes by inspecting trigger‑guard coverage and performing real‑world draws; rely on mechanical retention to back up—not replace—guard coverage.
How a mounted light shifts fit and draw
A mounted light alters the pistol’s geometry and balance in predictable ways. Expect the muzzle to sit slightly lower or further from the body for the same holster mouth; the added bulk often forces a higher ride or a forward cant to preserve a clean draw path. Retention that felt tight without a light can become overly stiff once the light’s bezel engages the holster wall.
Key trade-offs and quick adjustments:
- Ride height: lowering the belt-attachment point can clear the light from clothing, but may increase printing. Balance concealment against draw clearance.
- Cant: a modest forward cant (10–15°) often smooths the muzzle-forward pass and reduces edge catch.
- Mouth rigidity: stiffer mouth helps re-holstering a heavy muzzle, while slightly relaxed retention eases the initial break.
- Switch access: ensure intentional placement of off/on controls; ambidextrous or tactile-footprint lights need extra clearance during the draw stroke.
Consider whether do sweat shields help with light-mounted holsters?—a sweat shield can protect switches and reduce corrosion but may affect concealment and reholster feel. Reevaluate fit after live draws; small incremental changes matter.
Prioritized buying checklist
- Exact pistol + light compatibility
Fit claims must match the exact pistol generation, MOS/optic cut, and the specific light model or footprint. Generic “fits most” listings often miss bezel/rail offsets that cause binding or gaps.
Look forManufacturer lists the exact pistol generations and TLR-1/footprint compatibility.AvoidVague compatibility claims or single-photo mockups without the listed light installed. - Full trigger‑guard coverage and mechanical retention
Trigger protection should be continuous; retention features (posi‑click, hood, or adjustable friction) must secure the gun without exposing the trigger. A loud click is useful but not sufficient alone.
Look forExplicit trigger‑guard coverage diagrams and adjustable retention hardware.AvoidPartial guard coverage, soft flaps that can compress exposing the trigger. - Retention adjustability and break‑in behavior
Kydex and hybrid designs break in differently; a tunable retention screw or multiple cant options preserves safety and draw balance as the holster wears.
Look forAdjustable retention, choice of clips/cant, and notes about break‑in.AvoidFixed, nonadjustable mouth or claims that no break‑in is needed. - Attachment hardware and ride stability
Clips, belt slots, and mount height determine concealment and stability with the added mass of a light. Weak clips or incorrect clip spacing cause sag and ride‑mouth collapse.
Look forRobust belt clips, multiple mounting positions, and 1.5"+ clip compatibility.AvoidThin stamped clips, single low‑profile mounting point, or unlabeled clip size.
Always confirm fit with the exact pistol and light installed, unloaded.
Test insertion/removal, retention, and draw in a controlled, safe environment. Look for binding around the bezel, unwanted trigger exposure, or clip flex under load. A click into place is helpful but inspect visual coverage and mechanical retention as primary evidence.Four-step verification before ordering
-
Measure the actual setup
Record the pistol’s dimensions with the chosen light attached: overall length, rail-to-bezel footprint, switch location, and thickness. Use calipers or a ruler and note the exact pistol and light model names for compatibility checks.
-
Cross-check manufacturer fit lists
Compare recorded dimensions and model names against holster makers’ compatibility charts and customer-fit photos. For appendix-style carry, also review guides for AIWB holsters that clear weapon lights to avoid surprises.
-
Dry-draw with a matching trainer
Use a training gun or an unloaded pistol fitted with an identical dummy light to perform multiple draws and reholsters, assessing retention, muzzle path, and whether the light snags the holster mouth.
-
Simulate carry and adjust
Mount the holster on the intended belt, wear typical clothing, sit and bend, then test draws and reholstering. Verify full trigger-guard coverage, reachable switch access only when intended, and fine-tune retention screws as needed.
Match carry scenario to holster style
EDC concealed
For everyday concealed carry, favor inside‑the‑waistband (IWB) or tuckable Kydex hybrids that ride low and close to the body. Prioritize full trigger‑guard coverage, adjustable retention, and low‑profile sight/light clearance so clothing conceals the light footprint without binding the draw.
Urban deep concealment
When maximum concealment is required, choose slim IWB or appendix holsters with a low ride and soft sweat guard; look for narrow clips that allow a deep tuck and minimal printing. Retention can stay modest — tune it just enough to avoid accidental loss while keeping a smooth, reliable draw.
Duty / open carry
Duty setups benefit from OWB Level II/III retention, a locking hood or retention lever, and a robust belt platform. Choose holsters built for rapid re‑holstering around a duty belt that accepts light‑equipped pistols without excessive cant or wobble.
Vehicle & range use
For vehicle or range carry, a rigid OWB or paddle with positive mechanical retention makes re-holstering easy while seated. For range work, open‑top Kydex speeds reloads; for vehicle transport, combine a secure holster with a lockable storage option.
Complementary stabilizing gear
- Stiff belt: prevents ride‑down and anchors OWB holsters.
- Claw or wedge: reduces printing and tilts grip toward the body.
- Retention screws / holster pads: tune retention and reduce rattle.
For specific belt recommendations and fit tips, consult the belts that stabilize holsters with lights guide.
Versatile OWB for lights
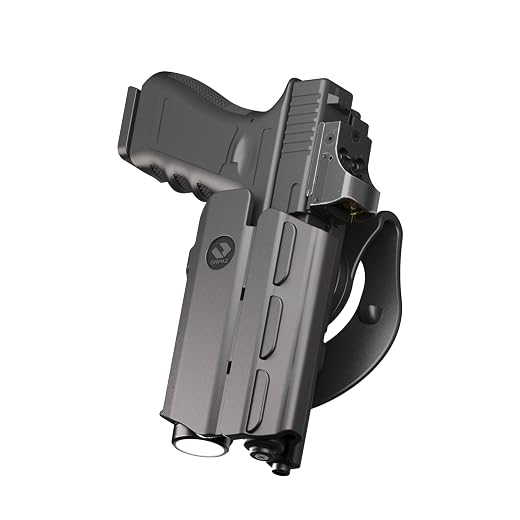
Orpaz T40 accepts many pistol+light combos and offers both Level II (T40) and Level III (T40 Pro) options. Features include height/width adjustment, an adjustable magnetic retention base for 6.2″–7.5″ barrels, and optional optic guards. Built for duty/tactical use, it pairs well with a reinforced belt and belt platform for stable OWB carry.

Common questions on universals, clearance, modifications, and trade-offs
Are universal holsters safe for pistols with lights?
Universals can work but often lack precise molding; they require full trigger-guard coverage and verified retention with the light attached.
How much clearance is typical?
Allow the bezel and switch plus about one to two millimetres; confirm with a footprint or a physical test fit.
Is shell modification (heat‑trimming) acceptable?
Trimming is common but changes retention and may affect warranties; trim incrementally and re‑check trigger coverage after each cut.
How to prioritise concealment versus retention?
Prioritise full trigger coverage and sufficient passive retention; modest concealment gains should not compromise basic safety engineering.
Checklist and takeaways
- Confirm fit with the light mounted
- Preserve full trigger‑guard coverage
- Test draw and reholster with intended clothing
Checklist: verify exact fit, bezel clearance, adjustable retention, and test draw/reholster in intended clothing.
WARRIORLAND IWB Kydex Holster Optic Cut, Fits Glock 17/19 Gen 3-6 & 23/32 Gen 3-4 & 19X 44 45 with TLR-7/TLR-7A/TLR-7X, Inside Waistband Conceal Carry, Adj....
Features
| Brand Name | WARRIORLAND |
| Manufacturer | WARRIORLAND |
| ASIN | B0B48XCZDM |
| Hand Orientation | Right |
| Product Style | Adjustable |
| Color | Black Kydex - Right Hand |
| Size | 1.5" |
| Material Type | Kydex |
- COMPATIBILITY - Fit Glock 17/ 19 Gen 3-5 & 23/ 32 Gen 3-4 & G19X 44 45 with TLR-7/TLR-7A/TLR-7X - Optics cut to fit variety of red dot sights - Not fit Glock 23/32 gen 5 - Not fit other laser/light
- COMPENSATOR & OPEN MUZZLE CUT - The holster can accommodate with various compensators - Over-Cut open muzzle accommodate with threaded barrel
- FULL LENGTH SWEAT GUARD & POSI-CLICK AUDIBLE SYSTERM - Full length sweat guard can prevent sweat towards your pistol - You can hear a clear "CLICK" sound when firearm was firmly seated
- 0.08 INCH US KYDEX MADE -Made of .08 Inch US Kydex material, which possess rugged, durable, waterproof, washable and lightweight characters - Super suitable for daily concealed carry
- HAND POLISHED EDGE & SMOOTH INNER STRACTURE - All WARRIORLAND Kydex holsters edge are polished by hand - Smooth inside structure ensure no scratch nor wear
- ADJUSTABLE CANT & RETENTION - Adjustable carry angle from -5 to +20 Degrees - Adjustable retention for suitable tightness
- LIFETIME WARRANTY - ALL WARRIORLAND holsters possess lifetime warranty, if for any reason you are unsatisfied, please feel free to contact our 24/7 Customer Services for replacement. We stand behind the quality of our work!
IWB Holster for Glock 19/17 with Streamlight TLR-1/TLR-1 HL/TLR-1S Flashlight, Red Dot Optics Cut, Holster for Concealed Carry Fits Glock G17 G19 19x 22 23...
Features
| Size | Right Hand Draw |
- COMPATIBILITY: MEIGON Concealed carry solution designed specifically holster for Glock 17 19 19X 44 45 Gen 1-5 & G22 G23 G31 G32 Gen 1-4 Compatible with TLR1/TLR-1 HL/TLR 1S Tactical Weaponlight, NOT FITS TLR 2. Optic cut designed allowing compatible w/ most of red dot in market.
- TIGGER GUARD & "POSI-CLICK" DESIGN: The kydex trigger guard design provides complete coverage of the trigger effectively accidental finger insertion preventing any potential accidents. and you can hear ‘CLICK’ the gun lock into place when you insert to holster, indicating a firm lock-in.
- ADJ.CANT & RETENTION: The 1.5" clip was 0° to 30° degrees of angle adjustment designed.The adjustable cant allowing you to change fit and draw to your carry style and liking. The kydex portion has adjustable retention allowing you tightness adjustment to achieve the best extraction pistol strength.
- WATERPROOF & SWEATPROOF: The full-length guard design can effectively prevent the gun from coming into contact with the skin, and has sweatproof and avoiding clips.
- SMOOTH & COMFORT DESIGN: All of MEIGON holster edges was polished to preventing scratching the skin and inside of the holster was smooth designed to prevents your pistol from getting scratched.
Orpaz T40 Light-Bearing Holster – Universal OWB Tactical Holster, Level 2 & Level 3 Security, Compatible w/Most Pistol Lights, Optics-Ready, Adjustable, Fits...
Features
| Brand Name | Orpaz |
| Manufacturer | Orpaz |
| UPC | 756201828669 |
| Model Number | Pagayer |
| Warranty Description | Backed by a lifetime warranty |
| Included Components | Holster |
| Item Weight | 0.5 Kilograms |
| ASIN | B0B6Q5XYYS |
| Hand Orientation | Right |
| Closure Type | Level 1 or Level 2 |
| Product Style | T40 Medium |
| Color | Black |
| Size | T40 Medium |
| Material Type | Polymer Plastic |
- 𝐔𝐧𝐢𝐯𝐞𝐫𝐬𝐚𝐥 𝐅𝐢𝐭 𝐟𝐨𝐫 𝐏𝐢𝐬𝐭𝐨𝐥 & 𝐋𝐢𝐠𝐡𝐭: Width and height adjustable to accommodate most pistols and tactical lights—T40 fits medium lights (TLR-7, Baldr Mini, XC1, etc.) Check compatibility chart before purchase.
- 𝐋𝐞𝐯𝐞𝐥 𝐈𝐈 𝐑𝐞𝐭𝐞𝐧𝐭𝐢𝐨𝐧: Magnetic retention with an ergonomic thumb-release lever ensures your firearm is secure yet instantly accessible for fast, natural draws.
- 𝐅𝐮𝐥𝐥𝐲 𝐀𝐝𝐣𝐮𝐬𝐭𝐚𝐛𝐥𝐞 & 𝐌𝐨𝐝𝐮𝐥𝐚𝐫: Customize for slide/barrel lengths (6.2"–7.5"). Width, height, retention, and cant all adjustable for your pistol and flashlight setup. Works with all Orpaz attachments—paddle, belt loop, MOLLE, drop-leg, and more.
- 𝐎𝐩𝐭𝐢𝐜 & 𝐀𝐜𝐜𝐞𝐬𝐬𝐨𝐫𝐲 𝐂𝐨𝐦𝐩𝐚𝐭𝐢𝐛𝐥𝐞: The open-back design and raised sight channel allow a secure fit for pistols equipped with most red dot optics and tall suppressor-height sights—no cover to restrict optic size or shape.
- 𝐑𝐮𝐠𝐠𝐞𝐝, 𝐅𝐢𝐞𝐥𝐝-𝐓𝐞𝐬𝐭𝐞𝐝 𝐂𝐨𝐧𝐬𝐭𝐫𝐮𝐜𝐭𝐢𝐨𝐧: Made from high-quality, impact-resistant polymer, trusted by law enforcement and military worldwide. Includes Paddle attachment, installation hardware and Allen key for at-home adjustment.
- 𝐈𝐦𝐩𝐨𝐫𝐭𝐚𝐧𝐭 𝐅𝐢𝐭 𝐍𝐨𝐭𝐢𝐜𝐞: This is a universal, adjustable holster—it must be adjusted for your specific pistol/light. Will not fit pistols/lights larger than listed in the compatibility chart. Subcompact/extended barrels require optional adapter kit (sold separately).


12 Comments
One last practical: the prioritized buying checklist says “sturdy attachments” — any rule of thumb on clip vs belt loop vs paddle for lights? I need something that won’t sag or cant after a full day.
I’m confused about the “light cuts reduce passive retention” line in safety engineering — does that mean I should always go for an active retention device if I have a light? I’m mainly worried about concealment, not competitions.
Also, how big of a retention tweak is safe before it starts affecting fast draws?
From my experience: you don’t have to go full active retention. Incremental tightening (as the article says) usually works. Active retention helps in high-risk environments but can slow a draw. Best to balance with training.
Good points from Charlie. To clarify: light cuts do reduce the holster’s passive surface area that secures the pistol, so the holster relies more on geometry and retention screws. That doesn’t automatically require active retention.
Recommended approach:
1) Preserve full trigger-guard coverage first (non-negotiable).
2) Tune passive retention incrementally — tighten just enough that the handgun resists a firm tug but draws cleanly with a practiced motion.
3) If you operate in physically demanding or high-risk environments, consider an active retention layer (thumb break, hood, or mechanical lock) but train with it — it will affect draw speed.
The article’s fit-and-test checklist lists simple drills (one-handed tug, draw with empty gun) to find the sweet spot between security and speed.
Agree with Charlie — I tried a thumb-break for a while and my draw time increased a bit, but it was worth it for crowded urban carry. Practice made it smooth.
Thanks for the four-step verification checklist — super helpful.
One small nit: for step 2 (verify switch location clearance) do you recommend testing switch access with gloves on? I carry in both winter and summer and the switch placement feels different with thicker gloves.
I liked the carry scenario mapping, but I wonder — for appendix carry with a compact light, how much does the mouth stiffness of the holster actually matter vs just getting a belt claw? Any experience?
Short and sweet: the safety-engineering priorities saying “preserve full trigger‑guard coverage” seems obvious, but some universal holsters still show partial coverage. Are universals basically a no-go for lights?
On material and break-in: does Kydex vs injection molded polymer make a big difference in wear on the light housing? I don’t want my light’s bezel getting scraped after a month.
Good question. Kydex and hard polymers behave differently: Kydex holds its shape and generally scuffs less on the housing because it’s firm and slides over contact points, but it can be unforgiving if the holster mouth is tight and you repeatedly force the light in. Softer injection-molded blends (or hybrid with leather) may flex and reduce point wear, but they can abrade over time if debris gets trapped.
If minimizing wear is priority: look for a holster with a slightly relieved interior around the bezel/footprint, or a soft polymer liner where the light contacts. Also check fit tolerances in the “Material and construction” section — adjustable retention and a good break-in period help avoid excessive rubbing.
Quick question: when you talk about “footprint” in the technical terms section, is that the exact outer dimensions of the light or something manufacturers standardize? Trying to know if I need to measure my light or the rail area on the slide.
Minor gripe: the article didn’t show examples of how a light shifts cant for small framed folks. I have a shorter torso and lights always seem to ride weird. More pics or diagrams would be lovely 🙂