
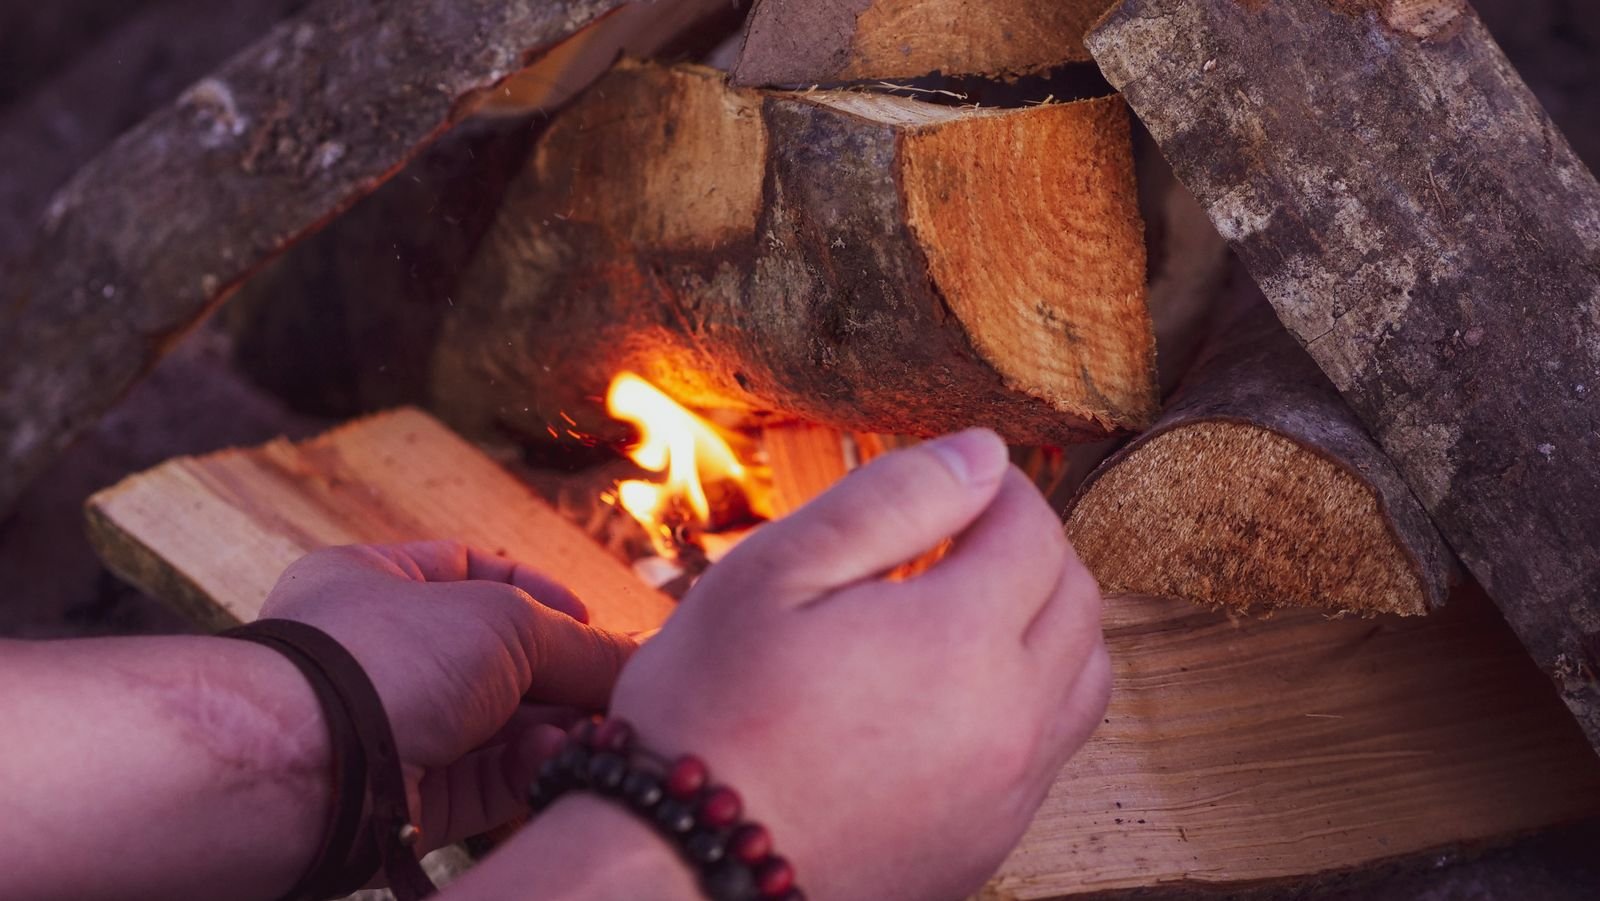
A ferro rod supplies heat for an instant; it does not dry a saturated fuel bundle.
A spark shower can look impressive on wet tinder—then vanish without a trace. In damp weather, the deciding question is not whether the rod throws hot enough sparks, but whether the material holds only surface moisture or is waterlogged throughout.
Surface-wet fuel may still ignite once its outer film is wiped, split away, or shaved to expose dry fibers. Waterlogged tinder behaves differently: incoming heat is spent warming and evaporating trapped water, while the brief ferro-rod spark cools before it can establish a coal. Cold, stiff hands compound the problem by making fine scraping and steady spark placement less reliable. The practical aim is to uncover a dry, fine, airy ignition surface—not to keep striking harder at a damp one.
- A dry-feeling interior revealed by splitting or tearing is more promising than a merely dry-looking surface.
- Tinder that squeezes out water or feels uniformly heavy generally needs replacement, not extra sparks.
- Heat disappears A ferro rod’s sparks are brief; wet fuel can absorb their heat before ignition begins.
- Find the core Expose fibers from inside bark, wood, or plant material rather than relying on the rain-facing surface.
- Keep it airy Fine, loose material catches more readily than a dense, damp wad because air can reach the hot particles.
Look Past the Wet Surface
-
Check sheltered seams first
Inspect the underside of bark, the leeward face of standing dead stems, grass clumps under overhangs, and the interior of dead conifer branches. Rain often wets the exposed shell while protected pockets retain fibers that can still be teased apart.
-
Use the snap-and-scrape test
A small stem that snaps sharply and reveals pale, fibrous material is more promising than one that bends or crushes. Scrape a thumbnail or knife spine across the exposed core; dry-enough fibers lift as dust, curls, or fuzz rather than smearing into pulp.
-
Break open, then judge
Do not reject bark, punky wood, or resinous wood because the outside feels wet. Split, peel, or shave it and examine the newly exposed face; the useful portion may be only a thin dry band near the center.
-
Favor materials with an internal fuel advantage
Birch-like papery bark, resin-rich conifer wood, fatwood shavings, dry grass bases, and fibrous inner bark can tolerate some dampness because they present fine edges or contain flammable compounds. Waterlogged leaf litter and solid, green plant tissue usually consume more effort than they repay.
-
Collect more than the first handful
Gather several candidate fibers before striking. Sorting takes seconds, while repeatedly leaving a prepared bundle to search for another fragment exposes the fire lay to rain and wind.
Build a Small Dry Workstation
- Create a roof and a floor
Work under a rock lip, dense evergreen boughs, a pack flap, or another nonflammable shelter from direct rain. Place bark, a split wood slab, or a dry clothing-free surface beneath the tinder so ground moisture cannot wick into it.
- Keep airflow without exposing the bundle
A windbreak on the prevailing-wind side helps, but the tinder still needs an open face for oxygen and ferro-rod sparks. A fully enclosed pocket traps damp air and makes it harder to direct a shower of sparks.
- Process the driest material first
Shave resinous wood into fine curls, pull inner bark into hairlike strands, and crush dry grass bases between the palms. The goal is a loose nest with many thin edges; thick pieces can sit outside it as the next fuel layer.
- Separate ignition tinder from drying tinder
Reserve the finest, fluffiest fibers for the center and keep slightly damp but combustible pieces around the outside. Warmth from the first ember can dry these outer fibers instead of forcing the initial spark to heat an entire wet bundle.
- Stage every transition before striking
Set the ferro rod, tinder nest, pencil-thin kindling, and a few finger-thick splits within reach under the shelter. Once an ember appears, moving it through rain or searching for fuel is often the point at which a marginal ignition fails.
If a knife is used to expose fibers, cut away from the body and keep the tinder clear of the cutting path.
Prepare the Core
- Split to the dry core
Break the branch or bark along its grain to reveal the pale, unweathered wood or fiber underneath the wet outer layer.
- Shave the dry core
Draw a knife along the exposed face to lift thin, curling shavings that catch a spark far more easily than a solid surface.
- Scrape spark-fine fibers
Work the spine of the blade across the driest shavings to loosen a fine dust of fibers that ignite almost instantly.
- Fluff an airy feather nest
Gather the shavings and fine fibers into a loose, springy nest with open air pockets rather than a compressed clump.
Watch it in practice
This video from Nathan4071 shows wet-kindling ignition in action, illustrating how thoroughly reduced, dry-core fibers catch a ferro rod’s spark even in damp conditions.
Make a small dry core do the work
-
Choose the most spark-responsive material
Reserve the driest carried tinder, waxed fiber, charred material, or freshly exposed inner bark for the center. Its job is to turn a brief ferro-rod shower into a sustained ember, not to supply the whole fire.
-
Keep the core compact, not compressed
Form a thumb-sized nest with enough airspace for sparks to enter. A loose, oversized pile spreads the heat across too much damp material; a crushed wad denies the ember oxygen.
-
Add a ring of dry natural shavings
Feather fine curls from protected deadwood or scrape dry inner bark around the core, leaving a small opening on the striking side. The shavings should touch the core lightly so its flame can transfer outward.
-
Graduate the fuel by thickness
Place finer curls closest to the core, then pencil-thin twigs, then slightly larger dry splits. Each layer needs to ignite from the previous one before moisture and mass begin to absorb the heat.
-
Strike into the exposed center
Anchor the ferro rod and pull the striker back so the tinder stays undisturbed. Once the core takes, protect it from wind without covering it; add the surrounding shavings only as the flame strengthens.
A compact ignition nest is easier to shield, inspect, and rebuild than a large bundle of uncertain material.


Give the first flame somewhere to go
- Keep a hollow at the center
The spark-catching fibers need a shallow pocket rather than a compressed ball. Air can enter from below and around the sides, while the finest material remains close enough for heat to travel through it.
- Arrange material in three grades
Place the dry, teased fibers at the ignition point; lay slightly coarser curls, feather-stick shavings, or dry grass around them; then bridge into pencil-thin split-stick interiors. Each layer must touch the next loosely, so flame can advance without being smothered.
- Use dry wood from inside the stick
A damp branch may still contain usable material beneath its outer shell. Split or shave it to expose pale, dry interior faces, then make thin curls with attached ends; those curls stay in place while presenting a large surface to the growing flame.
- Leave one side open
A bundle wrapped tightly from every direction often burns briefly and dies. A thumb-width opening facing the sheltered airflow gives hot gases a path upward and draws fresh air through the fine fibers.
If the bundle must be moved, support it from underneath; squeezing the core can close the air channels that keep it burning.
Put the spark shower on one small target
- Set the rod before striking
Rest the ferro rod close to the finest exposed fibers, with its tip aimed at the center of the pocket. Keeping the rod low reduces the distance sparks cool in flight and limits scatter in damp surroundings.
- Hold the bundle motionless
Instead of sweeping the rod across the nest, anchor the rod and pull the scraper back along it. The ignition point stays fixed while the scraper moves away, so the bundle is not dragged apart at the moment it is most fragile.
- Use a firm, short stroke
A crisp stroke produces a dense shower of hot particles without grazing surrounding tinder repeatedly. Start with moderate pressure; excessive force can shove the rod tip into the fibers or fling the bundle aside.
- Repeat on the same spot
Several strikes directed into one pocket build heat in a small volume of fibers. When a coal appears, pause briefly and let it spread through the fine material before adding more sparks or handling the bundle.
- Feed the ember gradually
Once the center glows, shield it from gusts and bring the surrounding curls inward only enough to contact the ember. Gentle airflow supports the transition from glowing fibers to a sustained flame in the next layer.
Protect the transition
- Cup the bundle without crushing it
Once a coal appears, form a loose windbreak with hands, a bark panel, or a pack lid. Keep the glowing fibers visible and the bundle springy; pressure closes the air spaces that keep combustion moving.
- Breathe in short, measured pulses
Aim breath across the ember rather than directly into it. Gentle pulses supply oxygen while avoiding the blast that scatters a fragile coal or drives it into wet material.
- Wait for the glow to spread
A widening orange-red patch and a thin stream of smoke signal that adjacent fibers are pyrolyzing. Do not add fuel merely because the first glow looks small.
- Lay on dry-core fuel a few pieces at a time
Bridge the ember with pencil-thin dry splinters, feathered wood, or shaved inner bark. Leave gaps between pieces and pause until each addition is actively burning.
- Expand only after a sustained flame
When flame persists without breathing, add finger-thick sticks in a loose teepee or lean-to. Keep wetter exterior wood nearby to dry in the rising heat, not in the flame’s first path.
A dead glow with no flame usually means the next fuel was too damp, too large, or packed too tightly. An ember that vanishes during breathing points to excessive airflow or a bundle that is too thin. Smoke without a lasting coal often means the tinder contains moisture deeper than its surface.
Change one weak link at a time: expose more dry core, refine the tinder, improve the windbreak, or reduce the fuel increment. Repeatedly showering sparks onto the same failing bundle rarely fixes its structure.
-
Carry a protected ignition reserve
A waterproof pouch can hold a ferro rod, striker, and two independently sealed tinder portions.
-
Include reliable dry-core material
Waxed wood shavings, resin-rich curls, or commercially prepared tinder provide a small fuel source that is not dependent on finding dry material.
-
Pack a cutting and processing edge
A compact knife or scraper helps expose pale inner wood and produce fine curls from damp sticks.
-
Add a wind and ground barrier
A folded foil sheet or waterproof pad creates a dry work surface and reflects some heat toward the bundle.
-
Replace used components promptly
After a wet-fire attempt, dry the rod and striker and replenish the tinder reserve before the next outing.
Keep ignition materials separated from liquid fuel, food, and loose metal items that can damage or contaminate them.
- A flame grows by protecting a loose, spreading coal—not by burying it under fuel.
- Small dry-core additions reveal whether moisture, airflow, or fuel size caused the failure.
- A sealed ignition reserve turns a damp-weather problem into a manageable fuel-processing task.
The critical moment is the handoff from tinder ember to small dry fuel. Shield the glow, feed it measured oxygen, and make every new piece of fuel smaller and drier than instinct suggests.

überleben | Hexå Ferro Rod Fire Starter Survival Tool – Up to 20,000 Strikes, 1/2" Thick Hexagon Fire Steel with Multi-Tool Striker & Lanyard – Waterproof...
Features
| Brand Name | Überleben |
| Unit Count | 1 Count |
| UPC | 850005432111 |
| Number of Packs | 1 |
| Included Components | Fire Starter |
| Manufacturer | Überleben |
| Manufacturer Part Number | UB-HESI-0101 |
| ASIN | B07P19TCTT |
| Flavor | Natural Wood |
| Item Form | Stick |
| Material Type | Ferrocerium |
| Item Weight | 4.16 ounces |
- Up to 20,000 Strikes: The Hexå Original camping fire starter is built with our Sånft-korr ferro blend, throwing 5,500°F sparks in any condition for dependable ignition every time.
- Sized for Survival: At 6" long and 1/2" thick, this fire starter tool provides extended use while staying compact enough for packs and kits.
- Six-Sided Control: The Hexå’s flat hexagon profile provides better grip and efficiency, delivering more molten ferrocerium per strike and making it a standout piece of camping gear for any trip.
- Functional Fire Striker & Lanyard: This bushcraft gear is equipped with a mil-spec 550 paracord lanyard and a 6-function striker that works as a fire starter, tinder scraper, map scale, ruler, hex wrench, and bottle opener.
- Works Wet, Dry, Any Altitude: A reliable essential for survival gear, this waterproof fire starter delivers consistent fire power wherever adventure takes you.

Ferro Rod Fire Starter Kit with Fatwood Tinder Stick - 3/8" Thick Ferrocerium Flint and Steel Fire Starter, Multi-Tool Striker & Pouch - Survival Fire Steel...
Features
| Brand Name | Ours Furtif |
| Unit Count | 1 Count |
| Number of Packs | 1 |
| Included Components | Multi-Tool Striker, Natural Fatwood Tinder, Storage Pouch |
| Item Type Name | Firesteel |
| Model Number | OF-FS-K1 |
| Manufacturer | Ours Furtif |
| Manufacturer Part Number | OF-FS-K1 |
| Manufacturer Warranty Description | 1 year. |
| ASIN | B07W3FCH5N |
| Item Form | Stick |
| Material Type | Wood |
| Item Weight | 0.02 kg |
- COMPLETE FIRE STARTER KIT - Includes a 3/8" thick ferro rod, multi-tool striker, natural fatwood tinder stick and storage pouch. Everything you need to start a fire in one compact survival kit
- FATWOOD TINDER INCLUDED - Unlike basic ferro rods, this kit includes natural fatwood to help you catch sparks faster and build a flame more easily, even when conditions are challenging
- 15,000+ STRIKES - Made from premium ferrocerium, the extra-thick rod creates hot, reliable sparks and is built for years of camping, bushcraft, hiking and emergency use
- WORKS IN RAIN, WIND & SNOW - Waterproof and weather-resistant, this fire starter is designed to perform when matches or lighters fail
- DESIGNED BY OURS FURTIF - Developed by outdoor enthusiasts in France and refined through real-world testing for a simple, reliable and easy-to-use fire-starting experience

4" Survival Ferro Rod Drilled Flint Fire Starter and Striker Kit
Features
| Brand Name | bayite |
| Included Components | Fire Starter |
| Number of Pieces | 1 |
| Unit Count | 1 Count |
| Manufacturer | bayite |
| UPC | 708624425840 |
| Set Name | Yes |
| Number of Items | 1 |
| Manufacturer Part Number | 1A333 |
| Warranty Description | 1 Year |
| ASIN | B00PSGOM32 |
| Item Weight | 2.46 ounces |
| Material Type | ferrocerium |
- 5ft Paracord included, gives you a good grip and never comes off. Comes with a bayite Striker-Pro striker attached to the paracord, always be prepared to start a fire
- bayite 6 Striking Edges Striker-Pro striker is made from TOOL GRADE HSS STEEL and has a distinct hardness, maximizes a shower of hot sparks, no matter whether you prefer to use your left hand or right hand to scrape. Don't use bad quality Knife as striker. Otherwise it will not produce enough sparks due to insufficient hardness of blade
- Ferrocerium Rod Length:4"(10cm). Diameter: 3/8"(10mm). Large enough for a shower of sparks and small enough to carry
- Made of high effective ferrocerium rod. Waterproof & Weatherproof, fits all weather, works in any weather condition
- Sparks shower at 5,500 F (3,000 C) to ignite a fire in any weather (even wet), at any altitude. Perfect emergency fire starter for Bushcraft, Hiking, Hunting, Fishing, EDC, Emergency, BBQ, Gas Camp Stoves, etc



8 Comments
Good reminder that “wet” isn’t one condition. A soaked chunk of punky wood is not going to magically become tinder because I attacked it with a ferro rod for ten minutes. The distinction between surface moisture and a dry inner core is probably the most useful part here.
I also like the raised workspace suggestion. Working directly on wet leaves has ruined more than one otherwise decent tinder bundle for me.
I’m a little skeptical of the “pulsed airflow” wording. When I have a coal, any blowing seems to either blast ash over it or send the whole bundle rolling away. Maybe this is easier with a proper nest than with the sad handful of forest debris I usually end up with 😂
Same experience until I started using my cupped hands as a windbreak and breathed from farther back. More like gentle warm puffs than blowing out birthday candles. If the bundle moves, it usually means I skipped the little twig cradle underneath.
The graduated fuels bit is exactly what I was missing. I could get sparks to glow in my scraped wood, then I’d dump bigger twigs on it and wonder why it died. Apparently fire does not appreciate my impatience.
This worked on a rainy hike last weekend. I stopped trying to light the outside of the birch bark and scraped down to the fuzzy inner stuff, then kept the ferro rod still like you said. Tiny flame, but it caught the pencil shavings fast. Felt ridiculously satisfying 😄
Step 3 / making the airy core is where I keep failing. Mine either ends up packed into a little wad that won’t take a spark, or I fluff it so much the wind blows it away.
Is there a rough size you aim for? I was using damp pine and some bark scrapings, with only a small knife.
That balance is the tricky part. Aim for a core about the size of a large coin or small cotton ball, but tease the fibers outward rather than compressing them into a ball. Put it in a shallow scrape or against a small piece of bark so the wind cannot scatter it, then place your finest dry fibers on top. With damp pine, shave into the protected wood beneath the wet surface; bark scrapings are best saved as the surrounding fuel unless they are truly fine and dry.
One practical addition: I carry a couple of dry wood curls in a tiny zip bag now. Not cheating, just planning ahead.
Still useful to know how to find protected fibers when that bag is gone, though. The stationary-rod technique gave me noticeably better spark placement than dragging the rod across my bundle.