A strong shell-card mount depends more on surface preparation than extra adhesive.
A receiver patch may feel solid after installation, only to develop a curled corner after several reloads. Skin oil, cleaning solvent residue, heat, recoil, and repeated card removal can progressively stress the adhesive—especially where an edge hangs beyond the receiver or bridges a contour.
The durable approach is to remove a failed panel and start again on a clean, dry surface. Adhesive manufacturer 3M advises cleaning bonded surfaces, applying firm pressure, and allowing time for the bond to build before loading it. The patch should make full contact across its entire area, with no trapped debris, unsupported corners, or tension from bending. Adding glue over contaminated adhesive rarely corrects the underlying problem and can leave an uneven mounting surface that peels again.
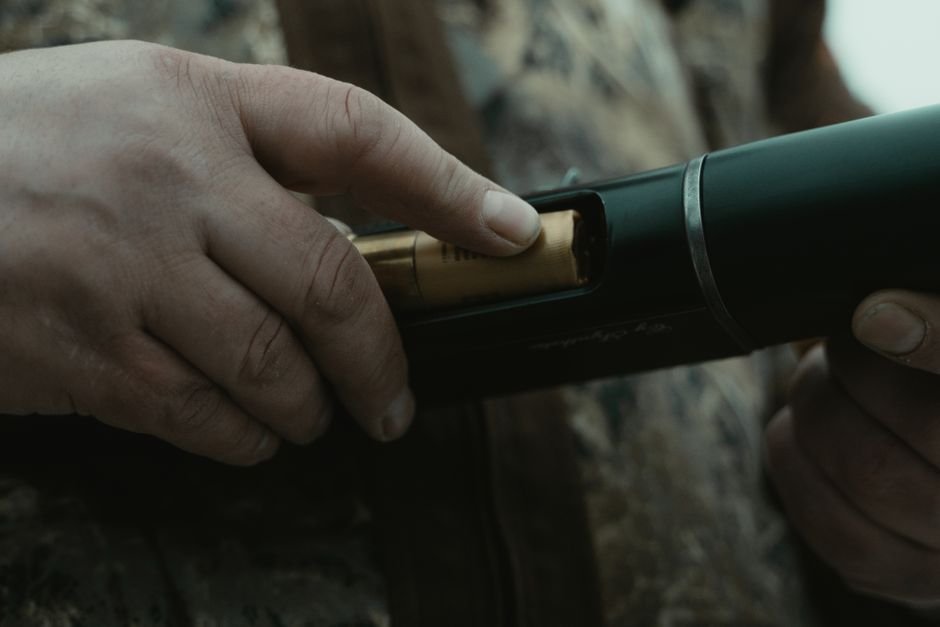
Unload the shotgun and confirm fit
Follow the shotgun manufacturer’s manual exactly. Point the muzzle in a safe direction, engage the safety if instructed, open the action, and remove every shell from the chamber and magazine tube. Visually and physically verify both are empty, then move all live ammunition to a separate work area.
Before cleaning or applying adhesive, hold the hook-and-loop backing and loaded-size card against the receiver without removing any release liner. The broader guide to shotgun shell carrier systems can help distinguish adhesive cards from receiver-mounted alternatives.
Check the proposed position from several angles. Neither the backing nor the card should:
- overlap the ejection or loading port;
- cover assembly pins, screws, controls, or required markings;
- interfere with the fore-end, bolt handle, safety, or action release;
- block access needed for loading, unloading, or field stripping;
- bridge a sharp receiver contour that leaves an edge unsupported.
With the shotgun still verified empty, operate only the controls specified in its manual to confirm clearance. Reposition the template if any edge lifts or any function becomes restricted.
Do not continue if the chamber or magazine cannot be confidently checked. Consult the manufacturer or a qualified gunsmith before fitting the carrier.
Choose a compatible mounting system
A larger receiver panel is not necessarily more secure. Its entire adhesive footprint should fit on a flat, rigid area, with no corner crossing a contour, seam, pin, or control. Rounded corners are preferable because sharp points can concentrate peeling forces and catch on gear.
Before purchase, check the adhesive maker’s supported-substrate guidance. Painted steel, anodized aluminum, polymer, and sealed wood may require different products or preparation; an adhesive labeled for one surface should not be assumed suitable for another. Even mounting a shell carrier without drilling requires explicit compatibility between the receiver, adhesive, and firearm finish.
Confirm these points before removing the liner:
- Every edge and corner remains fully supported.
- The hook-and-loop components are designed to work together.
- The proposed orientation follows the system manufacturer’s directions.
- Temperature, humidity, cleaning, pressure, and cure time can meet the adhesive maker’s requirements.
Do not trim or round a receiver panel unless its manufacturer permits modification. If the available area is curved, textured, oily, heat-exposed, or too small for full contact, an adhesive mount may be inappropriate. A firearm-specific, manufacturer-approved mechanical receiver or professionally installed mounting system may provide a more suitable alternative.
Remove the old panel and residue
Start at one corner and peel the failed panel back slowly at a low angle, keeping the pull nearly parallel to the receiver. This reduces concentrated stress on the finish. Do not pry with metal tools; if assistance is permitted, use a clean plastic edge that cannot gouge the surface.
Avoid applying heat unless both the firearm and adhesive manufacturers specifically allow it. Excess heat may affect coatings, polymer parts, or nearby components.
Remove residue without harming the finish
Check the firearm maker’s care instructions and the adhesive maker’s technical data or removal guidance before selecting a solvent. This is especially important when assessing whether adhesive or cleaner could affect the shotgun’s finish. A product described as safe for bare metal may not be compatible with bluing, anodizing, paint, camouflage film, or other coatings.
Test the approved cleaner on an inconspicuous area first. Apply a small amount to a lint-free cloth rather than pouring or spraying it onto the receiver, then wipe gently without soaking seams or controls. Avoid aggressive scraping and unapproved solvents.
Once residue is gone, make a final pass with the manufacturer-approved degreaser. The mounting area should be clean, oil-free, and completely dry before a replacement panel is applied.
Unapproved solvents, heat, scraping, or refinishing can damage a coating and may complicate warranty service. When instructions are unclear, contact the firearm manufacturer before proceeding and retain the product guidance used.
Dry-fit and mark the panel
Keep the release liner in place and position the entire receiver panel on a single flat plane. No portion should bridge a contour, seam, pin, recess, or receiver edge. These unsupported transitions concentrate force at the adhesive boundary and give the panel a place to start peeling.
Use a finish-safe reference to preserve alignment. A short strip of low-tack tape may provide a useful guide, but only if the firearm or coating manufacturer permits it. Place the tape beside the intended panel boundary—not beneath it—and mark the panel’s front and lower edges on the tape rather than on the receiver.
Check the dry fit from several angles. The panel should sit flat without rocking, overhang, trapped debris, or interference with controls, pins, loading, or disassembly.
If the panel is too large, modify it only when the product manufacturer expressly allows trimming. Make cuts before removing the liner, then round permitted cut corners instead of leaving sharp points. Remove loose fibers or cutting debris and repeat the dry fit; if trimming would damage stitched, sealed, or reinforced edges, select a correctly sized panel instead.
Apply the receiver panel without stretching
-
Condition the materials
Keep the unloaded shotgun, panel, and adhesive within the temperature range specified by the adhesive manufacturer. Follow its stated conditioning time rather than warming the receiver with uncontrolled heat.
-
Expose a short section of adhesive
Fold back only enough liner to create a manageable starting edge. Avoid touching the exposed adhesive, since skin oils and dust can reduce contact.
-
Anchor one end
Align the panel with the dry-fit guides, then lightly secure the starting edge. The panel should remain relaxed—pulling it taut can store tension that later lifts corners.
-
Work progressively across the receiver
Withdraw the liner a little at a time while pressing the panel down behind it. Smooth from the center toward the edges so air is pushed outward rather than trapped beneath the panel.
-
Make a deliberate final pass
Apply firm, uniform pressure over the entire panel, then revisit the perimeter and every corner. Use only the pressure method and application tool recommended by the adhesive manufacturer.
-
Allow the bond to build
Keep shell cards and other loads off the panel for the manufacturer’s specified dwell or cure period. Maintain the stated temperature during that interval.
If the panel begins tracking outside the guide marks, stop before more adhesive contacts the receiver. Carefully lift only the newly placed portion if the adhesive manufacturer permits repositioning; otherwise, replace the adhesive rather than pulling the panel sideways.
After placement, inspect the full perimeter under good light. Any corner that will not stay fully seated should be corrected before the panel carries loaded shell cards.
Let the adhesive reach full strength
Initial tack only holds the panel in position; it does not indicate that the adhesive has reached full bond strength. Keep the receiver panel unloaded, dry, and undisturbed for the complete cure or dwell period stated by the panel or adhesive manufacturer. Avoid attaching the card “just to check,” because its weight and removal force can pull at corners before the bond has developed.
Maintain the specified temperature range during curing. Do not accelerate the process with a heat gun, hair dryer, or other unapproved heat source, which may affect the adhesive or firearm finish.
After the documented period has elapsed:
- Confirm again that the shotgun is unloaded.
- Attach the empty shell card and inspect the panel perimeter for lifting, bubbles, or movement.
- Remove the card using the system maker’s recommended technique, supporting the receiver panel rather than pulling sharply away from it.
- If the panel remains secure, load the card with clearly identifiable inert dummy shells of the correct gauge and repeat the fit check.
Stop if any edge rises or the panel shifts. More cure time will not reliably correct contamination, trapped tension, or unsupported edges; the panel may need replacement and surface preparation repeated.
Use only verified inert dummy shells for retention and clearance checks. Never cycle live ammunition during setup. Keep live shells in a separate location to reduce the risk of a mix-up.
Inspect the mount and practice removal
With the shotgun unloaded, inspect the entire panel perimeter under good light. Press each corner gently; any lifting, bubbling, or contaminated adhesive calls for replacement rather than added pressure over a failing bond. Confirm that the card and shells do not obstruct the action, loading port, controls, optic, or normal grip.
Test removable shell card setups first with an empty card, then with inert training shells appropriate for the shotgun. Pull from the intended tab in a smooth, controlled motion while supporting the receiver-side panel. Avoid snapping a loaded card sideways, which can concentrate peel force at the panel edge.
Record the adhesive maker’s permitted cleaners, temperatures, and replacement guidance with the maintenance notes. Recheck corners before field use and after cleaning or prolonged storage. If receiver curves, pins, or surface transitions repeatedly prevent full contact, stop replacing identical adhesive panels and use a mounting method designed for that receiver geometry.
- Check the perimeter Replace panels with lifting edges, trapped contamination, or unreliable contact.
- Control removal Use the designated tab and a smooth pull instead of a sharp sideways snap.
- Recognize poor fit Change mounting systems when receiver geometry repeatedly defeats full adhesion.
Surface preparation matters as much as the hook-and-loop. Hook-and-loop lifts at a corner first, and it lifts because oil was left behind: degrease with the solvents in a field shotgun cleaning kit and let the receiver dry fully before the adhesive ever touches it.