

When the pivot fails, a key organizer stops behaving like a tool and starts behaving like loose hardware.
A key that swings open in a pocket, a stack that binds halfway through its arc, or a missing screw discovered at the door are all signs that the pivot assembly needs attention. This tiny fastener does more than hold the sides together: it sets the clamping force on the keys and any spacers, determining whether they stay neatly nested, fan out smoothly, and remain aligned with the frame.
Treat the repair as a controlled reassembly rather than a simple screw swap. Excess torque can pinch the stack, deform softer washers, strip fine threads, or leave a key difficult to deploy; too little lets parts rattle, shift, and potentially escape. Keeping the original order of keys, spacers, and washers intact is as important as fitting a compatible replacement pivot.
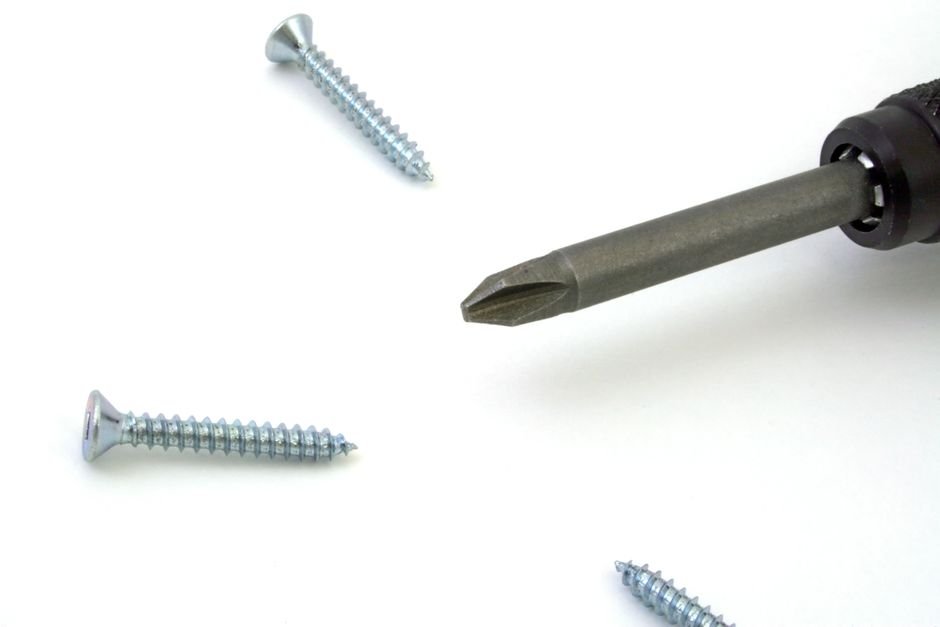
Identify the real pivot before ordering
A key organizer pivot screw replacement often involves a two-piece pivot: a threaded screw and a barrel or sex bolt. The barrel is not merely a spacer—it sets the clamping distance and supplies the threads. Decorative caps, stand-off spacers, and accessory screws can look similar but are not interchangeable.
Before disassembly, photograph both faces and measure the intact assembly. Record these dimensions:
- Thread diameter and pitch: Matching diameter alone is insufficient; similar-looking metric and imperial threads can cross-thread or seize.
- Barrel outside diameter: It must fit the organizer’s pivot bore without slop.
- Barrel length and total stack thickness: Include every key, washer, spacer, and any elastic or liner.
- Screw’s usable threaded length: It needs adequate engagement in the barrel without bottoming out before the stack is clamped.
- Head diameter, profile, and drive: A proud head can catch on pockets; a countersunk head used in a flat recess can force the stack out of alignment.
A candidate screw passing through the hole proves only that its shank is narrow enough. It does not confirm thread pitch, head clearance, barrel engagement, or correct tension range. When the original is available, compare it side by side and retain it as the reference part for future repairs.
If the original hardware is missing, manufacturer documentation is more reliable than guessing. A hardware sample matched with a thread gauge is also more reliable than estimating from photos.
Check whether the organizer uses a plain pivot barrel or a shouldered bushing.
A shouldered part locates the stack and lets keys rotate around it. Replacing it with an ordinary screw-and-nut arrangement can compress the keys and cause uneven friction.
Set up a compatible pivot kit
-
Gather the small-part essentials
Use a tray or magnetic mat, a correctly sized driver, soft cloth, tweezers, mild threadlocker if the organizer originally used it, and a caliper for confirming dimensions. Good lighting matters: a cross-threaded barrel or damaged driver recess is easier to spot before assembly.
-
Buy the screw and barrel as a pair
A matched pivot set is generally safer than pairing a new screw with an unknown worn barrel. Even hardware that appears identical can differ in thread pitch, engagement depth, head geometry, or barrel shoulder, causing loosening, binding, or stripped threads.
-
Confirm seating before final assembly
With the key stack removed, thread the screw into the barrel by hand. It should start smoothly and allow the head and barrel shoulder to sit flush in their recesses; any rocking, proud head, or resistance signals incompatible hardware.
-
Choose material for the carry environment
Stainless hardware commonly resists sweat and moisture well, while brass can develop a patina and aluminum may mark more readily. Avoid mixing metals where frequent moisture and abrasion could accelerate cosmetic wear or corrosion.
-
Match the finish to nearby hardware
Black coatings, bead-blasted surfaces, polished heads, and anodized parts wear differently at contact points. A close visual match keeps the repair unobtrusive, but a durable, properly seated pivot matters more than a perfect color match.
Retain the original pivot until the replacement has been test-fitted; it remains a useful reference for length, head profile, and shoulder shape.
Record the stack before disassembly
Before either pivot half is loosened, make a record that can be followed at the bench. Photograph both sides of the closed organizer, then lift the stack only after noting each layer’s position. A simple sketch is useful: mark the screw-head side, barrel side, key order, any washers or spacers, and the direction each key’s bow faces.
Keep removed parts arranged in a left-to-right row that matches the sketch, so alignment is predictable.
This matters when installing a multitool in an organizer, since a tool’s thicker body, offset hole, or moving implement may require a specific location in the stack rather than simply fitting wherever there is room.
Add-ons change the measurement. A carabiner tab, key fob bracket, thick multitool, or several washers increases compressed stack thickness. The replacement barrel must still engage the screw threads fully without bottoming out before the stack is clamped. If the added length causes interference, use spacers.
Extra length may require spacers to prevent lateral play. Verify the stack remains aligned when you tighten the clamp so threading stays engaged. Ensure all components seat evenly before final clamping. If you feel any wobble, stop and recheck each part before continuing.
A reversed key can still fit the pivot but deploy awkwardly or collide with a neighboring item. Include the key teeth, accessory faces, and washer positions in the reference photo.
Open the old pivot without sacrificing the organizer
- Protect the scales and capture the small parts
Lay the organizer on a clean, light-colored tray or towel; its texture prevents a freed screw from rolling away. Cover finished scales with painter’s tape around the pivot, then use a correctly sized driver that fills the recess wall to wall. Keep a magnetic parts dish nearby, but do not place magnet-sensitive keys or electronic fobs directly on it.
- Confirm which side is turning
Most organizers use a screw entering a barrel on the opposite side. Hold the barrel-side head still with a second matching driver while turning the screw side counterclockwise. If both sides rotate together, increased force merely twists the stack and can mark the scales.
- Soften threadlocker gradually
A firm, rubbery resistance often indicates medium-strength threadlocker rather than a seized thread. Apply controlled heat to the screw head—such as a soldering iron held against the driver bit or head for short intervals—then let the warmth penetrate before retrying. Keep heat away from plastic scales, leather wraps, adhesive inserts, batteries, and nearby key fobs; gentle warmth is preferable to an open flame.
- Break a stubborn fastener with controlled force
Press the driver straight down while applying slow, even turning force. A brief, restrained “seat-and-turn” motion can help the bit bite, but cam-out is a stop signal: it rounds the recess quickly. Penetrating oil may help exposed metal threads, yet it can stain porous scales and migrate into adhesive-backed parts, so use only a minute amount and allow time before disassembly.
- Stop before the hardware becomes unrecoverable
Pause if the head deforms, the driver slips, the barrel spins freely, heat threatens the finish, or the pivot remains immovable after a few careful attempts. At that point, a precision repair shop can use extraction methods or replace the pivot without drilling through a scale. Once released, lift off each layer in recorded order and retain any still-serviceable barrel, washers, and spacers.
Do not pry the scales apart while the pivot is still threaded: side-loading can bend a barrel, crack a scale, or distort washers.
An increasingly rounded recess is not evidence that more torque is needed. It usually means the driver no longer transfers force evenly. Stopping early preserves extraction options; forcing the head can turn a straightforward pivot replacement into scale repair.
Rebuild the stack squarely
- Lay out the parts in documented order
Place keys, tools, liners, spacers, and any exterior scale on a flat surface in the exact recorded sequence. Check each part’s face and direction before it reaches the pivot; a reversed key can make the stack look correct while binding during rotation.
- Start the screw through a square stack
Align the pivot holes with the barrel using fingertip pressure, keeping the stack faces parallel rather than pulling them together with the screw. The screw should enter the barrel smoothly for several turns; resistance at the first threads usually signals cross-threading, a misaligned hole, or debris.
- Keep threads clean and hardware matched
Remove lint, grit, and fragments of old threadlocker from both screw and barrel before assembly. A screw that is clean but mismatched in pitch can seem to catch briefly, then damage the barrel’s internal threads under tightening force.
- Use washers only where the design calls for them
Thin factory washers may reduce rubbing between specific moving pieces or protect a finished outer scale, but they do not correct a pivot-length problem. Add them only in their original location and count; moving one changes clamping force and can introduce side play.
- Avoid makeshift spacing fixes
Random washers, folded foil, cut plastic, or stacked shims can tilt the pivot axis, reduce thread engagement, and create uneven pressure across the keys. If the assembled stack remains loose with the correct hardware, the more likely issue is an omitted component, incorrect barrel length, or an unrecorded accessory thickness.
Do not force a screw that will not thread by hand; replacing a damaged barrel is usually simpler than recovering stripped pivot threads.
Calibrate the new pivot
Tune the pivot
With the stack square and the screw hand-seated, tighten only until side play disappears, then turn it in very small increments to minimize side drag.
Test the thickest and thinnest keys, plus any tool in the stack. If a key drops open, add a tiny increment; if deployment becomes jerky or the scales converge at the pivot, back off slightly. This same check helps diagnose how to correct loose screws and pivots when the original hardware remains usable.
Apply removable, medium-strength threadlocker only after the setting is confirmed and the threads are clean and dry.
Place a pinhead-sized amount on the screw threads—not the barrel or washers—so excess cannot wick into the key stack.
Allow it to cure undisturbed according to the product label before testing the pivot.
Over-tightening can deform thin scales, crush nylon or brass washers, gall threads, and turn a routine future adjustment into a difficult repair. The pivot should feel firm, not clamped solid.
After each adjustment, view the organizer edge-on and face-on. Parallel scales with smooth individual key movement matter more than maximum screw tightness.
Test, troubleshoot, and document the repair
Confirm normal operation
Cycle each key several times, then carry the organizer briefly in its usual pocket or bag. Check that keys stay positioned, deploy independently, and that both pivot heads remain flush with the scales.
Use the symptom to narrow the correction:
- Looseness or rattle: tighten in very small increments; see practical fixes for rattling keys if the stack is otherwise square.
- Binding: loosen slightly and confirm washers, keys, and spacers are in their recorded order.
- Side play: inspect for a missing washer or a barrel that is too long for the compressed stack.
- Uneven seating: reopen the stack and remove trapped debris or a tilted component.
Recheck tension monthly at first, then after any accessory change. Record the screw diameter, thread pitch, barrel length, head style, washer order, and whether removable threadlocker was used.
Key Organizer Pivot Repair: Common Questions
How do I know if I need a new pivot screw or a whole new barrel?
Try threading the new screw into the existing barrel by hand first. If it starts smoothly and the head sits flush, the barrel is likely fine. If the screw won’t thread by hand or the barrel’s threads feel damaged, replacing the barrel is usually simpler than trying to recover stripped threads.
How tight should a key organizer pivot screw be?
Tighten only until side play disappears, then adjust in very small increments while opening and folding every key. The pivot should feel firm enough that keys stay positioned, but loose enough that each key moves independently without dragging its neighbors or bowing the scales.
Should I use threadlocker when reassembling the pivot?
Only apply removable, medium-strength threadlocker after the tension setting is confirmed and the threads are clean and dry, placing just a pinhead-sized amount on the screw threads so excess doesn’t wick into the key stack. Let it cure undisturbed per the product label before testing the pivot again.
What should I do if the pivot screw head is already rounded or stripped?
Stop trying to turn it with more force. A rounded recess means the driver is no longer transferring force evenly, and continuing can turn a straightforward pivot replacement into a scale repair. At that point, controlled heat on the screw head can help loosen threadlocker, or a precision repair shop can extract the fastener without damaging the scale.
How often should I recheck a repaired pivot?
Recheck tension monthly at first, then again after any accessory change such as adding or removing a key, tool, or fob. It also helps to record the screw diameter, thread pitch, barrel length, head style, washer order, and whether threadlocker was used, so future adjustments are easier.
A serviceable pivot is a documented pivot
A sound repair feels controlled rather than rigid: keys move when selected, yet the stack stays quiet and aligned. Keeping the hardware specification with the organizer makes the next adjustment or replacement far less uncertain.






15 Comments
Short version: don’t overtighten. I treated mine like a cabinet screw and turned a neat key organizer into a stiff little brick for an hour 😂 Backed it off gradually and it’s fine now.
The testing section caught a problem I would have missed. At the desk everything felt great, but after carrying it for a day one key started rubbing the scale and the stack loosened slightly.
I reopened it, found one thin washer had shifted during assembly, squared the stack while hand-starting the screw, and then made micro-adjustments. It’s been solid for two weeks now. I also wrote down the barrel length in my notes like you suggested—future me may actually thank present me for once.
That is a perfect example of why normal-use testing matters. A stack can feel fine while stationary but reveal washer migration or uneven compression after repeated deployment. Recording the barrel length and final arrangement will make any later service much quicker.
I keep a little phone photo album called “tiny things I’ll forget.” Hardware stacks definitely belong in there.
This worked! My organizer had been getting floppy for months, and I assumed the whole thing was worn out. A new matched screw/barrel set plus tiny tension adjustments fixed it in about ten minutes.
The reminder not to crank it down was key (no pun intended). I stopped when each key would stay put but still swing independently.
Glad it brought it back to life. That “stays put, but moves on its own” point is the sweet spot—tight enough for retention without loading the stack sideways.
Same experience here. I overtightened mine the first time and thought the new hardware was bad. Backing it off maybe 1/16 turn made all the difference.
For anyone ordering parts: don’t match only the screw diameter. I did that, got a screw that looked perfect in the listing photo, and discovered the barrel threads/pitch were different. It threaded maybe one turn, then stopped.
Fortunately I tested it by hand instead of using a driver. Matched hardware is not marketing fluff, apparently.
Exactly. Similar-looking pivot screws can differ in pitch, barrel length, head shape, and even how the head seats in the scale. Hand-starting is the safest compatibility test; if it does not turn smoothly with almost no force, it is not the right pair.
This needs to be printed on every generic hardware kit. I bought a “universal” one and it was universal only in the sense that none of it fit my organizer.
I’m still a little skeptical about using threadlocker here. If I’ve finally got the tension right, won’t even removable threadlocker make the next adjustment annoying?
The layer-by-layer photo suggestion is boring advice until you dump six keys, two washers, and a mystery spacer onto the table 🙃 Saved me from assembling it backwards.
Step 3 didn’t quite work for me because my car fob adapter is much thicker than the regular keys. The barrel that came in the kit was flush before tightening, but after compression the scales were no longer parallel. Is that a sign I need a longer barrel or just another washer?
Usually that points to barrel length and stack planning rather than simply adding a washer. Measure the compressed stack with the fob adapter installed; the barrel should support the stack without bottoming out before the scales clamp squarely. A washer can fine-tune spacing, but it cannot compensate for a barrel that is too short or too long.
I had this with an Airtag-style holder. A slightly longer barrel solved the crooked scales; extra washers just made my keys bind.