Trim the noise into a handful of defensible tradeoffs.
At the gun counter a new permit-holder opens five tabs—holsters promising zero printing, layered retention systems, slim belts, mag carriers, and training bundles—and freezes. The moment is visceral: fear of printing during a commute, safety worries about handling, and the nagging thought of wasted money collide. That mix of anxiety and marketing turns practical choices into paralysis. What follows is a short, prioritized checklist designed to turn noise into clear, defensible tradeoffs so fundamentals come before flashy extras.
- Holster: rigid design that fully covers the trigger and offers positive retention.
- Fit: a carry gun and grip that permit comfortable concealment and reliable control.
- Practice: regular dry-fire and range sessions to validate draw, concealment, and safe handling.
Decision framework: rank accessories by daily impact
Keep purchases focused on concealed carry accessories: list items by daily impact rather than impulse. Additionally, rank accessories in three tiers, then filter choices using five trade-off criteria.
Ranked priorities
- Primary (highest daily impact): holster (proper fit/retention), sturdy carry belt, at least one spare magazine + carrier. These affect concealment, safety, and reloading ability directly.
- Secondary: quality clothing adjustments (concealable jackets/shirts), tuckable holster options, small EDC light. These improve accessibility and concealment in real situations.
- Tertiary: range-specific gear (targets, tools), optics mounts for dedicated setups, specialized retention systems. Useful but lower everyday return.
Filter purchases with five tradeoffs
When evaluating each item, rate it on concealment, retention/safety, comfort, accessibility, and compatibility (with firearm, clothing, carry position). Additionally, weigh these criteria by personal priorities for concealed carry accessories, and for daily carry emphasize concealment and comfort.
A quick scoring method is available. It helps evaluate results efficiently.
- Score 1–5 each criterion.
- Multiply concealment and comfort scores by 1.5 if daily carry is the focus.
- Sum scores and compare items; higher totals earn earlier purchase.
Additionally, this turns subjective preferences into repeatable decisions and prevents overbuying low-impact gadgets.
Non‑negotiables: what a holster must do
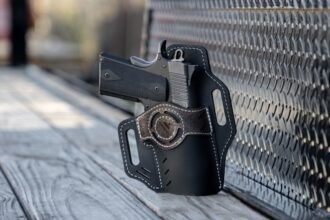
The trigger area must be enclosed by a solid barrier so the trigger cannot be depressed while holstered. Inspect the molding or stitching around the trigger for gaps and test seating depth.
A holster must seat the firearm in exactly the same position every time and hold it securely under movement. Check for a positive tactile or audible lock and smooth, repeatable re‑seating.
Materials should resist abrasion, deformation, and delamination; edges must be finished to avoid fabric catch or trigger rub. Poor materials wear quickly and change retention characteristics.
The draw should be unobstructed for the chosen carry method; any retention release must be reachable and operate consistently under stress. Overly complex mechanisms increase failure points.
Before finalizing a purchase, perform simple visual and manual checks: confirm trigger coverage, flex the holster mouth, and simulate seating and draw motions. For depth on coverage and verification techniques, read how to find holsters that provide it.
Also confirm the holster includes basic safety features and retention consistent with responsible carry—see holster safety features that reduce risk. If a holster shows delamination, loose rivets, sharp unfinished edges, or inconsistent retention during these checks, consider alternatives.
Pick a carry position that fits clothes and life
When choosing concealed carry accessories, holster location is a trade-off among concealment, comfort, and access during movement.
Additionally, IWB (inside-the-waistband) and OWB (outside‑the-waistband) tilt the balance differently.
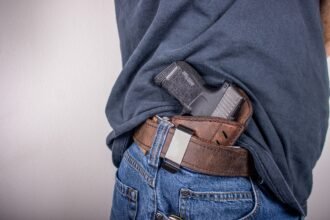
- IWB: stronger concealment and lower printing risk with shirts tucked or jackets, but can be hotter and less comfortable for long sitting or bending. Draw access may be slower from some positions; retention is usually good.
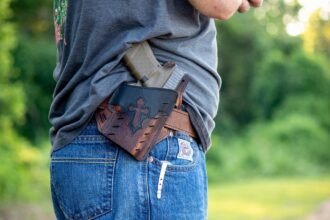
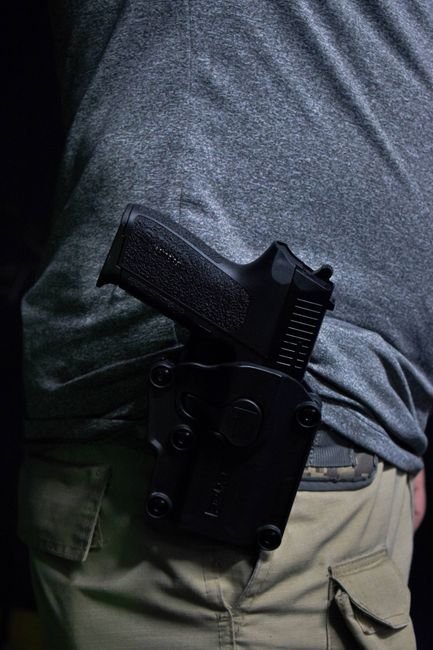
- OWB: easier access and more comfortable for extended wear or active work, yet it typically needs a cover garment (jacket, untucked shirt) to hide the profile.
For how holster type interacts with clothes, see the comparison of IWB and OWB against different outfits.
Common placements and when they suit
- Appendix (IWB): best with slim shirts and short draws; can be uncomfortable when seated for long periods.
- Strong‑side hip (IWB or OWB): balanced for most casual wardrobes and everyday errands.
- Small of back: good concealment with loose tops; less suitable for driving or heavy activity.
- Ankle/shoulder: niche options for specific outfits or movement patterns; slower access but useful when waist carry is impractical.
Select the position that aligns with daily clothing, posture, and typical activity rather than habit alone.
Quick Q&A: Why printing or pain happens — and fast fixes
-
Printing visible at the front
Common causes are high ride height, no forward cant, or a holster that doesn’t tuck. Lower the holster, add 5–15° forward cant, or try a tuckable model; for focused tactics, see reducing printing while keeping access with small adjustments reducing printing while keeping access.
-
Discomfort when seated or bending
Pain often comes from the grip or muzzle pressing into the abdomen. Drop ride height a notch, rotate the muzzle slightly away from the body, or test a holster with a narrower footprint.
-
Shirt snagging or obvious outline
Shirts ride up or cling when the holster lacks concealment profiling. Swap to a tuckable holster, change shirt length/texture, or increase cant to reposition the grip toward the torso.
-
Hotspots or pressure points
Pressure can come from rigid backings or incorrect belt support. Try a thicker, stiffer belt and a holster with a wing or pressure-dispersing pad.
-
When to change holster type
If two or more adjustments still leave printing or persistent discomfort, consider switching carry positions (hip IWB/OWB) or a different holster platform rather than further tweaking.
Run these diagnostics in under five minutes:
Cant test: Rotate the grip 5° at a time and observe printing while standing and seated. Ride-height test: Move the holster up or down one notch and re-check concealment. Tuck test: Try a tuckable holster or tuck the shirt; small changes reveal whether concealment or geometry is the issue — explore specific tuckable models in the roundup best tuckable appendix holster options.If multiple tests fail, consider changing carry position instead of forcing the current setup.
Why a Carry‑Specific Belt Matters — and How to Choose One
- Stiffness (rigidity)
A stiff belt keeps the holster from canting, sagging, or rotating so draw and sightline stay consistent; see the full buying guide for test methods. Avoid belts that flex under load — they allow holster shift and printing.
Look forInternal stiffener (metal/polymer) or reinforced nylonAvoidButter‑soft belts that bend under weight - Width
Width spreads the gun’s weight and resists rotation; a wider carry belt creates a firmer platform and reduces pressure points. Avoid narrow dress belts that concentrate load and let holsters tip.
Look forBroader webbing (standard carry widths) that fills belt loopsAvoidSlim belts designed for dress wear - Material and construction
Reinforced leather or laminated/ballistic nylon holds shape and resists stretching; multilayer construction with a stiff core is preferred. Avoid single‑layer synthetics or thin leather that stretch, sag, or delaminate.
Look forReinforced leather or laminated ballistic nylonAvoidThin single‑layer materials that deform - Hardware and attachments
Hardware should lock reliably and resist rotation—stitched buckles, low‑profile quick‑adjust systems, or solid metal closures perform best. Avoid cheap plated buckles, flimsy clasps, or loose rivets that work loose under load.
Look forSturdy, corrosion‑resistant buckles and stitched attachmentsAvoidThin, loose, or plated hardware that deforms
Spare‑mag carrier choices
Spare‑mag selection is a trade-off among capacity, bulk, and concealability. A single‑mag carrier keeps profile low and light; a double or stacked carrier improves reload speed and hands-free capacity at the cost of extra width and potential printing.
First, there are key tradeoffs to weigh.
- Single: minimal printing, lighter, easier to tuck.
- Double / stacked: faster follow‑up reloads, more weight and visible footprint.
- Retention level: passive friction vs active retention affects draw speed and security.
Placement and orientation matter as much as the count.
IWB hiding excels for concealment, but requires a slim carrier and correct cant to avoid printing while seated.
OWB is more accessible but bulkier.
Consider a carrier that stays stable during movement — test draws while seated and walking.
Additionally, review the low-profile IWB mag carriers that stay put.
They stay in place when you sit.
Orientation tips: Forward vs rearward cant changes how a hand finds the mag. Moreover, testing in real clothes and while moving can reveal subtle shifting that lab specs miss.
Common compatibility problems and a short pre‑purchase checklist
-
Shorts and summer carry
Lightweight clothing and shorts reduce concealment and belt support; confirm holster clips clear the waistband and test for printing and sweat migration in typical summer outfits. See holsters that work while moving in shorts.
-
Threaded or compensated barrels
Threaded or compensated barrels add length and muzzle devices that many shells won’t accept; verify manufacturer compatibility or choose holsters with muzzle cutouts or extra clearance. Consult holsters that fit threaded or compensated barrels.
-
Tolerance and clearance check
Use the actual pistol, optics, lights, or a same‑size test object to confirm trigger‑guard coverage, sight clearance and draw resistance before purchase.
-
Clothing fit test
Try the holster with intended shirts, shorts or pants—sit, bend, reach and walk—to spot printing, ride‑up, or interference with pockets.
-
Retention under activity
Simulate daily motions (sitting, climbing, jogging) to ensure retention, clip/belt stability, and no rotation; prefer holsters that stay consistent through movement.
Actionable purchases and tests
-
Holster (top priority)
Choose one that meets retention, muzzle coverage and consistent cant. Test by holstering with the belt on, then perform slow and fast draws while standing and seated.
-
Carry belt (second priority)
Pick a stiff, reinforced belt sized for the holster. Attach holster and walk, sit, bend and check for sag, rotation, or shifting.
-
Spare‑mag carrier
Select a low‑profile, stable carrier that matches orientation. Validate by reloading from the carrier while seated and moving.
-
Ammunition and magazines
Have reliable practice rounds and duty loads separated for training. Confirm feed and function with dry checks and live range validation.
-
Clothing compatibility test
Try everyday outfits and intended concealment layers. Check printing, access, comfort and concealment in normal movement.
-
Dry‑fire and live‑fire validation
Start with controlled dry‑fire to verify draw and trigger reset, then confirm on the range that gear works under live conditions.
Wear the actual clothes used daily.
Perform these moves: sit, stand, tie shoes, bend, twist, and reach into pockets.
Make a slow deliberate draw, then a timed draw; attempt a reload while moving.
Look for printing, shifting, retention failures, discomfort, or draw hindrances.
Frequently Asked Questions
Do I need a special belt for concealed carry?
Yes. A standard dress belt lacks the stiffness needed to support a holster and firearm without sagging or rotating. A dedicated carry belt with an internal stiffener (metal or polymer) keeps the holster in a consistent position and makes the draw reliable and repeatable.
What is the most important accessory to buy first for concealed carry?
The holster is the top priority. It must provide complete trigger-guard coverage, consistent retention, and a repeatable draw. Without a quality holster, no other accessory improves safety or performance meaningfully.
Should I carry a spare magazine?
Yes, a spare magazine carrier is considered a primary accessory alongside the holster and belt. A single spare magazine adds capacity and allows for a reload if needed; choose a low-profile IWB carrier to keep concealment intact.
How do I stop my concealed carry from printing?
Printing is usually caused by high ride height, no forward cant, or a holster that doesn’t tuck against the body. Lowering the holster, adding 5–15 degrees of forward cant, and switching to a tuckable model are the most effective adjustments. Clothing fit also plays a significant role.
Final reminders
- Prioritize holster, belt, and practice over accessories.
- Validate every item in real clothes and movement before relying on it.
- Small adjustments (cant, ride height, magazine placement) solve most problems.
Practical validation matters. Gear is only as good as its performance during everyday movement; test holster, belt, mag carrier and clothing together, iterate quickly, and confirm with dry‑fire and live‑fire where possible.