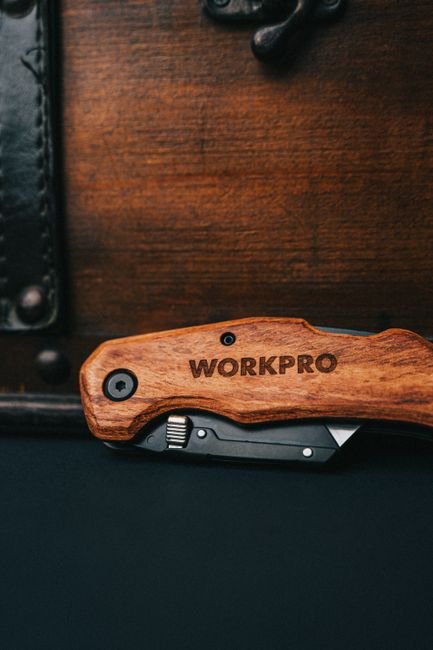
A free hand should not be a hidden requirement.
When one hand is gripping a ladder, holding material, or keeping a workpiece steady, a buried implement can turn a simple task into an awkward pause.
The label “one-handed multitool” needs careful reading. It may mean only that the knife blade has a thumb hole or stud, that the pliers slide or swing into position with one hand, or that several implements are accessible from the closed handles. It rarely guarantees identical access to every tool. Lock release, closing, and left-handed operation can also require a different grip—or a second hand—so each needed implement should be checked individually rather than relying on the headline claim.
What “one-handed” actually needs to cover
Access
The implement can be reached from its carried position without first opening the multitool’s handles or using the other hand.
Deployment
The implement can be moved from stowed to working position with one hand. A thumb hole, tab, or accessible nail nick may help, but handle layout and hand dominance still matter.
Operation
The tool can perform its intended task one-handed after deployment. Pliers, scissors, bit drivers, and files often require different grips, so an accessible implement is not automatically practical one-handed.
Safe closure
The lock can be released and the implement returned to its recess without placing fingers in the closing path. This step may be harder than opening, especially with stiff locks or gloves.
A one-handed blade does not make the entire multitool one-handed. Check access, deployment, working grip, lock release, and closure for each implement—and for the intended hand.
Do not count wrist-flicking, shaking, or loosening the pivot beyond the manufacturer’s guidance as evidence of designed one-hand use. These workarounds can reduce control, alter lock behavior, or create unwanted blade play.
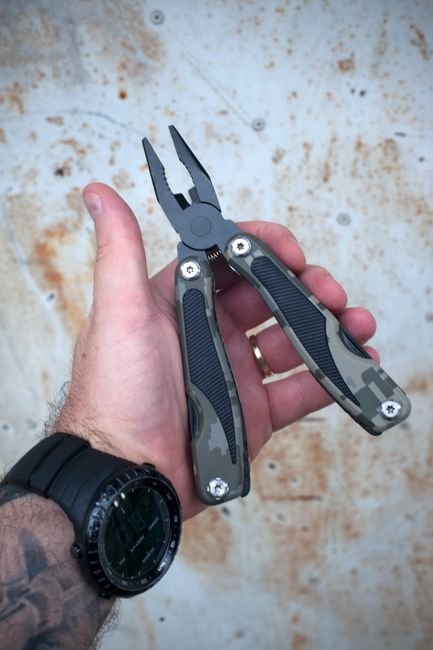
Which tools usually qualify?
A multitool may contain several implements yet provide one-handed deployment for only one or two. Manufacturer documentation from brands such as Leatherman and Gerber treats this as a model-specific feature, so the exact manual and product listing remain the most reliable references.
| Implement | Typical one-hand status | What changes the answer |
|---|---|---|
| Outside-opening knife blade | Commonly possible | Thumb holes, studs, blade orientation, detent strength and lock placement |
| Outside-opening saw or file | Sometimes possible | An accessible opening feature and enough clearance to start the tool safely |
| Sliding or assisted-opening pliers | Possible on some designs | A slide, spring-assisted mechanism or free-moving handles; unfolding butterfly handles may still require two hands |
| Scissors | Sometimes possible | Outside mounting helps; small nail-nick scissors are usually two-hand tools |
| Bit driver or large screwdriver | Occasionally possible | Outside-mounted drivers may qualify, but a separate bit may still require the other hand |
| Nested screwdrivers, awls and openers | Usually not | Nail nicks, tight stacking and neighboring tools make controlled access difficult |
| Tweezers, toothpicks and micro tools | Rarely practical | These accessories generally require a pinch grip and careful extraction |
Lock operation must be checked separately. A right-side thumb hole may open easily in the right hand while placing the release awkwardly for left-handed closure. Liner locks, frame locks, back locks and push-button releases also demand different grip changes.
Before relying on any implement, the user should verify four points with the unloaded, clean tool: whether it can be reached, fully deployed, locked and closed with the intended hand. Gloves, dirt and unusually tight pivots can turn a nominally one-handed feature into a two-handed task.
How the opening mechanism changes the experience
The opener matters as much as the tool’s location. Each design trades speed against purchase, clearance, and control.
- Thumb holes provide broad contact and are often easier to find by feel. Large holes can accommodate gloves; small or partly obstructed holes may not.
- Thumb studs offer direct leverage, but short studs and tight handle clearances can be awkward with thick gloves. A stud on only one side may also favor one hand.
- Tabs and flippers let the index finger initiate movement without repositioning the thumb. Their performance depends heavily on pivot resistance, and protruding tabs can catch on pockets or pouches.
- Cutouts or nail nicks reduce bulk but usually provide less leverage. A shallow cutout should not be treated as genuinely one-handed merely because a fingertip can reach it.
- Low-friction or magnetic pivots can make tools move with little effort. Dirt, pivot tension, corrosion, or an overly loose joint can change that behavior, so smooth deployment is not the same as controlled deployment.
- Sliding plier heads can extend through gravity, wrist motion, or a release control. They need clear space, and the required swing may be unsuitable near people or equipment.
- Assisted controls reduce the force needed after movement begins, but can make the tool open abruptly. Gloves may also reduce access to small buttons or safeties.
Closing deserves a separate check. Liner and frame locks may release one-handed, but often require fingers near the blade path. Back locks, stiff releases, and tools needing a grip change may deploy one-handed yet be safer to close with both hands.
How layout changes one-hand access
Manufacturer documentation reveals three distinct approaches; the model name matters more than the general brand reputation.
Butterfly handles with outside tools
The Leatherman Wave+ uses conventional folding handles but places both knife blades, the saw, and the file on the outside. Leatherman labels the model’s features as outside-accessible and one-hand operable. The pliers still require the handles to be unfolded, so “one-handed” does not mean every function deploys in the same way.
This layout can suit someone selecting a full-size EDC multitool primarily for quick blade access while retaining familiar butterfly construction.
Sliding pliers
The Gerber Center-Drive shifts the emphasis to its pliers. Gerber’s official description specifies one-thumb deployment of the sliding, spring-loaded plier jaws and identifies the knife as an outboard tool. That is a different access pattern from opening two handles before using the pliers.
The exact name must be checked: Center-Drive variants can have different tool sets, and an outboard position alone does not establish that opening, unlocking, and closing are equally manageable with either hand.
Broader outside access
Leatherman describes the FREE P4 more broadly: its official product documentation states that every feature can be opened with one hand. Magnetic architecture and outside tool placement reduce the need to reach between folded handles, but the claim should remain attached to the P4—not automatically extended to every FREE-series model.
Before choosing among these layouts, compare:
- the complete model and generation name;
- manufacturer diagrams showing tool location;
- thumb controls and lock releases for the intended hand;
- deployment and closure instructions in the manual;
- smaller or larger versions, which may rearrange or omit tools.
Product photos should be inspected from both handle sides. A right-hand demonstration does not by itself document equivalent left-hand access.
Verify the complete one-handed sequence
-
Check the official tool map
Use the manufacturer’s manual or labeled diagram to identify which implements are outside-accessible with the handles closed. Treat retailer wording such as “one-hand opening” as incomplete unless it names the specific tools.
-
Watch the full motion
Find an official demonstration showing access, deployment, locking, unlocking, and refolding—not just a quick opening shot. Confirm that the demonstrator does not steady the multitool against another surface.
-
Inspect the opening control
Check whether the thumb hole, stud, flipper, or sliding control can be reached by the dominant hand without changing grip. Product photos should also show enough clearance for the intended gloves.
-
Confirm lock operation
The documentation should identify the lock and explain its release. Verify that the tool visibly reaches full lockup and that releasing it does not place fingers in the blade’s closing path.
-
Rehearse with the tool unloaded
After purchase, practice the complete sequence slowly while seated over a clear surface. Stop if the implement only partly locks, the pivot binds, or safe refolding repeatedly requires the other hand.
-
Test the actual carry setup
Check clip side, tip orientation, dominant-hand draw, and access from the intended pocket or pouch. Compare carry setups that support faster access, then choose the position that permits a controlled draw without snagging.
Repeat the check with each intended tool; one accessible blade does not make every implement one-handed.
A control that works barehanded may become unreachable or slippery with work gloves. Test the specific glove-and-carry combination in a controlled setting, keeping blades pointed away from the body and bystanders.
When deployment becomes difficult
A tool that once opened smoothly should not need progressively more force. Before attempting repairs for a multitool that is hard to open, check the manual for cleaning, lubrication, adjustment, and warranty instructions.
| Symptom | Likely cause | Safe response |
|---|---|---|
| Gritty or uneven travel | Dirt in the pivot | Brush away debris, clean as directed, dry thoroughly, and apply only an approved lubricant. |
| Rust staining or binding | Corrosion | Stop forcing the implement. Follow the maker’s corrosion guidance or request service. |
| Tool moves only with heavy pressure | Overtightened or damaged hardware | Do not aggressively loosen or modify the pivot; use manufacturer service unless adjustment is explicitly documented. |
| New tool feels uniformly stiff | Break-in stiffness | Cycle it slowly with two hands, keeping fingers clear of the edge and lock. |
| Thumb cannot reach the control | Gloves, grip position, or another implement blocking access | Reset the grip, remove obstructions, or treat that configuration as two-handed. |
| Deployment is awkward from carry | Clip, sheath, or pocket orientation | Reorient carry only within the maker’s approved options. |
Forceful flicking can reduce control and mask damage. Persistent stiffness, lock hesitation, or side-to-side play warrants inspection by the manufacturer or an authorized repair provider.
Control matters more than speed
Controlled deployment starts with a stable grip and a clear path for the implement. Fingers should remain outside the blade’s travel and away from plier pivots, scissor joints, and locking surfaces. Opening should stop if the tool binds or requires a wrist flick that could send the edge toward the body.
Before applying force, confirm full lock engagement using the manufacturer’s specified indicator or check. A partial lock can appear secure under light pressure yet release when cutting or driving. For cutting-heavy work, compare one-handed cutting-tool options by opening control, edge orientation, lock access, and closure—not merely by the presence of a thumb hole or stud.
Pliers introduce a different problem: although some deploy in one hand, effective gripping usually depends on two handles being squeezed and repositioned. An occupied or injured hand reduces leverage and makes slips harder to arrest. Closing a liner lock, frame lock, or back lock can be similarly hazardous if disengaging it places a finger in the blade path.
Pain, weakness, numbness, or restricted motion can undermine grip and lock control. If deployment, operation, or closure cannot be completed without crossing the edge path, use another tool or postpone the task.
Choose around the task
- For cutting, prioritize controlled opening, secure lockup, and predictable closure.
- For gripping, assess handle control and whether useful pressure is possible one-handed.
- For driving, check reach, bit retention, and resistance to handle folding or twisting friction within rated use conditions.
Frequent tool changes favor accessible outside implements and locks that can be released without shifting into a hazardous grip. Before carrying, verify both deployment and closure with the intended hand, then account for hand fit, carry position, lock design, and applicable local law.
One-handed access is harder on a large frame, which is part of the case made in multitools for smaller hands — reach and leverage decide which implements can be deployed without a second hand.