A visible part is not necessarily a workable part.
A loose connector behind a wiring bundle may be easy to spot yet impossible to pinch without scraping nearby components. Needle-nose jaws trade gripping area for access: their tapered tips can reach recessed clips, washers, wire ends, and narrow fasteners. Manufacturer tool lists, including Leatherman’s, distinguish these fine tips from the wider “regular pliers” section closer to the pivot.
That reach becomes a liability when the job requires twisting force. A small contact patch can slip, mark soft hardware, or rotate around a stubborn part. Blunt-nose jaws generally place more jaw surface on a nut, clamp, or connector, improving control—but only if the head can enter the enclosure and open far enough. A practical check is to identify the limiting step: choose needle-nose geometry when access blocks engagement; choose broader jaws when engagement is possible but grip is failing. Before applying force, isolate power, brace the surrounding assembly, and confirm the jaws are seated rather than touching only one edge.
What the Jaw Shape Actually Changes
Needle-nose jaws
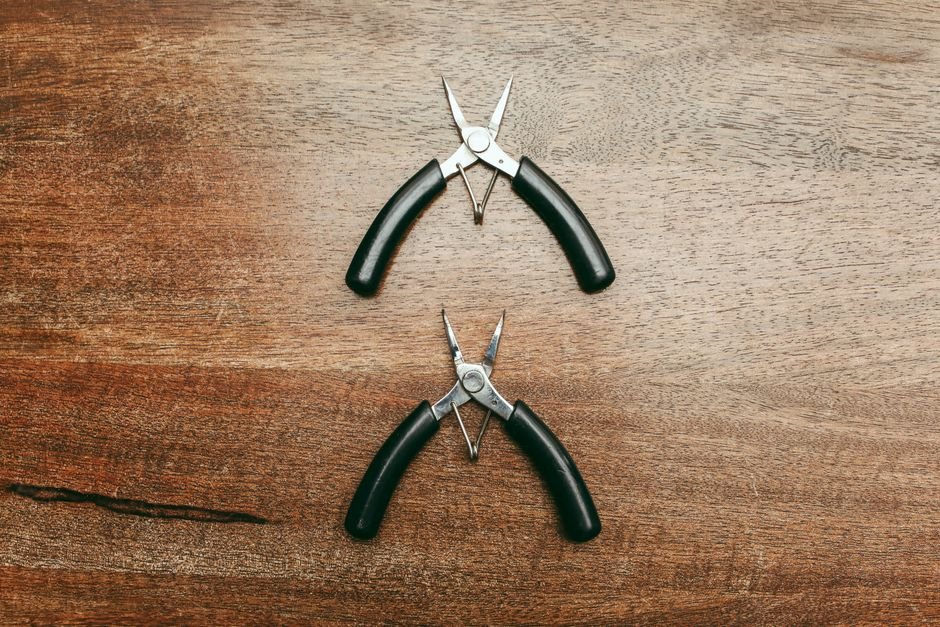
Long, tapered jaws can reach recessed clips, narrow slots, and small wires. Their slim tips provide less gripping surface, so heavy twisting can feel less controlled.
Blunt-nose jaws
Shorter, broader jaws place more metal against nuts, tabs, and thicker wire. The tradeoff is reduced access when surrounding parts leave little clearance.
Tip width and taper
These measurements indicate whether the pliers can enter a confined opening more reliably than a “needle-nose” label. Product drawings or scaled photos may help when dimensions are not published.
Usable jaw depth
Jaw length alone can mislead: pivots, cutters, and thick shoulders may stop a part before it reaches the gripping teeth. Check how much of the toothed section can actually surround the target.
Teeth and cutters
Fine teeth suit small parts, while coarser teeth tend to engage rough or rounded surfaces more securely. Cutter position also matters when wire must be reached without opening the handles fully.
Access Is a Whole-Tool Problem
Tool-selection guidance in the U.S. Army’s TM 9-243 associates long-nose pliers with confined work, but a multitool adds packaging constraints. A narrow tip may enter a recess, while broader jaws place more metal against a nut, pin, or clamp. More contact area can distribute pressure and reduce rocking.
Jaw length determines how far the tool reaches past an obstruction. Added length also gives side forces more leverage, making lateral stiffness important. Jaws that flex sideways may twist off a small part even when their tips fit; shorter, thicker jaws generally resist side loading better but sacrifice reach.
Serrations can resist pullout on textured parts, yet aggressive teeth may mark soft wire, plated fasteners, or plastic. Fine teeth are often more suitable for small components; coarse patterns tend to favor rough surfaces. Delicate parts may require light pressure or a nonmarring tool.
Before choosing, map the complete operating motion:
- Can the pivot pass the opening?
- Can the handles spread enough to close the jaws?
- Is there clearance for knuckles and the return stroke?
- Can the jaws remain aligned instead of approaching at a slipping angle?
A tip-only measurement can mislead. Trace the closed tool, pivot, and handle sweep on cardboard, then test that profile against the intended access path.
Precision first, force second
Needle-nose jaws are most useful when a repair depends on controlled placement rather than high torque. Their tapered tips can reach past hose bundles, brackets, or enclosure lips to retrieve a washer, start a cotter pin, or hold a small nut while a screw is turned from the opposite side. Serrated sections nearer the pivot usually grip more securely than the tips, so a part should be seated as deeply as access permits.
Know when to change tools
Long, narrow jaws provide considerable leverage against themselves when twisted sideways. If hardware is seized, forcing the handles can round the fastener, throw the jaws off the work, or deform the tips. Penetrating fluid, followed by a correctly sized socket, wrench, or locking pliers, is generally a more controlled approach.
A broader jaw is also preferable when the contact surface is wide or easily crushed. Needle tips can dent soft tubing, distort thin clips, and damage connector housings; electrical connectors should be pulled by the housing rather than the wires.
For repeated pick-and-place work, spring-loaded pliers for repetitive repairs can reduce the effort required to reopen the handles. They do not eliminate fatigue, however. Frequent squeezing, awkward wrist angles, or excessive grip force signals that a dedicated hand tool—or a short break—is warranted.
Where blunt jaws hold steadier
A shorter, wider jaw is most useful when the target sits close to the pivot and has enough exposed surface for broad contact. This geometry reduces flex at the tip and directs hand force through the sturdier part of the plier head. On a flattened nut, hose-clamp tab, bent bracket, or thick wire, that can produce a steadier hold with less sideways twisting.
Use the strong zone
Position the work as deep in the jaws as clearance allows—not at the outer edge. Keep the handles aligned with the intended turn, then increase pressure gradually. If the part begins to cam out, stop and reset; squeezing harder on a poor bite can round an edge or send the tool sideways.
Broader jaws are particularly useful for:
- compressing clips or tabs;
- gripping broad, exposed fasteners;
- bending small brackets;
- holding material during a short, forceful turn.
The trade-off appears as soon as access narrows. A blunt profile may strike surrounding housings before its teeth reach a recessed fastener. It can also obscure tiny retaining rings, tucked electrical connectors, or hardware between closely spaced components. In those situations, needle-nose jaws—or a dedicated long-reach tool—may reach contact points that the stronger blunt jaw cannot.
Choose for the obstruction and task
Start by tracing the tool’s entire path to the fastener or wire. A narrow target does not necessarily require a needle nose if a wide jaw can reach it; conversely, a roomy opening may taper into a channel that blocks broad pliers.
Match the limiting factor
- Depth: Long, tapered jaws suit clips, terminals, and small parts recessed behind housings—provided the handles can still open.
- Delicacy: Fine tips provide better placement around thin leads or tiny retaining parts. Low gripping force remains important because narrow tips can mark or deform soft material.
- Grip area: Blunter jaws place more tooth surface on hose clamps, nuts, and broader tabs. That added contact can reduce slipping when access permits deep engagement.
- Resistance: A corroded fastener or stiff bend calls for substantial jaw contact and minimal side loading. If only the tips can touch, a separate full-size tool may be safer and more effective.
- Repeated operation: Jobs involving many crimps, twists, or clamp releases favor comfortable handles, smooth pivots, and suitable return action over maximum reach alone.
Before committing, check whether the jaws can approach squarely, close far enough around the part, and move through the required arc without striking adjacent surfaces. If they cannot, changing the access angle or using a dedicated tool is usually preferable to forcing the multitool.
Hard-wire performance is a separate specification. Needle-nose and blunt-nose profiles do not establish cutter hardness or capacity; those depend on cutter material, geometry, and the manufacturer’s documented rating. For spring wire, fishhooks, or similar stock, compare pliers and cutters rated for hard wire and stay within the stated material and diameter limits.
Measure the repair, not just the plier tip
-
Map the access path
Measure the narrowest opening, the depth to the part, and any corner the jaws must pass. Compare those dimensions with the plier-head width and usable jaw length rather than judging taper by appearance.
-
Reserve room for the handles
Check the space needed to insert, open, squeeze, and reposition the tool. A narrow nose offers little advantage if a wall, panel, or cable bundle prevents the handles from moving.
-
Place the part on the serrations
Estimate where the fastener or wire will sit when the jaws reach full depth. It should land on an appropriate toothed section—not a smooth tip, cutter notch, or transition between gripping surfaces.
-
Inspect jaw alignment
Close the unloaded pliers and view the jaws from the front and side. Uneven overlap, sideways offset, or visible twisting can reduce predictable contact on small parts; compare another sample if the design intent is unclear.
-
Test the working handle spread
Open the jaws to the width required by the repair, then assess the resulting grip span. For smaller hands especially, a manageable handle spread can matter more than an exceptionally slim nose because it affects reach, squeezing force, and control.
-
Check secondary contact points
Look for rounded handle edges, useful texture, accessible locks, and controls that remain reachable with the intended gloves. Spring action may help with repeated gripping, but it should not make controlled positioning harder.
Measurements should reflect the tool while open to the required jaw width, not merely its closed dimensions.
A controlled sequence for confined repairs
- Make the workpiece safe and stable
De-energize electrical equipment, release stored pressure, and secure anything that could shift. Provide enough light to see both jaw tips and the nearby components.
- Inspect the pliers before use
Reject a multitool with cracked handles, a loose pivot, distorted jaws, chipped teeth, damaged cutters, or a lock that does not engage reliably. Contamination such as oil can also make a marginal grip slip.
- Confirm the material suits the tool
Check the manufacturer’s cutter rating before cutting wire, cable, hardened pins, or similar stock. If the material is unidentified or exceeds that rating, use a dedicated cutter specified for it rather than increasing handle force.
- Seat the jaws squarely
Place the part as deep in the jaws as access permits, with both gripping faces making contact. Avoid catching a fastener on the tips or approaching at an angle, since either position concentrates force and encourages slipping.
- Apply force in the jaw plane
Squeeze smoothly and turn without twisting the plier nose sideways. If the tool begins to cant, release it and reposition; do not rock the jaws, strike the handles, or add an extension for leverage.
- Stop and reassess early
Rounded edges, spreading jaws, flexing handles, or repeated loss of grip indicate a poor tool-task match. Change jaw style, improve access, or move to the correct wrench, driver, extractor, or cutter.
Plastic or rubber handle coverings do not establish electrical protection. Electrical work should be de-energized and verified before contact. Where energized work is permitted under applicable procedures, OSHA requires appropriate insulated tools and protective equipment; only tools carrying the required voltage rating should be considered.
Match the Jaw to the Repair
- Measure the narrowest opening, required reach, gripping surface, and available handle spread before comparing tools.
- Cut a cardboard profile of the closed jaws and handles; test whether it can reach the fastener and still open enough to grip.
- Confirm jaw dimensions, cutter ratings, and material limits in manufacturer documentation rather than relying on “needle-nose” or “blunt-nose” labeling.
Choose needle-nose jaws when the repair rewards depth, precise placement, and a clearer view around small or recessed parts. Choose blunt-nose jaws when broader contact, resistance to twisting, and controlled moderate force matter more than reaching past an obstruction.
If neither profile clears the housing while maintaining square jaw contact, a different tool is the safer choice. The useful distinction is not the name stamped on the package, but whether the measured geometry matches the actual repair path and load.
Jaw shape is the whole argument, and the comparison of mini pliers against needle-nose pliers covers the same geometry in dedicated tools, where the trade-offs show up more starkly.