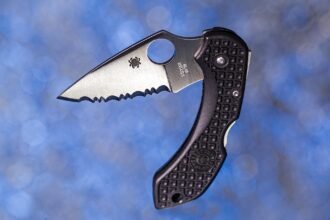
A battered blade with missing chunks prompts a sharp decision.
A kitchen knife scarred by vegetable scraping or an EDC nicked on a tin can creates an awkward question: restore or replace? Reestablishing a reliable bevel often requires removing metal; excessive grinding alters profile and aggressive heat can soften the temper. The first step is a focused assessment of chip size, position, steel type and intended role — this determines whether a local touch‑up, full reprofile, or replacement is appropriate.
- Chips wider than 1 mm across the bevel usually need reprofiling
- Multiple scattered micro‑chips point to brittle steel or impact damage
- Blueing or temper colours indicate heat sensitivity — avoid high‑heat grinding
Fast checklist: classify the chip and choose the repair path
-
Measure size and shape
Estimate chip length along the edge and depth into the bevel. Use a loupe or bright light; small nicks (<1 mm length) are often fixable by honing, while long or V‑shaped losses likely need stock removal.
-
Locate the damage
Record whether the chip sits at the tip, belly, heel, or along a convex/concave section. Tip and heel chips affect function differently and may demand reshaping or tip reprofile.
-
Check steel and hardening
Identify steel family and expected hardness. Hard steels hold a thin edge but resist aggressive material removal; softer steels blunt quickly and sometimes require more cutting of material to restore geometry.
-
Assess grind geometry and blade thickness
Note bevel angle, presence of secondary bevels, and spine thickness. Thin, acute grinds respond well to rehone; thick/wedge profiles may need grinding to recreate proper angles.
-
Prioritize repair path
Map findings to a path: small surface chips → hone; edge distortions or chips under the bevel → reprofile at controlled angles; long/deep chips or soft steel with multiple losses → aggressive stock removal with coarse abrasives.
Photograph and mark the damaged edge before starting. A quick photo plus a fine permanent mark at the chip boundary saves time and prevents over‑removal during regrind.
Also consider testing a small repair on a less visible section to judge heat, grind speed, and abrasive aggressiveness before committing to full removal.
Match steel, heat treatment, and abrasives
Different steels and heat treatments change how aggressively material can be removed and how easily the edge will overheat or clog abrasives. For background on how alloy and hardness affect repair choices, consult the steel and techniques to remove chips.
Quick mapping: steel class → abrasive strategy
- Soft/low‑alloy steels (lower hardness): use aluminum oxide or silicon carbide abrasives. Grit progression: 220→400→800→1000–3000 for a polished finish. Coarser belts remove chips quickly with low heat risk.
- High‑carbon and medium tool steels (hardened ~56–62 HRC): start coarser for large chips (120–240), then step to 400→800→1000+. Use ceramic or high‑quality alumina; avoid excessive pressure to limit tempering.
- Stainless and secondary‑hardening steels: these tend to work‑harden and clog; prefer abrasives with open cutting geometry (ceramic, zirconia) and progress 240→400→800→1500.
- PM and very hard steels (>62 HRC): use diamond or CBN abrasives. Start at 200–400 grit diamond for large chips, then 600→1200 diamond or fine stones for refinement.
Practical cautions
- Excessive speed or pressure raises edge temperature and can temper and soften the hardened zone; use light passes, intermittent cooling, or water‑cooled setups when possible.
- Pick abrasives that match chip severity: too fine wastes time on big chips; too aggressive on hard steels wears grinding media rapidly.
Match abrasive type and grit progression to both steel class and chip size to minimize heat, preserve hardness, and finish efficiently.
Shop setup and safety checklist
- Secure the blade
Clamp the knife in a bench vise with soft jaws or a dedicated blade holder. Orient the edge away from the operator and immobilize the tang to prevent leverage.
- Protect jaws, handle and finish
Pad contact points with leather, rubber or wood to avoid marring. Mask the handle and grind lines with high‑adhesion tape to protect the finish.
- PPE and ventilation
Use eye and hearing protection plus a NIOSH‑rated particulate respirator for metal dust. Provide local exhaust or a dust collector and avoid indoor recirculation.
- Mark material to remove
Scribe a shallow line or apply contrasting tape to mark the removal boundary. Measure from tip and heel to keep symmetry.
- Rehearsal passes before abrasive contact
Perform dry practice strokes with a file or a dressed abrasive at low pressure to validate angles and clamp security. Confirm hand positions and clearance before abrasive contact.
Sparks and hot metal can ignite combustibles; keep a suitable fire extinguisher nearby.
Fine metal dust is toxic; use local extraction and a respirator.
Clamp the spine, tang or a holder — never the cutting edge.
Remove large chips, then blend to a finished edge
- 1) File the worst of the damage
Begin with a single‑cut mill or bastard file to knock down high material quickly while staying true to the existing bevel. Use long, even strokes along the bevel face, keeping the file at the target bevel angle and working across the chip until it is feathered into a continuous edge.
- 2) Move to belts or coarse wheels for bulk shaping
Switch to a coarse belt or bench wheel (coarser grits for heavy chips) to remove remaining material and re‑establish the primary bevel. Keep the blade moving along its length, avoid dwelling in one spot, and make several light passes rather than one aggressive cut to reduce heat buildup and prevent warpage.
- 3) Progress to stones for geometry and consistency
Use coarse stones to refine the bevel created by the belt, then step through finer stones to remove scratches and form a uniform burr. Maintain the chosen bevel angle with each grit; use a marker to check contact and a loupe to inspect chip boundaries and progress.
- 4) Blend small chips and create a finishing bevel
Where small chips remain, establish a shallow microbevel to trap the edge and strengthen the tip, then polish the microbevel on progressively finer abrasives. Deburr by using light opposite‑side strokes until the burr lifts cleanly.
- 5) Monitor heat and control material removal
Pause frequently to let the blade cool and inspect for discoloration or temper colors that indicate overheating. Use intermittent coolant or air, reduce pressure and RPM, and favor extra passes at finer grits rather than aggressive coarse removal to preserve hardness and geometry.
Finish with stropping or a high‑grit ceramic to restore cutting performance without removing more material.
Warning: excessive heat can temper the steel and ruin hardness.
Watch for blue, purple, or straw discoloration and reduce contact immediately. Use short passes, coolant, and lower pressure; allow the blade to cool between heavy cuts. If unsure whether overheating occurred, inspect edge performance and consult hardness testing methods before further restoring.Rebuild the Primary Bevel and Finish to a Durable Apex
- Set and verify target angles
Choose a primary bevel angle to match use: slicing edges 12–18° per side, general-purpose 15–20°, heavy-duty/choppers 20–25°. Mark the bevel with a marker or tape and use an angle guide or jig to keep consistency while rebuilding.
- Follow a logical grit progression
Start coarse to remove metal (e.g., 220–400 grit or coarse diamond), then step through 800–1200, 3000, and finish with 6000–8000-equivalent abrasives or fine strops. Each grit should remove the previous grit’s scratches and re-establish the bevel geometry.
- Create and manage the burr
Work until a continuous burr forms along the entire edge—detectable by feel or by a thin reflective wire of metal. Once present, reduce pressure and switch to finer grits to thin the burr, then alternate light passes on each side to transfer and finally remove it cleanly.
- Add a micro‑bevel for durability
Raise the angle 1–3° above the primary and take a few light, controlled strokes on a fine stone or ceramic. The micro‑bevel preserves cutting ability while improving resistance to rolling or chipping.
- Strop and polish to finish
Use a leather strop with fine compound or a paste-free leather to align and polish the apex; 10–30 alternating strokes away from the edge achieves a polished, low-friction face. Inspect under light for uniform reflection and test cutting on appropriate materials.
Sharper = thinner = less durable.
12–15°/side: razor sharp, best for delicate slicing and sashimi; prone to rolling. 15–20°/side: balanced for kitchen work and everyday tasks. 20–25°/side: sacrifies thinness for toughness — preferred for heavy chopping or hard ingredients.A small micro‑bevel (+1–3°) often yields the best compromise: keeps a fine cutting line while significantly improving edge life.
When to stop DIY and seek a pro or replacement
Decision framework
Stop DIY if continued work risks the blade’s integrity, safety, or value. Seek professional service or replacement when any of the following apply:
- Visible cracks extending from the chip toward the spine. These indicate structural failure.
- Major material loss (several millimetres) that requires heavy reprofiling or reduces stock below safe thickness.
- Unknown or ultra‑hard steel that needs heat treatment or specialist abrasives.
- Serrated or exotic geometry that’s difficult to restore by hand.
- High monetary or sentimental value where a mistake would be costly.
Repairability checklist
Use this quick checklist to decide pro service versus replacement:
- Steel & heat treatment known?
- Cracks present?
- Remaining stock ahead of apex (enough to reshape safely)?
- Can bevel geometry be matched at home?
- Estimated pro cost vs replacement value?
- Handle or pivot issues complicating repair?
Maintenance and Prevention Checklist
-
Inspection cadence
Check after heavy use and monthly otherwise; look for new nicks or rolling under good light.
-
Field fixes for small chips
Use a ceramic rod or fine diamond card; a few controlled passes on a coarse stone for larger micro‑chips.
-
Safe cutting habits
Avoid twisting, prying, or cutting on hard surfaces; prefer wood or polymer boards and controlled strokes.
-
Honing and inspection schedule
Hone lightly before use if needed; perform stone progressions and strop every few weeks, reprofile when wear increases.
Tiny burrs: 5–10 strokes on a ceramic rod.
Small chips: two controlled passes on a coarse stone, then refine with finer grits.
Close the Job: Decide and Maintain
- Reassess geometry and function after repair—burr checks and cutting trials confirm success.
- Prefer the least‑aggressive fix that preserves hardness; avoid heat and excessive material removal.
- Reprofile or replace when the bevel is too thin, geometry is lost, or performance is poor post‑repair.
Close the workflow by following the assessment → repair → maintenance arc. After confirming chip size, steel class and remaining geometry, choose the least aggressive fix that restores a sound bevel. Verify with burr checks and cutting tests; if the edge is unstable, excessively thin, or needs a complex reprofile, escalate to professional reconditioning.
Routine inspection and conservative honing preserve results; when heat‑treatment risk, intricate grinds, or substantial material loss appear, professional repair or replacement is often the wiser option.