
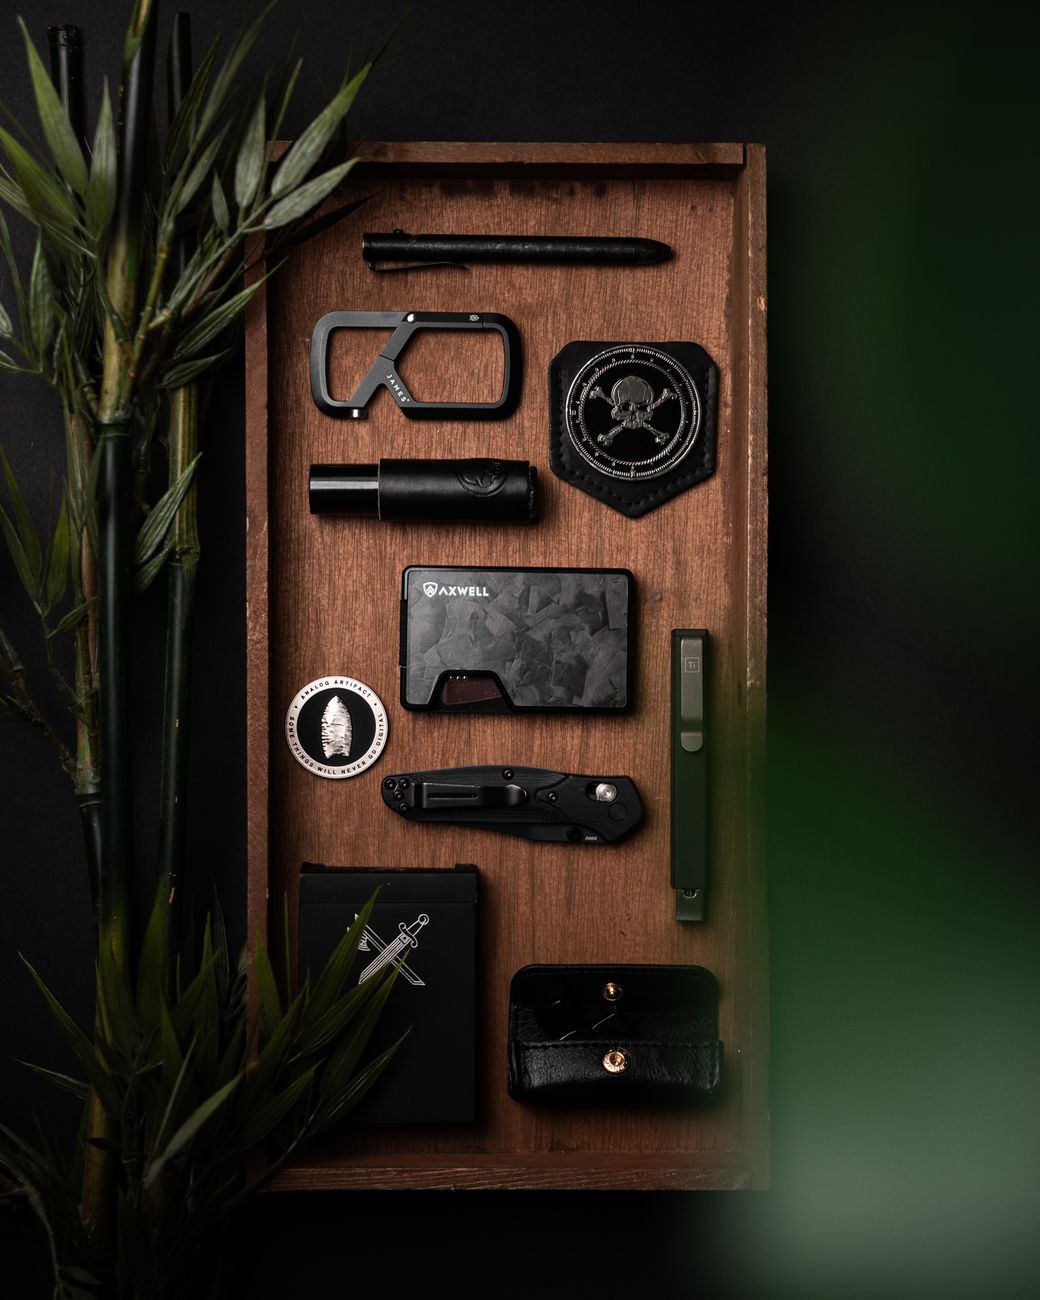
Tomorrow’s carry is easier to grab when it has one protected place to land tonight.
A phone, wallet, keys, flashlight, watch, and pocketknife can migrate across a kitchen counter in a single evening—then one missing item turns the morning into a search. Left loose, gear also collects dust, gets knocked behind furniture, and invites accidental contact with children, pets, or visitors.
A contained home base changes the habit without hiding essentials in a distant drawer. Think of a shallow valet tray inside a cabinet, a lidded box on an entry shelf, or a small drawer organizer near the departure point. It creates a single return location while keeping the visible surface clear. The useful test is simple: each item can be dropped off in seconds, yet retrieved without emptying a bag or opening several containers. Separate compartments matter for hard items; keys can scratch lenses, screens, finishes, and watch crystals surprisingly quickly.
- A lidded container adds dust control and visual calm while preserving quick access.
- Keep rechargeable items near a managed charging point, rather than mixing cords into the tray.
Let the gear dictate the organizer
Daily-carry tier
Items leaving the house most days need the shortest retrieval path: a drawer insert, entry shelf, or grab tray—not a deep bin.
Rotation tier
Gear used weekly or for particular activities can sit one layer farther back. Group it by outing or task, such as travel, cycling, or repair work.
Protection tier
Screens, lenses, blades, batteries, and polished metal benefit from separated compartments or soft pouches. Loose contact creates scratches, snagged cables, and hard-to-find pieces.
Charging tier
Charged devices need a dedicated location near power, with enough slack for cables and room for heat to dissipate. Separate spare cables from active charging leads.
Footprint test
Lay every item in its intended group on a towel or tray. The occupied area, rather than the number of objects, reveals the drawer depth and compartment sizes required.
A quick spread-out inventory often exposes the real problem: three similar flashlights, several partial cable kits, or batteries stored in unrelated rooms. A simple gear inventory also distinguishes true backups from forgotten duplicates.
Record each item’s use frequency, protection need, and charging status. Then measure the largest group as it lies naturally, including pouches, charging plugs, and cable bends. An organizer sized only for bare objects commonly overflows as soon as accessories return. Keep a small allowance for incoming items, but avoid buying storage for imagined future gear.
Make the return routine automatic
-
Map the actual arrival path
The landing zone works only where pockets are emptied naturally: beside the primary door for commuters, near the bedroom for end-of-day carry, or beside a desk for work-issued gear. A zone placed across the home becomes another item to remember.
-
Match the container to household traffic
A shallow drawer, lidded valet box, or cabinet-mounted tray contains visual noise better than an open bowl. In a busy entryway, choose a closed solution that also keeps small gear away from pets, children, and passing hands.
-
Separate incoming gear from ready gear
Reserve one small compartment for items just removed—keys, wallet, light, pocketknife, badge—and another for items cleared for tomorrow. This prevents yesterday’s loose change and receipts from contaminating the prepared carry.
-
Build charging into the landing zone
If lights, earbuds, watches, or battery packs need power, locate the zone within reach of a managed outlet. A cable pass-through, short labeled leads, and a dedicated power strip reduce cable drift; avoid charging where cords cross a walking path.
-
Close the zone every night
A two-minute reset returns charged items to the ready compartment, removes trash and receipts, and puts non-daily gear back in deeper storage. The routine matters more than a complex organizer.
An entryway zone suits gear that leaves with the household and benefits from a fast grab. A bedroom zone can be quieter and more secure for a wallet, watch, or personal items removed before sleep. An office zone fits badge-controlled access, work electronics, and desk-based charging.
When one item regularly migrates between zones, assign it a single overnight home rather than duplicating containers. Predictability usually keeps counters clearer than adding more storage.
Keep the daily kit behind a closed front
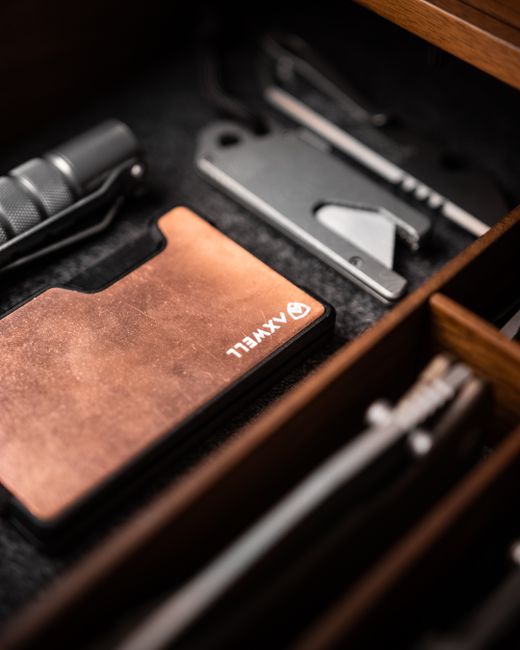
A closed drawer, lidded box, or cabinet turns the day’s carry into a single visual boundary, reducing clutter in your workspace. When shut, mismatched finishes, charging cables, and small loose items disappear; when opened, the entire kit remains visible at once.
The important distinction is concealment without search time, which helps you grab what you need quickly: daily-access storage needs one-motion opening and a predictable internal layout. That setup saves time and keeps your tools ready for EDC gear organization at home.
Make the interior shallow and legible
Keep active zones shallow enough that nothing can stack on top of anything else.
Additionally, a slim layer for keys, wallet, flashlight, and earbuds makes omissions obvious during a quick glance.
Deeper storage can hold infrequently used backups.
For a dedicated drawer, the layout stays orderly over time by this single-layer rule.
This simple approach supports EDC gear organization at home.
Use movable dividers to create broad neighborhoods rather than fitted slots for every object:
- Leave zone: wallet, keys, phone accessories
- Recharge zone: cable, power bank, earbuds
- Rotate zone: alternate light, knife, watch, or tool
A compartmented valet tray sized for pocket gear can define these zones inside a drawer, but fixed micro-compartments often become obsolete when a light, case, or wallet changes. Reserve narrow slots for stable items such as pens or cables; give variable gear an open bay.
Labels work best on the drawer edge or the inside lid, where they guide the reset without adding countertop signage. Use plain functional labels—“daily,” “charge,” “spares”—and remove any label that no longer matches the routine. The system should make putting gear away feel faster, not turn it into a sorting task.
Match the container to the moment of use
- Open trayA shallow tray makes the daily unload visible and nearly frictionless. It suits rugged, frequently handled items that benefit from a one-motion pickup.Works well whenKeys, wallet, pocket tools, and other items retrieved several times a day.Less suited whenLoose batteries, delicate electronics, or gear that creates visual noise when left exposed.
- Compartmented drawer organizerDividers preserve a fixed address without adding another lid to open. Adjustable cells are especially useful when gear changes size or gains accessories.Works well whenSmall essentials that need fast identification and separation.Less suited whenDeep, overfilled compartments that bury an item under its own accessories.
- Lidded container or protective caseA lid slows retrieval slightly but limits dust, snagging, and accidental mixing. A fitted case adds impact protection for vulnerable or infrequently used gear.Works well whenSpare cells, cables, optics, precision tools, and seldom-carried items.Less suited whenDaily essentials that will be left on the counter because opening storage feels like a chore.
- Mixed system with a bufferOne open landing zone, a divided drawer, and protected reserve storage can coexist. Leave one empty cell or small lidded box for incoming gear and short-term overflow.Works well whenA stable daily kit plus occasional swaps and new acquisitions.Less suited whenForcing every object into the same format or filling every compartment to capacity.
A holding spot is not a permanent address. When testing a new flashlight, multitool, or cable, place it in the buffer rather than displacing a proven daily item.
A brief review prevents the drawer from becoming an archive of experiments. Use a simple rotation routine for everyday carry items to confirm what returns to the daily zone, what moves to reserve storage, and what no longer earns space.
Protect gear without slowing it down
Grit is a quiet abrasive: dust and pocket debris trapped beneath a flashlight or clip can haze anodizing and polished metal. A wipeable tray liner or small microfiber pad gives frequently used pieces a soft landing.
Item-on-item contact is the other common culprit. Separate hard objects with narrow dividers, sleeves, or individual pockets; simple scratch-prevention measures matter most where clips, blades, and coated surfaces meet.
Moisture deserves a different response. Damp leather, wet fabric, and condensation can hold moisture against steel long after a tool looks dry. In places where humidity makes rust more likely, allow gear to dry before closing it into a case and keep absorbent materials clean.
Overcrowding defeats every protective layer: items press together, liners collect grit, and retrieval becomes a rummage. Reserve padded cases for delicate or infrequently carried pieces; daily gear generally needs only a defined, clean slot.
A soft-lined compartment protects everyday gear without adding the friction of unzipping a case. Save rigid cases and fitted foam for fragile finishes or travel.
Reserve cases for gear with a reason
A case earns its space when a drawer cannot control the risk: infrequent use, impact exposure, fitted components, or delicate finishes. Examples include a specialty light with spare mounts, precision bits that must remain together, and devices carried only for travel or outdoor work.
Choose a case that opens in one motion and lives in a known secondary location—not buried in long-term storage. A labeled spine, exterior contents tag, or consistent shelf position makes protected gear as findable as a drawer zone. Compact protective cases sized for everyday gear can stack vertically, scaling the system without reclaiming the countertop.
Fit the interior to the item
Foam is useful for impact-sensitive pieces, but only when the cutout holds the item without forcing it in or compressing controls. Learn to shape case foam cleanly for a repeatable layout. Keep frequently used tools in the daily home base; cases are for the gear whose protection outweighs instant access.
Display gear without spreading it
A collection deserves a different rule from the daily kit: it may be visible, but it does not get to occupy every convenient flat surface. Assign a fixed display footprint—for example, one shelf bay, a wall-mounted cabinet, or a narrow upper ledge—and keep the entry console, desk, and charging area reserved for active items.
Vertical space is usually more forgiving than horizontal space. A shallow shadow box or cabinet with a lip keeps compact flashlights, pocket tools, and watches from migrating forward; angled stands make a few selected pieces readable without creating a pile. Limit the display to what fits with breathing room. When a new item arrives, one piece can move into closed archive storage or leave the collection.
Dust is the trade-off for open presentation, particularly around knurling, pivots, and charging contacts. For frequently admired items, clear display cases that reduce dust exposure preserve visibility while adding a barrier. Use soft, non-abrasive liners and avoid stacking metal gear; a display should invite inspection, not create fresh wear.
Keep power gear in its own lane
Charging is a separate station, not an extension of the valet. Put chargers on a stable, open surface away from paper, fabric, and pocket gear. Cable clips plus one small bin for active adapters prevent a tangle; store specialty leads elsewhere.
At night, a deliberately organized bedside charging station keeps essential devices close without making the nightstand a catchall. Once charged, each device returns to the enclosed home base.
Loose cells must never sit beside keys or metal tools. For EDC gear organization at home, place batteries in a dedicated, insulated compartment. This prevents contact with metals and reduces shorting risks. Individual cases or terminal covers help separate charged and depleted zones.
Follow the maker’s instructions for charging and disposal. Safe loose-battery storage practices help keep mixed sizes and chemistries from drifting together.
Inspect leads and connectors before use. Remove damaged, swollen, leaking, or unusually hot equipment from the setup and follow manufacturer guidance.
EDC Home Storage: Common Questions
Where should the daily landing zone go?
Wherever pockets are emptied naturally—beside the primary door for commuters, near the bedroom for end-of-day carry, or beside a desk for work-issued gear. A zone placed across the home becomes another item to remember.
Should everyday gear go in a sealed case?
Not usually. A soft-lined compartment protects everyday gear without the friction of unzipping a case; save rigid cases and fitted foam for fragile finishes, infrequent use, or travel.
Is it safe to store loose batteries with keys and metal tools?
No. Loose cells should never sit beside keys or metal tools; use individual cases or terminal covers and keep distinct charged and depleted zones to prevent contact and status confusion.
What's the best way to keep gear from getting scratched in storage?
Separate hard objects with narrow dividers, sleeves, or individual pockets, and give frequently used pieces a soft landing with a wipeable tray liner or microfiber pad, since dust and pocket debris trapped beneath an item can haze anodizing and polished metal.
What should I do if an item keeps ending up back on the counter?
Treat it as a system problem, not a habit problem—move its home closer to the arrival path, enlarge the compartment, or give it a dedicated charger, since a return that takes more than one simple motion means the storage is too far, too full, or too hard to open.
Treat the Countertop as Transit Space
A countertop can serve as a brief unloading surface, not a storage address. At the end of the day, each item returns to its assigned drawer, tray, case, or charging lane. That small reset prevents a few loose objects from becoming a permanent spread.
When the same item repeatedly remains out, the system—not the item—is usually the issue. Move its home closer to the arrival path, enlarge the compartment, or give it a dedicated charger. Start tonight with one contained landing zone; add storage only after that zone reliably stays clear.
If returning an item takes more than one simple motion, its home may be too far away, too full, or too difficult to open.


8 Comments
Good point about separating charging gear from the daily home base. I currently charge my phone, watch, flashlight, and battery pack all in one drawer with loose cables. It looks tidy when shut, but the cables snag and I’m not sure storing a power bank next to everything is wise.
Would you use dividers inside that drawer, or move the battery stuff completely somewhere else?
If the drawer is convenient and stays reasonably cool and dry, dividers can help a lot: one lane for active charging, one for spare cables, and a separate protected section for power banks or loose batteries. Avoid packing cells where metal objects or damaged cables can contact terminals. If the drawer becomes a tangle or gets warm, moving charging to a dedicated surface or cabinet is the better choice.
I used short cables and cable clips in my charging drawer. It didn’t solve everything, but it stopped the “drawer spaghetti” problem.
I’m still unconvinced about labels for a home setup. If it’s only me using it, isn’t that a little over-organized?
How shallow is “shallow” for closed storage? I’m looking at a cabinet drawer that is about 5 inches deep, but I’m afraid things will just stack and disappear at the bottom.
I appreciate that this doesn’t insist every item needs a fancy fitted case. Some articles make it sound like you need a Pelican case for a spare flashlight lol.
For things used once a month—like a headlamp or compact measuring tool—would a labeled bin in a closet be better than keeping them near the daily kit?
I like the idea of treating the countertop as transit space. My keys and earbuds always seem to “transit” there for three days though 😅 I guess that means my home base is in the wrong spot, not that I need a bigger bowl?
That’s exactly the signal to look for. Before buying a bigger container, try placing the home base directly along the route where you naturally unload—near the entry, desk, or wherever the items first land. A bowl can work for a few items, but a shallow closed compartment is often better once chargers and small accessories enter the picture.