

A crossbody earns its place by keeping essentials available without becoming a lopsided burden.
At the station gate, the passport has slipped behind a cable pouch, the phone is buried under sunglasses, and the bag must be swung forward, opened, and searched with one hand. That is the familiar failure of a small crossbody packed merely to its zipper line.
A workable travel load is arranged for access under pressure: identification and boarding documents in a secure, flat pocket; phone, transit card, and lip balm near the opening; charging gear contained so it cannot snag. Weight matters as much as volume. Dense items—power bank, compact camera, or metal water bottle—can pull one side of a narrow strap into the shoulder and make the bag twist while walking. A little unused space is valuable: it lets hands retrieve one item without emptying the whole bag, and leaves room for the small, unpredictable things travel produces.
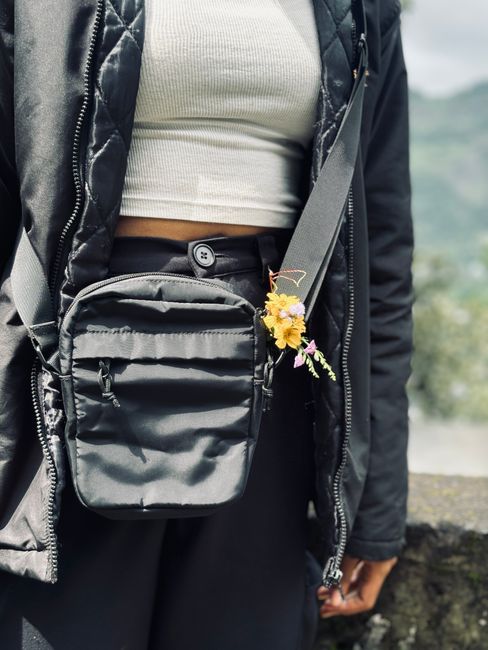
Measure the space that actually accepts gear
Exterior measurements and liter ratings are only rough signals. A curved front panel, thick lining, gusset seams, and a tapered base can remove the millimeters that determine whether a rigid item goes in at all.
Measure the usable interior for small crossbody purse travel, with the bag empty and gently shaped as it would be when worn.
- Width: side seam to side seam at the narrowest point a rigid object must pass.
- Height: base to the lowest point of the zipper track or flap clearance.
- Depth: front-to-back room at the base and near the opening; these often differ.
- Opening: the zipper span and the gap created when it is fully open. A pouch may fit inside yet be impossible to insert.
- Pockets: measure their flat width and depth separately; a slip pocket rarely holds a thick wallet and phone together.
Then compare those figures with the kit’s largest unbendable shapes: phone, passport holder, sunglasses case, power bank, or compact camera. Measure each item in the orientation it must enter, including protruding cable ends, case corners, and a wallet’s filled thickness. Soft items can occupy leftover volume; rigid rectangles set the true limit.
Wear geometry matters too: strap length can change what remains practical to carry, because a bag pulled tight against the body may compress its front panel and reduce usable depth.
Make a simple cardboard block matching the largest item’s dimensions. It quickly reveals pinch points at zipper ends, curved corners, and interior dividers.
Pack one working set, not a pile of exceptions
A compact crossbody works more reliably when travel-specific items are consolidated into two modules: documents and power.
Test the three items that set the limit
-
Lay out the proposed load beside the empty bag
Ignore item count at first. A dozen flat, flexible pieces can occupy less usable space than one sunglasses case, power bank, or key bundle.
-
Circle the three bulkiest pieces
Choose by actual volume and awkwardness, not weight. Common space-setters are a phone, wallet, glasses case, charger, compact camera, or medication pouch.
-
Classify each item’s physical behavior
Mark it as rigid, semi-rigid, or compressible; then note whether it is flat, cylindrical, rectangular, or irregular. Rigid rectangles need a clean wall; cylinders create corner gaps; soft pouches can fill those gaps.
-
Assign the packing order from geometry
Place the least compressible, widest item first, usually against the body-facing panel. Build flexible items around it, leaving the top area for items needed during the day.
-
Treat keys as a moving, noisy object
A loose cluster snags linings, prints through the bag, and consumes more room than its weight suggests. Consider ways to stop purse keys from jingling before deciding where the bundle belongs.
If the third bulky item only fits by forcing the zipper or distorting the bag, it is the item to relocate, reduce, or replace—not a reason to add more organizers.
Three rigid objects can make a small crossbody feel full even when its contents look minimal. A phone, hard glasses case, and irregular key bundle compete for uninterrupted space; five cards, a tissue, and a cable do not.
A useful test is to close the bag, walk briefly, then retrieve the phone without unloading anything. Resistance at the zipper, a bag that tips outward, or keys striking other items signals a packing-order problem rather than simply “too much stuff.”
Build a Stable Load From the Back Outward
- Start with the flattest layer
Place passport sleeve, folded itinerary, slim notebook, or other flat essentials against the body-side panel. This creates a smooth backing, prevents corners from printing through the front, and leaves the main cavity easier to read at a glance.
- Seat dense items low and near the body
Set the phone, compact power bank, card holder, or small camera in the lower center of the main compartment, rather than stacked at the outer wall. Weight carried close to the body swings less, and a centered load is less likely to pull the bag off line while walking.
- Use soft pieces to stop movement
Tuck a cable pouch, folded tote, lens cloth, or thin tissue pack around the rigid core. These items are not merely leftovers: they brace hard objects, quiet rattles, and fill awkward wedges without consuming the bag’s usable height.
- Reserve the top for immediate-use items
Keep the item most likely to be needed during the next transition at the opening: earbuds before a flight, a transit card before a station gate, or sunglasses before stepping outside. A shallow top layer avoids digging through the stabilizing layers beneath.
- Make each pocket justify its access
A pocket is valuable when it enables a single fast retrieval without disturbing the main load. Good candidates include a transit card, boarding document, phone, or key set with a secure attachment. Cables, receipts, and miscellaneous small items often fit, but can turn a pocket into a slow, noisy junk drawer.
Recheck the layout after the bag is worn: a load that looks tidy on a table may shift once the strap angle changes.
Match the load to the day
A small crossbody works most reliably when its load is defined by the day’s longest stretch away from a larger bag—not by every possible contingency. These three profiles make the trade-offs visible.
Bare-minimum sightseeing
For a museum visit, short walk, or cafe stop, a small crossbody purse travel holds a phone and cardholder.
It also carries keys, sunglasses in a slim sleeve, lip balm, tissues, and one compact power bank.
A passport can fit flat against the body-side panel when needed.
This is the load that suits shallow, narrow bags. Bulky key fobs, hard sunglasses cases, and a wide battery pack can consume the apparent spare room surprisingly quickly.
Full-day urban carry
A longer day usually adds a document pouch, earbuds, and hand sanitizer.
Also include a small snack, a folded reusable bag, and a compact charger.
For small crossbody purse travel, period supplies and personal essentials fit as a contained, flat kit.
Most medium-small crossbodies can manage this set if their main compartment has depth, not width.
Depth matters when items must stack: a 2-inch-thick sunglasses case plus a power bank may leave little room for a snack or pouch even in a bag that looks broad from the front. Keeping the flat document pouch against the back panel preserves a more stable shape.
Transit or flight carry
For a station or airport, the crossbody is often more useful as an access bag than as the entire personal-item system. It can hold passport, boarding documents, phone, wallet, charging cable, earbuds, medication or personal necessities, and a small snack. A portable battery may be carried here if it needs to remain readily available.
A water bottle, full-size headphones, paperback, sweater, and larger toiletry kit typically turn this into an awkward, overfilled load. Unless the bag is unusually deep, hydration and overflow belong in a tote, backpack, or under-seat bag. A slim bottle may work only when the bottle’s height and diameter do not force the zipper or distort quick-access pockets.
When “It Fits” Is No Longer Enough
A closed zipper only proves containment.
If the zip must be pulled around a hard corner, the bag is overfilled. Repeated strain distorts the opening and makes quick access clumsy.
Compression helps soft layers, not rigid bulk.
A packed charger, bottle, camera, or sunglass case still sets the bag’s depth. Forcing soft items around it creates a lumpy load that swings and presses into the body.
Small additions can disrupt access and balance.
Stop adding when one-handed retrieval fails, the bag will not lie flat against the torso, or removing one item spills several others. Those are secondary-carry signals, not packing puzzles.
A compact crossbody has reached its practical limit when it requires repacking at every stop, creates zipper tension, or needs an item carried in hand. Move depth-heavy gear—water, a camera, spare layer, or bulky power bank—to a daypack or secondary tote rather than sacrificing the crossbody’s working set.
Make the five-item departure edit
-
Name the day’s five non-negotiables
Phone, payment/ID, keys, transport or entry credential, and one power or comfort item form a practical baseline. Substitute only for a real itinerary need.
-
Remove duplicate access tools
Keep one payment method, one charging cable, one pen, and one set of keys unless the duplicate has a distinct failure role.
-
Check the walking shape
The bag should lie close to the body, zip without tension, and avoid a hard object pressing outward.
-
Check the seated shape
Sit with it across the lap or at the hip. Nothing should jab, spill into the opening, or force a full unpack.
-
Run the one-hand retrieval test
Phone, credential, and keys should be reachable in sequence while the other hand holds a rail, suitcase handle, or door.
Small Crossbody Travel Packing: Common Questions
Why do exterior measurements and litre ratings not predict what fits in a crossbody?
A curved front panel, thick lining, gusset seams, and a tapered base can remove the millimetres that determine whether a rigid item actually goes in. Measuring the usable interior—width, height, depth, and the opening span—gives a much more accurate picture.
What items usually set the real capacity limit of a small crossbody?
Rigid, unbendable shapes like a phone, passport holder, sunglasses case, power bank, or compact camera set the true limit. Soft, compressible items can fill leftover space around them, but rigid rectangles are what a bag either accepts or doesn’t.
How should items be arranged inside a small crossbody for stability?
Flat essentials work best against the body-side panel, dense items sit low and centered, soft pieces fill gaps around the rigid core, and the top layer is reserved for whatever needs to be reached next. This order keeps the load from shifting or pulling the bag off line while walking.
What's a sign that a small crossbody has reached its practical limit?
If the bag needs repacking at every stop, the zipper is under tension, or an item has to be carried in hand instead, it’s past its working capacity. Depth-heavy gear like water bottles, cameras, or bulky power banks are better moved to a daypack or tote at that point.
Should a crossbody bag be packed to leave some empty space?
Yes. A little unused space lets a hand retrieve one item without emptying the whole bag, and it leaves room for the small, unpredictable things a day of travel tends to produce.
A small crossbody earns its place through control
- Capacity is defined by usable shape and access, not by the number of objects squeezed inside.
- A deliberate empty margin makes changes of plan easier to absorb.
A compact crossbody works when its contents remain stable, visible, and retrievable in motion. The final edit is not about owning fewer things; it is about carrying one working version of each essential.
If the load passes the walking, sitting, and one-hand tests, it is ready for the day rather than merely able to close.




7 Comments
This worked! I packed flat items against the body, put my small power bank in the middle, then used a sunglasses sleeve as soft bracing. The bag stopped swinging into my hip every time I hurried for a train.
Also, separating transit card/ID from the document pouch was a big improvement. I was previously doing the one-zipper-dig-of-shame at every gate.
That is exactly the benefit of building from the back outward. A centered dense item changes the way a small bag carries far more than people expect, and keeping the tap/access items independent prevents the document module from becoming a daily rummage pocket.
“one-zipper-dig-of-shame” is painfully accurate. I keep my transit card in the outer slip pocket now and it feels like I gained five minutes a day.
I used to pack for every possible inconvenience: spare cable, spare cable for the spare cable, random receipts from 2019 apparently. Consolidating documents and power into two small pouches made my crossbody actually usable on a weekend trip.
The only thing I would add is a warning about hard sunglasses cases. Mine takes up more practical room than my wallet because of its shape, even though the volume looks reasonable on paper.
Step 3 didn’t work for me with keys. Mine are on a chunky car fob plus a little flashlight, and they somehow migrate to the bottom no matter which pocket I give them. Then the whole bag turns into a maraca when I walk.
I may just need to admit this is a “larger-bag overflow” item, although that feels ridiculous for keys.
The “measure the opening, not just the bag” point saved me from buying the wrong crossbody last month. My e-reader fit the listed dimensions but would not turn through the zipper opening. Such an annoying little geometry lesson 😅
The three movement tests are a good reality check. I can zip my bag shut with a tiny umbrella in it, technically, but bending to tie a shoe turns it into a lopsided brick. “It fits” definitely wasn’t the same as “I can use it.”