
A keeper solves a connection problem—not every form of unwanted motion.
A carry rig can start the morning exactly where it belongs, then rotate toward the hip, creep upward while sitting, or emerge from a waistband with its angle changed. Those are different failures, even when they feel like the same annoyance.
Keepers are most effective when an outer belt is sliding around an inner belt: they bridge the two layers and resist circumferential rotation. They do far less for vertical ride caused by a flexible belt, a holster clip that does not fully capture the belt, or a heavy setup levering the belt outward. Before adding hardware, note whether the belt, the holster attachment, or the holster body itself is moving. That distinction determines whether keepers are a fix or merely extra bulk.
- Rotation around the waist points to belt-to-belt slip.
- Upward drift often points to clip engagement or belt stiffness.
- Changing cant can indicate attachment hardware flex.


What belt keepers actually control
Yes—belt keepers are highly effective against belt-layer slippage. They are not, however, a universal answer to a holster that shifts, loosens, or changes angle under load.
A keeper is a short strap, usually secured by snaps, hook-and-loop, or a rigid fastener. It wraps around and connects the outer carry belt to the belt beneath it—typically an inner belt threaded through trouser loops. On a single-belt setup, some keeper-style devices instead capture the trouser waistband or a belt loop. The aim is the same: create mechanical links between layers that would otherwise slide independently.
Movement a keeper resists
Keepers primarily limit:
- Rotation: the carry belt turning around the waist when a holster is drawn from or reholstered.
- Side-to-side migration: the holster position creeping forward or backward as the belt shifts over the inner belt.
- Vertical separation: an outer belt riding upward while the inner belt remains held by trouser loops.
They do not directly secure the firearm inside the holster, stiffen a soft belt, or prevent a holster clip from walking along the belt. If the holster’s clips have poor purchase, its mounting screws flex, or the belt sags under the holster, keepers can reduce the symptom without correcting the source.
Read the movement before adding keepers
A keeper reinforces the platform already there
A keeper is a coupling device, not a structural spine. It adds friction and mechanical connection between layers, so a holster-side outer belt is less likely to rotate independently. If the underlying belt rolls under load, stretches through its holes, or bends at the holster, the keeper simply holds those weak layers together.
A purpose-built inner/outer setup solves more of the system at once. A loop-lined inner belt anchors inside the belt loops; a stiff hook-backed outer belt spreads the load over a wider, more resistant band. A conventional leather or web belt can work with keepers, but its single layer and buckle adjustment often leave more flex and less consistent contact. The difference becomes clear when comparing belt stiffness and shifting under a loaded holster.
Load geometry still matters
- Width: A 1.75-inch outer belt resists rolling better than a narrower belt, provided holster hardware matches it.
- Buckle position: A bulky buckle near the holster creates a hinge point and uneven tension; offsetting it can preserve a flatter mounting area.
- Friction: Hook-and-loop inner/outer interfaces resist sliding across far more surface area than several isolated keepers.
- Asymmetric load: A holster, spare magazine, or pouch pulls one side downward and inward. Keepers limit layer separation, but only belt stiffness and secure attachment control sag and tilt.
Inner/outer platform
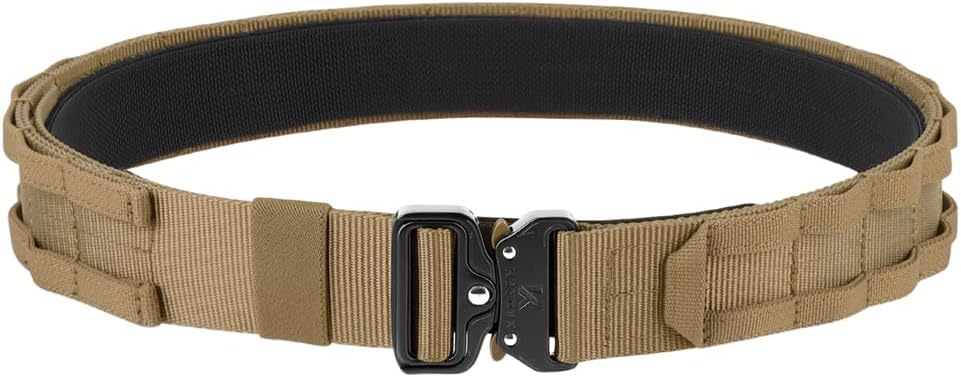
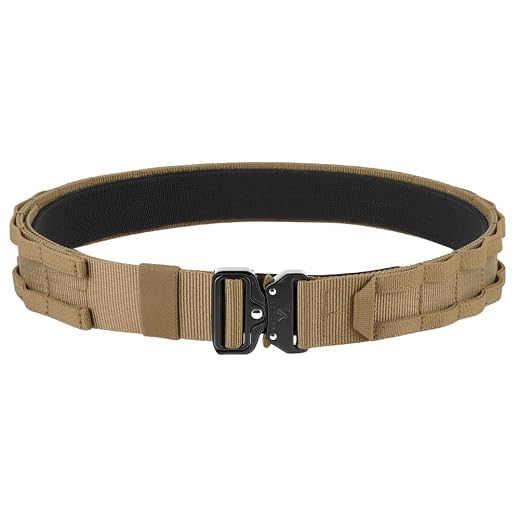
This system pairs a 1.5-inch loop-backed inner belt with a double-stiffened 1.75-inch hook-backed outer belt. Its quick-release buckle, MOLLE outer webbing, and sewn anchor points illustrate why a broad, bonded interface can stabilize gear more effectively than keepers added to a flexible conventional belt.
Where keepers help—and where they add trouble
Keepers are most convincing on a two-piece belt: the outer belt can otherwise creep around or peel away from its hook-and-loop inner belt under a holster’s off-center load. Placed near the holster and at spaced intervals around the waist, they reduce that relative movement.
They are less decisive on a single rigid carry belt. There is no second layer to bind, so a keeper cannot cure a belt that is undersized, overly flexible, or loaded through a narrow clip. Likewise, a holster that shifts because its clips flex, spread too widely, or do not positively capture the belt will still shift with keepers present.
Carry position changes the trade-off
At appendix, extra keeper hardware can create a noticeable pressure point while seated, especially if it lands near the buckle, holster wing, or the body’s front crease. A keeper positioned away from those contact zones may be useful; one stacked under other hardware can make a stable setup less comfortable.
At strong side, keepers commonly work well because the load tends to drag the outer belt downward and rearward. They still need clear belt-loop real estate. Thick denim loops generally support them better than sparse, narrow, stretchy, or decorative loops. A keeper forced over a seam or crowded beside a holster clip adds bulk without gaining much purchase.
Judge the entire retention chain
- Secure closure under loadA keeper is only as dependable as its closure. Double snaps add redundancy, but their retention matters only when they remain firmly engaged through bending, sitting, and belt flex.Look forPositive closures that stay closed when the belt is twisted and loaded.AvoidLoose snaps or hook-and-loop that peels under movement.
- A true width matchThe keeper must span both belt layers without crushing them or leaving enough clearance to pivot. Nominal width is not enough: belt thickness, overlap, and stitched edges change the effective fit.Look forA close fit around the assembled inner-and-outer belt stack.AvoidA wide keeper that rocks, or a tight one that distorts the belt.
- Low-profile, rigid constructionStiff material transfers force between layers; a thin, smooth profile reduces hot spots and interference with clips, loops, and seating. Excess bulk can create its own pressure point.Look forFirm construction with rounded, unobtrusive edges.AvoidSoft keepers that fold or bulky hardware near attachment points.
- Compatible interfaces and finishRetention travels through three contacts: clothing to inner belt, inner belt to outer belt, and belt to holster attachment. A keeper strengthens only the middle contact; clip geometry and belt surface finish still govern holster movement.Look forKeeper placement clear of clips, plus a belt finish that lets attachments bite consistently.AvoidTreating a keeper as a cure for a slipping clip or drifting waistband.
For 2–2.25-inch duty-belt systems
This four-pack uses double metal snaps and is specified for 2- and 2.25-inch duty belts. That width and hardware suit a conventional duty-belt stack more naturally than a narrow concealed-carry belt.
Its key test is dimensional, not merely closure strength: once wrapped around both layers, it should not rock or crowd holster attachment hardware. The stated one-year warranty and return period are useful purchase terms, but do not establish compatibility.
Test placement before committing to a layout
-
Start with an inert setup
Conduct fit checks with the firearm unloaded according to its manufacturer’s handling procedure, with ammunition removed from the test area. Use only a controlled setting and follow all applicable range, facility, and carry rules.
-
Mark the baseline movement
Fit the belt system without keepers, then note where the outer belt separates, twists, or walks. A small tape mark at the holster position and at the buckle makes migration easier to identify.
-
Try a local keeper pair
Place keepers close to the holster’s support zone—one on each side where space permits. This creates a short, stiff section that strongly resists rotation at that location, but may leave more distant belt sections free to shift.
-
Spread the connection points
Move the same number of keepers farther apart around the belt. Distributed placement shares torsional load across a longer arc and can reduce whole-belt drift, though it may add bulk, interfere with loops, or create pressure when seated.
-
Use ordinary positions, not a static mirror check
Walk, sit, bend, squat, climb stairs, and enter and exit a vehicle with the unloaded setup. Recheck the marks after each sequence; the useful layout is the one that limits meaningful movement without creating hot spots or blocking access.
Retest after changing belt tension, clothing thickness, holster position, or carried equipment; each change alters the belt’s leverage and contact pattern.
A tight cluster can lock down one problem area while allowing rotation elsewhere. Wider spacing often steadies the belt as a system, but only if each keeper has clean engagement with both layers.
The test result matters more than a universal clock-position layout. Anatomy, buckle location, belt stiffness, holster geometry, and clothing all change where a keeper can work without adding discomfort.
Buy for the movement that exists
- Keepers solve layer rotation and separation—not a weak clip, soft belt, excessive ride height, or unbalanced load.
- A stable setup needs enough belt stiffness, secure clip geometry, appropriate ride height, and load distributed around the waist.
Belt keepers are worthwhile when an outer belt rotates or separates from a compatible inner belt. If the holster still shifts after the layers are coupled, the fault usually lies elsewhere: belt stiffness, clip engagement, ride height, or concentrated load placement.
Before selecting keepers, confirm that both belt layers accept their attachment style, the connection points avoid buckle bulk and pressure zones, and the holster remains stable without relying on keepers to compensate for poor clip or belt support.






One Comment
Slightly skeptical about relying on inert testing alone. It will show obvious rotation and pressure spots, sure, but sitting in a car for an hour is where my “great” layout turned into a torture device 😅 Still, testing keeper locations before committing is way smarter than punching holes and hoping.