

A pinprick-sized cut can turn every button, tap, and handwash into a fresh bleed.
A nick at the pad, edge, or tip of a finger can look trivial until it catches on a pocket seam and the cover lifts again. Fingertips contain a dense network of small blood vessels and sensory nerves, so even shallow cuts may bleed freely and sting sharply.
The problem is not necessarily poor technique. Skin at the fingertip constantly bends, compresses, grips, and rubs; natural oils, sweat, handwashing, and moisture beneath a covering all weaken adhesion. A dressing placed while blood is still seeping can slide or fail to seal, then ordinary movement reopens the fragile clot. Bleeding control comes first: a cover has a far better chance of staying in place once the surface is no longer actively bleeding and can be kept reasonably dry.
- Fingertip skin has no flat, still surface for adhesive to grip.
- Repeated pressure can dislodge a clot even when the cut is small.
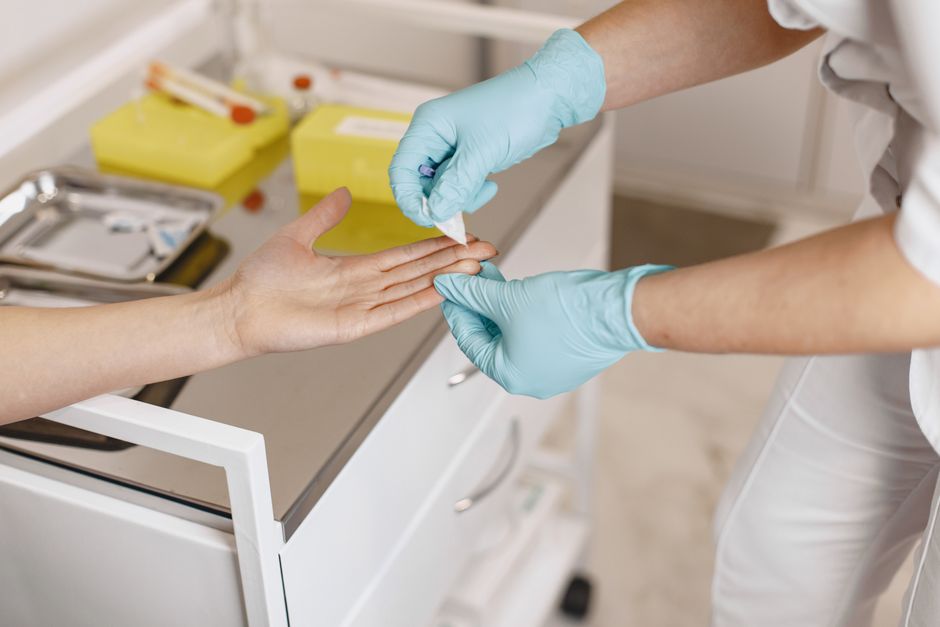
When a fingertip cut is not a bandage problem
At-home dressing measures fit a clean, shallow injury only after bleeding has settled and sensation, movement, and circulation appear intact. A pale, blue, cold, or increasingly numb fingertip, a partly detached tip, or bleeding that will not slow can warrant urgent assessment rather than repeated changes of bandage.
The same distinction matters for bleeding that goes beyond a small cut: a dressing protects a stable wound; it does not correct ongoing blood loss, deep structural injury, or contamination. Medication use and the injury mechanism can be as important as the cut’s visible size.
Use pressure, not repeated checks
-
Cover with clean absorbent material
Place gauze or a clean cloth directly over the cut.
-
Press firmly and continuously
Sustained direct pressure is the bleeding-control measure; lifting the material to inspect can restart flow.
-
Read the material, not minor staining
Light staining can be normal. Continued soaking through or blood pooling around the material indicates ongoing bleeding.
-
Keep elevation secondary
Raising the hand may assist, but it does not replace uninterrupted firm pressure.
Stopping bleeding before bandaging
CPRCertified.com demonstrates direct bleeding control and bandage application. If a fingertip bandage falling off becomes a concern, follow the steps shown.
Make the fingertip dry enough for adhesive to hold
- Clean away blood from intact skin
After bleeding is controlled, rinse the surrounding unbroken skin with clean running water and remove dried blood from the area where adhesive will sit. Avoid scrubbing the cut itself or flushing it with harsh household liquids.
- Dry beyond the wound edges
Pat the fingertip, nail fold, and the sides of the finger completely dry with clean gauze or a lint-free cloth. Adhesive bonds poorly to damp skin, especially around the curved fingertip.
- Keep the adhesive zone free of residue
Lotion, hand cream, ointment, oils, sweat, and soap film can leave a slippery layer. If a dressing needs an adhesive border, these products are generally kept off the intact skin beneath that border.
- Allow for fingertip movement
A fingertip shortens, widens, and twists while gripping or bending. Tape placed across creases, around a wet nail fold, or onto compressed skin is more likely to lift as the skin rebounds.
- Use wound-appropriate materials
Paper towels, tissues, cotton balls, and household tape can shed fibers, stick to the wound, or trap moisture. A clean, purpose-made non-adherent wound contact layer is less likely to bond to the healing surface.
If bleeding resumes during cleaning, direct pressure takes priority over finishing the dressing.
Overtight wrapping may temporarily hide a lifting edge but can become uncomfortable as the fingertip swells or moves. A clean, dry anchor zone and a dressing sized for the fingertip’s curves often matter more than adding layers of tape.
Choose a dressing that fits the cut
A generic strip often lifts because it tries to bridge a moving, rounded surface. The useful question is where the wound sits and which force—pressure, shear, moisture, or nail movement—defeats the cover.
| Cut location | Covering that often fits | Trade-off to expect |
|---|---|---|
| Fingertip pad | A flexible fingertip-shaped bandage or a small non-adherent pad secured around the finger | Wraps can loosen with handwashing or become restrictive if applied too tightly. |
| Side of finger | A narrow strip placed lengthwise, with adhesive anchored on the flatter upper and lower surfaces | Crosswise strips tend to peel at the knuckle-side edge during gripping. |
| Beside or under the nail edge | A small non-stick contact layer with a light protective cover that does not pull on the nail | Adhesive across the nail is unreliable; bulky layers can catch and lever the cover loose. |
For pad injuries, waterproof fingertip-wound coverings can reduce early lifting from handwashing, but waterproof does not mean friction-proof. A cover that is intact yet slides during pinching may need a lower-profile shape rather than more adhesive.
Liquid bandage has narrow limits
Liquid bandage products form a film, not a padded dressing. They can be useful on a small, superficial, clean, dry skin split where wound edges naturally rest together and there is little bleeding. They are less suitable for actively bleeding cuts, gaps that open with movement, deeper wounds, moist areas near the nail, or surfaces that need cushioning from repeated contact.
The film can sting on application, crack at flex points, and seal in moisture if used over skin that is not fully dry. It also offers little protection against impact. A conventional cover is generally more practical when the main problem is pressure, rubbing, or a wound that needs an absorbent layer.
Anchor the dressing on healthy skin—not around the fingertip
- Cover the wound with a non-adherent contact layer
Place the protective pad over the cut without packing material into it. The layer should be large enough that its edges rest on intact, dry skin.
- Run tape lengthwise when possible
For many pad and side-of-finger cuts, two narrow strips running from the fingertip toward the hand provide more stable fixation than a tight ring. Anchor each end well beyond the injury on unbroken skin.
- Use a light outer wrap only for movement control
If a conforming wrap is needed, apply it with the finger relaxed and use only enough overlap to keep the dressing from shifting during ordinary hand motion. It is meant to support the cover, not compress the finger.
- Check the fingertip after securing it
A finger that becomes pale, blue, cold, numb, tingly, increasingly painful, or swollen beyond the wrap may have impaired circulation or nerve compression. These are warning signs rather than evidence that the dressing is securely fitted.
- Avoid the narrowest-point tourniquet effect
Circumferential tape concentrates force as the finger swells and bends, especially near a joint or the distal fingertip. Re-anchor loose edges with separate strips instead of tightening a complete tape ring.
Any concerning color, temperature, sensation, or pain change merits prompt medical assessment, particularly when bleeding has been difficult to control.
A dressing stays on because adhesive has broad contact with dry, intact skin and because its pull is distributed. Tightness can briefly hide lifting edges while creating a new problem: pressure concentrated around a small, swelling cylinder.
Let the failure explain the fix
A dressing that fails in the same way provides useful information. Edges that peel soon after application usually point to moisture, skin oils, or an adhesive border placed across a crease. More tape over the same damp edge rarely changes that; it can add bulk and create more corners to catch.
Blood escaping through or around the cover suggests that bleeding control, absorbency, or both were insufficient when the dressing went on. A larger outer cover does not substitute for uninterrupted pressure, and a saturated pad is no longer a reliable protective layer.
Rolling at the fingertip pad, side, or joint commonly reflects a flex point being asked to stay flat. A lower-profile dressing shape or anchors positioned on less mobile skin can reduce that mechanical pull. A cover stuck to the cut indicates direct contact with drying blood or wound fluid; a non-adherent contact layer can make later removal less disruptive.
“Waterproof” describes resistance to outside water, not an ability to manage ongoing bleeding, trapped perspiration, or extended wear. An occlusive film may loosen as moisture accumulates beneath it and can be poorly suited to a dressing that is already wet or saturated.
Protect the dressing from the next task
A secure dressing can still fail when the hand returns to normal work. Water softens adhesive; food preparation adds moisture and contamination; tools and gloves create shear; keyboards repeatedly flex the fingertip. Where practical, postponing high-friction tasks while the area is fresh can preserve the cover.
For unavoidable hand washing, a brief wash followed by careful drying around—not under—the edges is less disruptive than prolonged soaking. A clean glove can reduce exposure during messy work, but trapped sweat can loosen adhesive, so the dressing merits a check after glove use. Keep spare, clean supplies accessible; guidance on carrying an everyday first-aid kit can make a replacement less improvised.
Check after washing, cooking, tool work, or a long typing session. Replace a cover that is wet, dirty, rolled up, or no longer protecting the cut. Avoid repeatedly lifting it merely to inspect. Persistent bleeding, increasing pain, altered sensation, or color change are reasons to review. Impaired movement indicates medical care is needed, especially if the fingertip bandage falling off.
Fingertip Bandages: Common Questions
Why does a fingertip bandage keep peeling off?
Fingertip skin constantly bends, compresses, and rubs, and natural oils, sweat, and moisture beneath the covering weaken adhesion. Edges that peel soon after application usually point to moisture, skin oils, or an adhesive border placed across a crease rather than a weak bandage.
Should I stop the bleeding before applying a bandage?
Yes. A dressing placed while blood is still seeping can slide or fail to seal, and ordinary movement can reopen the fragile clot underneath. Cover the cut with clean absorbent material and press firmly and continuously until bleeding has settled before applying a longer-term cover.
Does adding more tape make a fingertip dressing more secure?
Not necessarily. Extra tape can worsen lifting when the underlying problem is moisture or a moving crease, since each added edge can curl, catch, and trap sweat. Holding power depends more on dry, stable anchor skin than on tape quantity.
Is a waterproof bandage enough while a fingertip cut is still bleeding?
No. “Waterproof” describes resistance to outside water, not an ability to manage ongoing bleeding or trapped perspiration. Fluid can saturate the inner pad while the outer film remains intact, so bleeding needs to be controlled with pressure before relying on a waterproof cover.
When does a fingertip cut need more than a bandage?
Bleeding that continues to soak through firm direct pressure, gaping edges, loss of feeling, weakness, limited motion, or a fingertip that turns pale, blue, cold, or numb are reasons to seek prompt medical assessment rather than repeated bandage changes.
Return to the sequence when a cover fails
Pressure first; then reassess whether bleeding is controlled. Use a clean, location-appropriate cover that does not constrict, and seek care for persistent bleeding or warning signs.


2 Comments
Useful distinction between a little staining and actual soaking through. People (me included) tend to see any red on a bandage and panic-replace it, which seems to restart the whole process.
One caution from experience: I would not use liquid bandage on anything that is still actively bleeding or gaping. It stung like crazy and did basically nothing for the cut on my index finger.
The “don’t keep checking it” point was the one I needed. I sliced the side of my thumb opening a package and kept lifting the gauze every 30 seconds because it looked dramatic. Held steady pressure for a full 10 minutes, then used two lengthwise strips instead of wrapping tape all the way around. Finally stayed put.